User and Programmer Guide
Introduction
This user and programmer guide covers the Business API Ecosystem version 5.4.1, corresponding to FIWARE release 5. Any feedback on this document is highly welcomed, including bugs, typos or things you think should be included but aren’t. Please send them to the “Contact Person” email that appears in the Catalogue page for this GEi. Or create an issue at GitHub Issues
User Guide
This user guide contains a description of the different tasks that can be performed in the Business API Ecosystem using its web interface. This section is organized so the actions related to a concrete user role are grouped together.
Profile Configuration
All the users of the system can configure their profile, so they can configure their personal information as well as their billing addresses and contact mediums.
To configure the user profile, the first step is opening the user Settings located in the user menu.
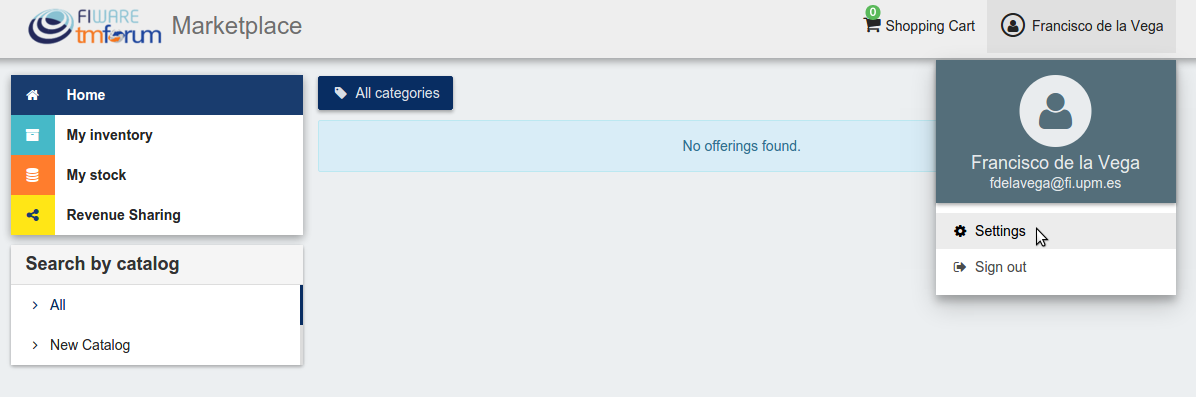
In the displayed view, it can be seen that some information related to the account is already included (Username, Email, Access token). This information is the one provided by the IdM after the login process.
To create the profile, fill in the required information and click on Update
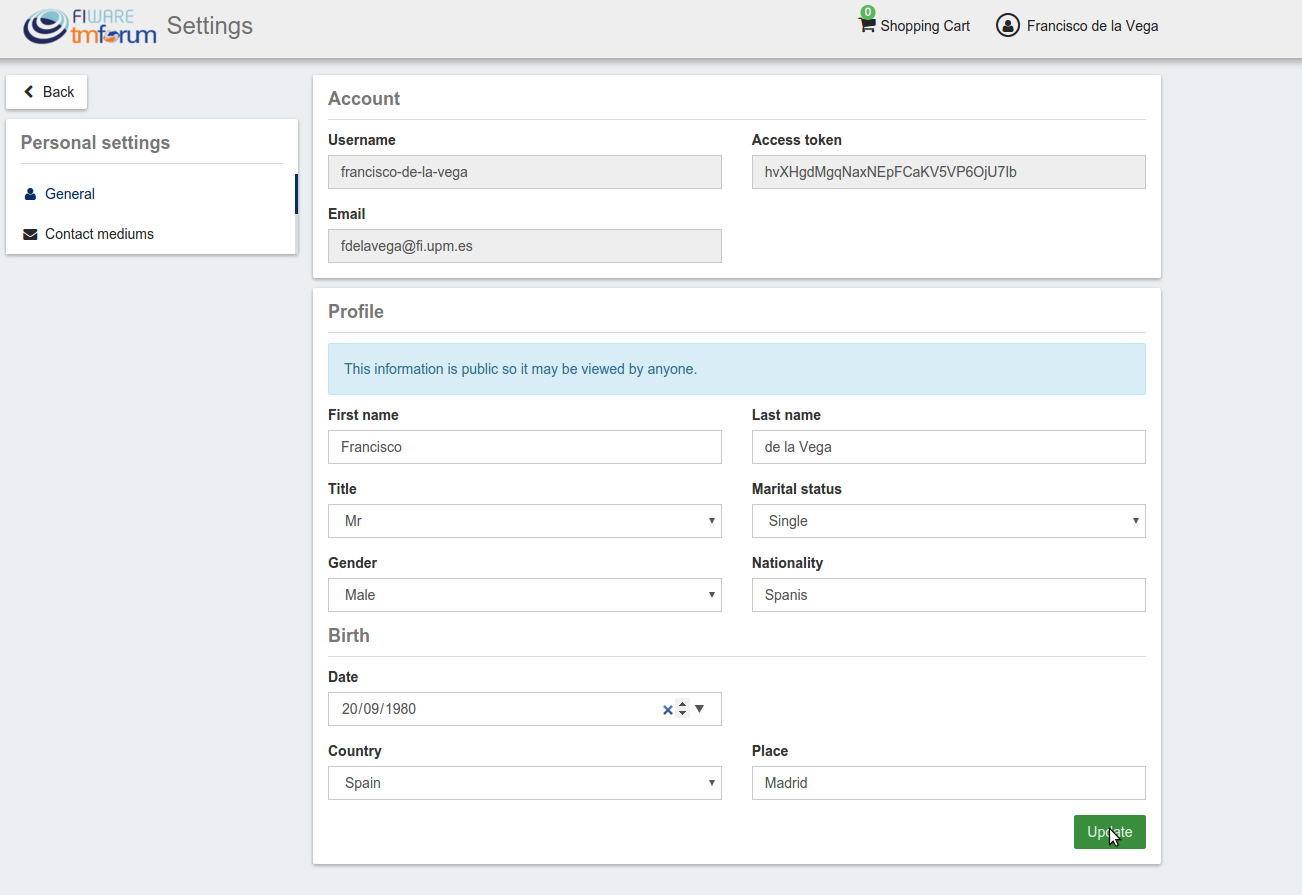
Note
Only the First name and Last name fields are mandatory
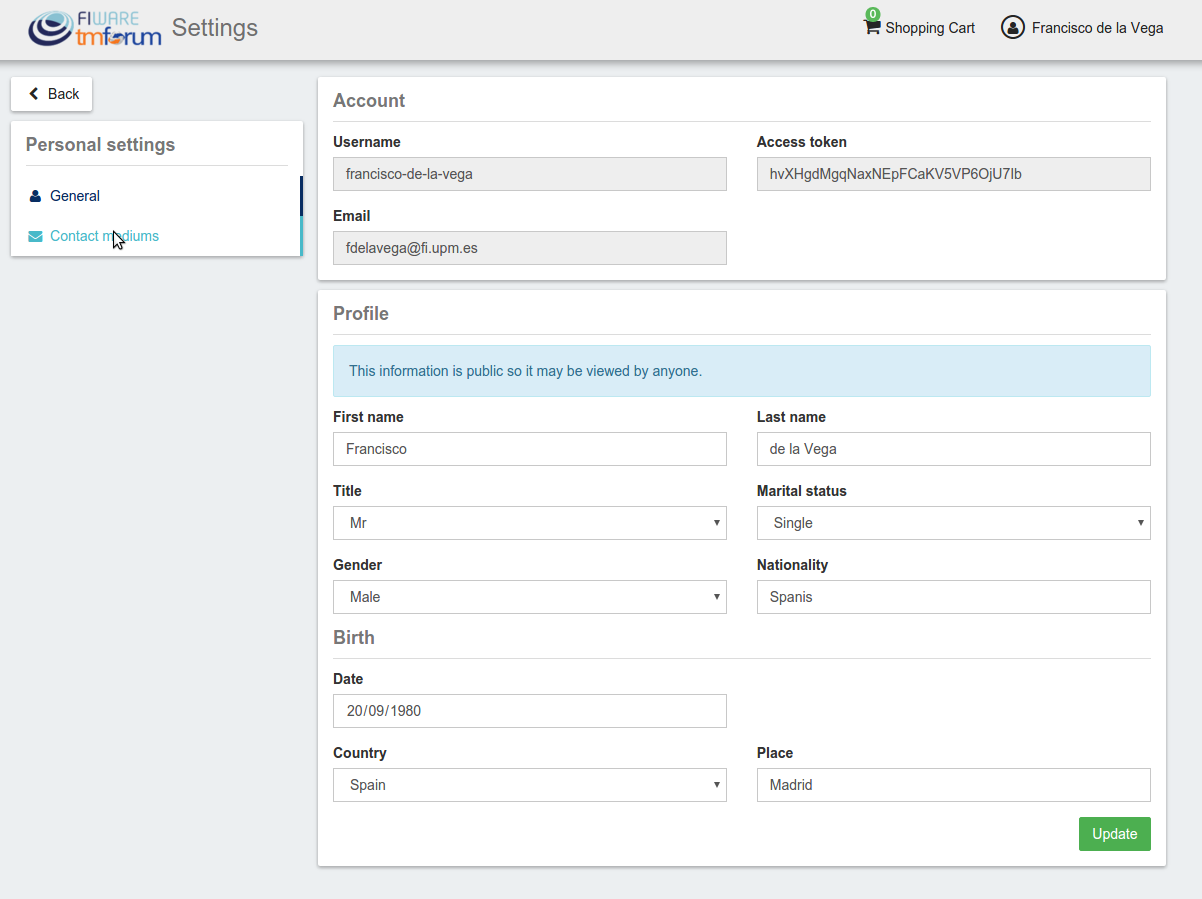
Once you have created your profile, you can include contact mediums by going to the Contact mediums section.
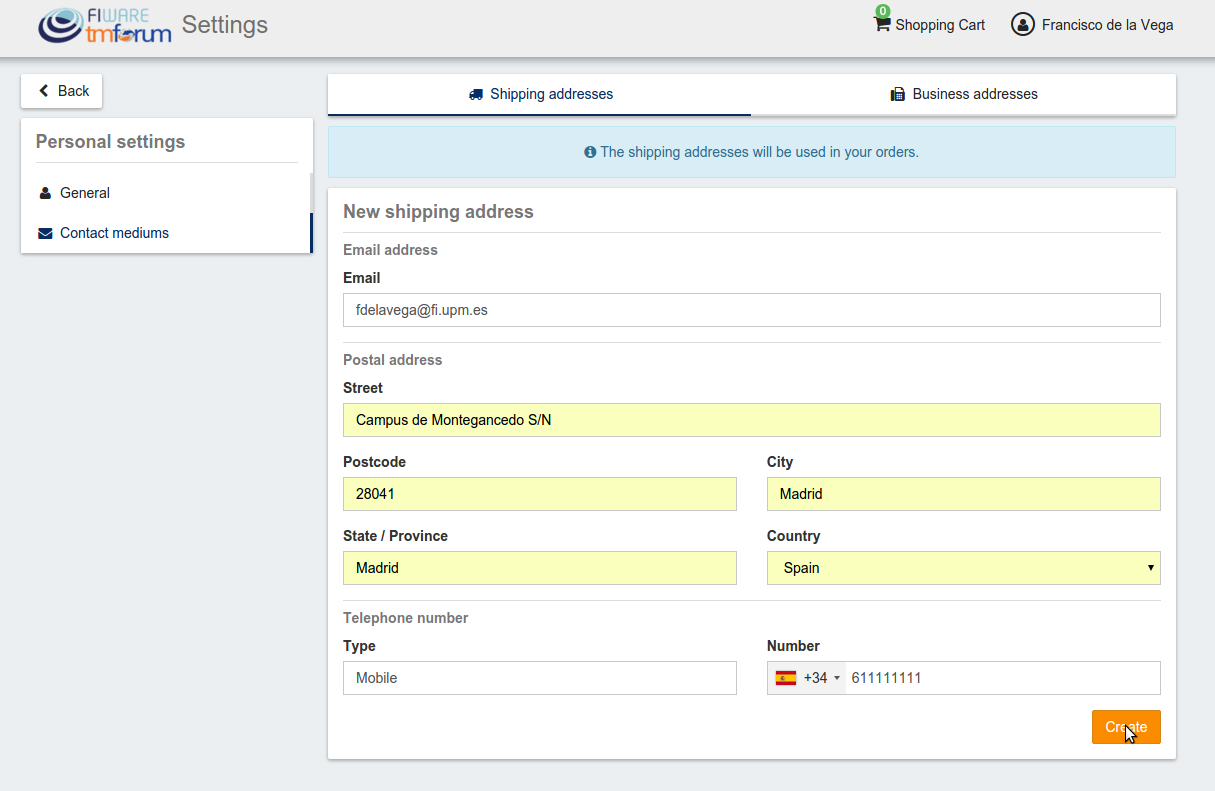
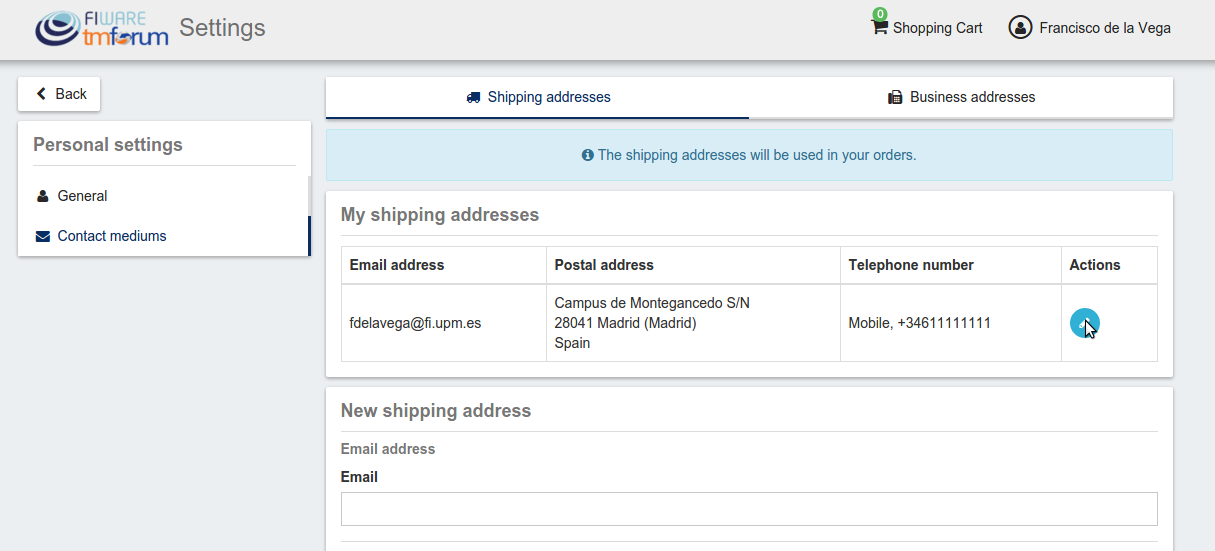
In the Contact Medium section, there are two different tabs. On the one hand, the Shipping addresses tab, where you can register the shipping addresses you will be able to use when creating orders and purchasing products.
To create a shipping address, fill in the fields and click on Create
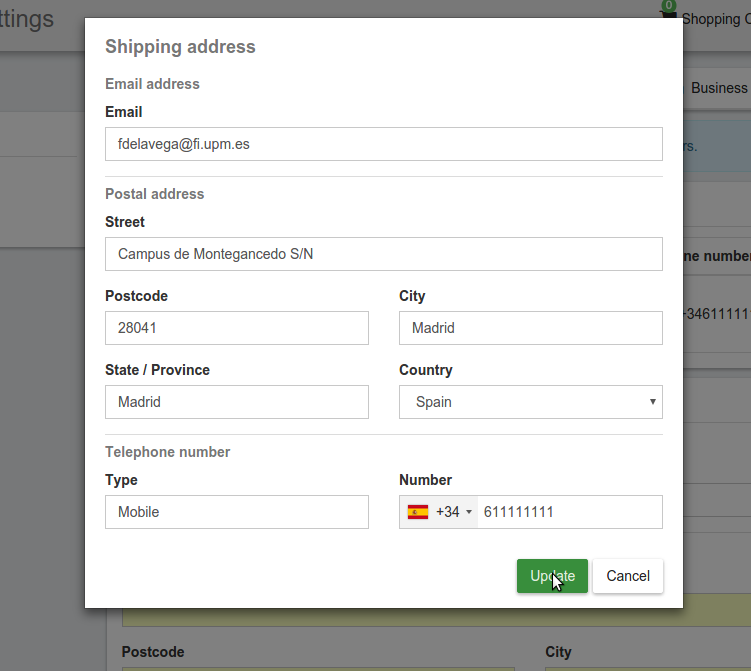
Once created, you can edit the address by clicking on the Edit button of the specific address, and changing the wanted fields.
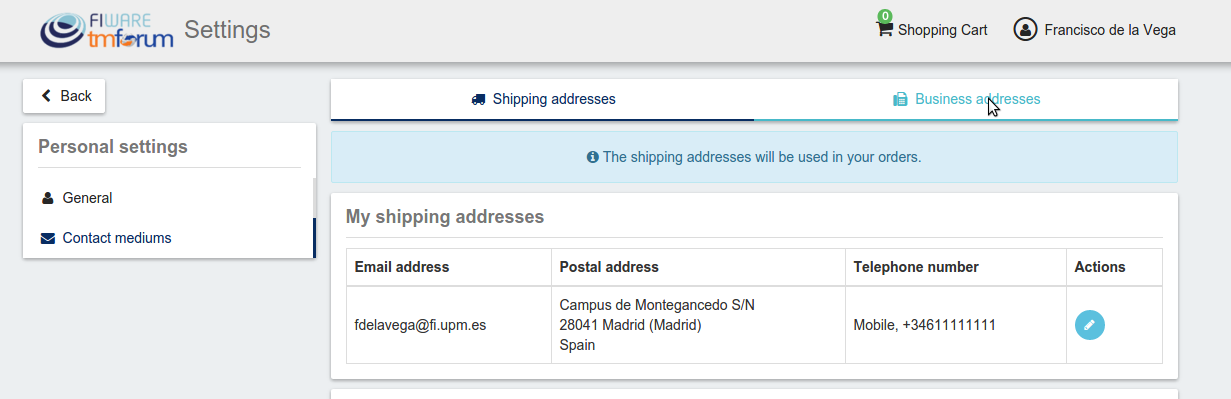
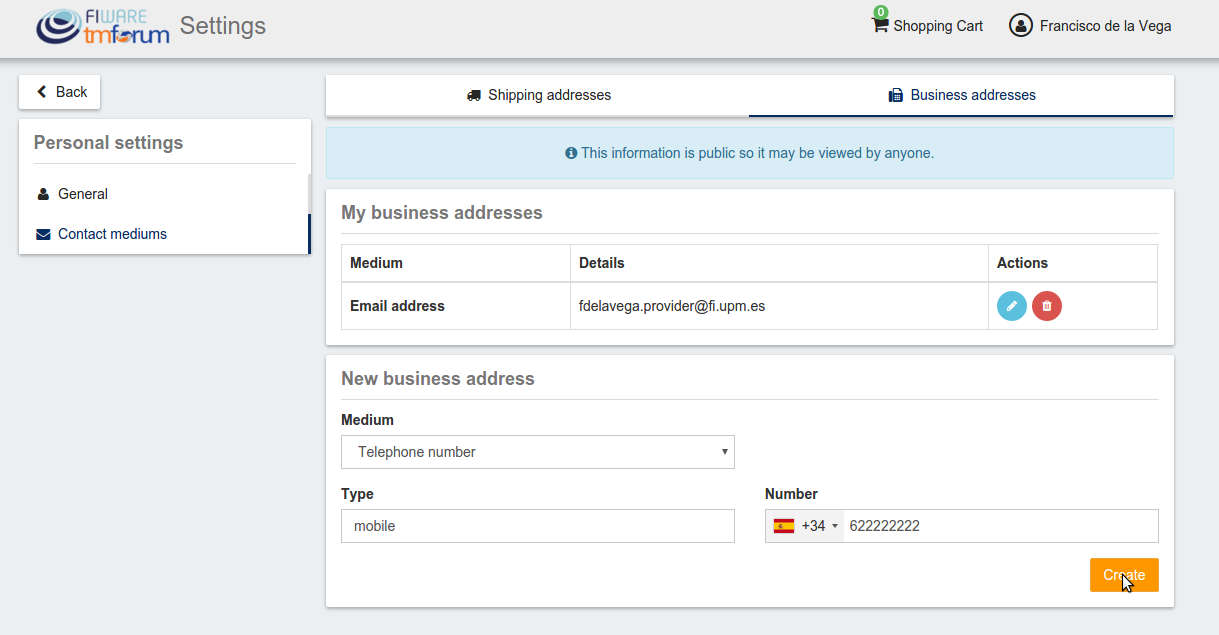
On the other hand, if you have the Seller role you can create Business Addresses, which can be used by your customers in order to allow them to contact you.
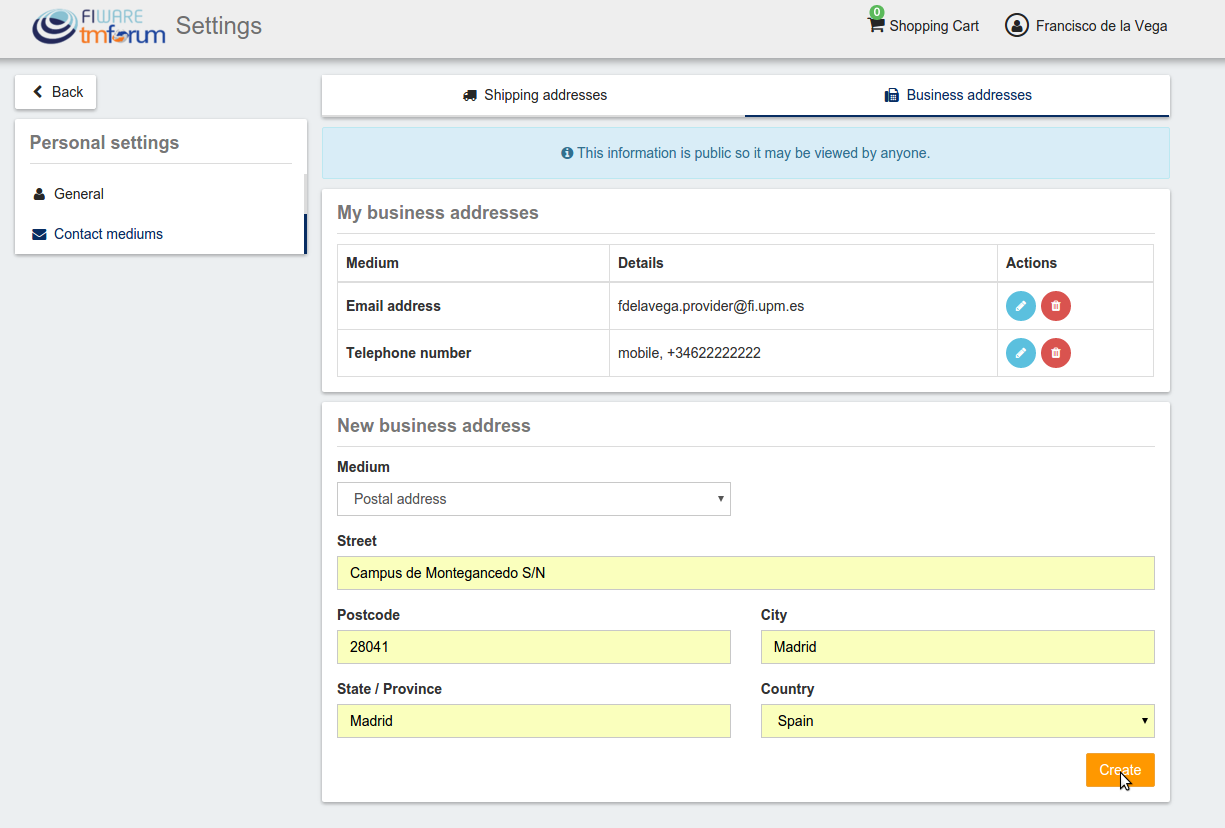
In the Business Addresses tab you can create, different kind of contact mediums, including emails, phones, and addresses. To create a contact medium, fill in the fields and click on Create
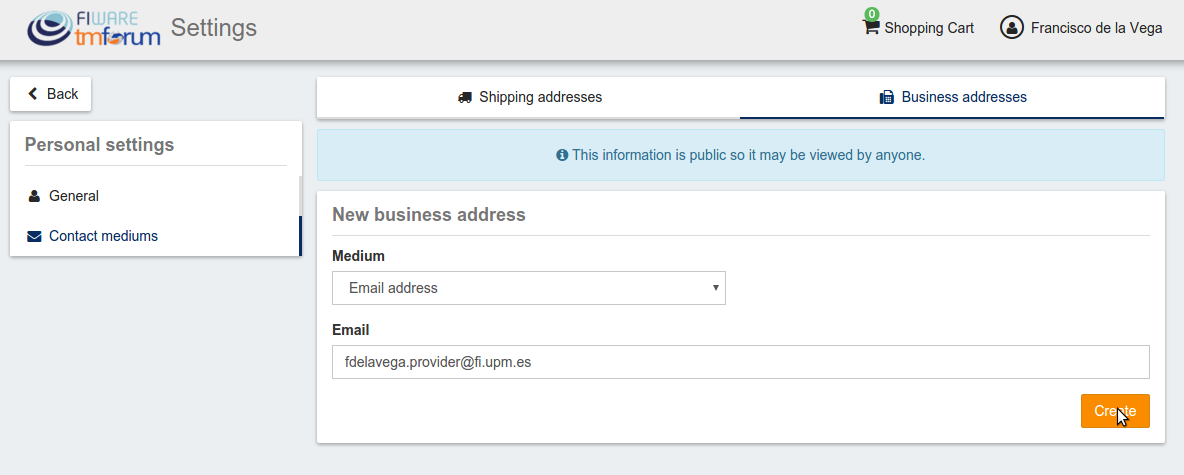
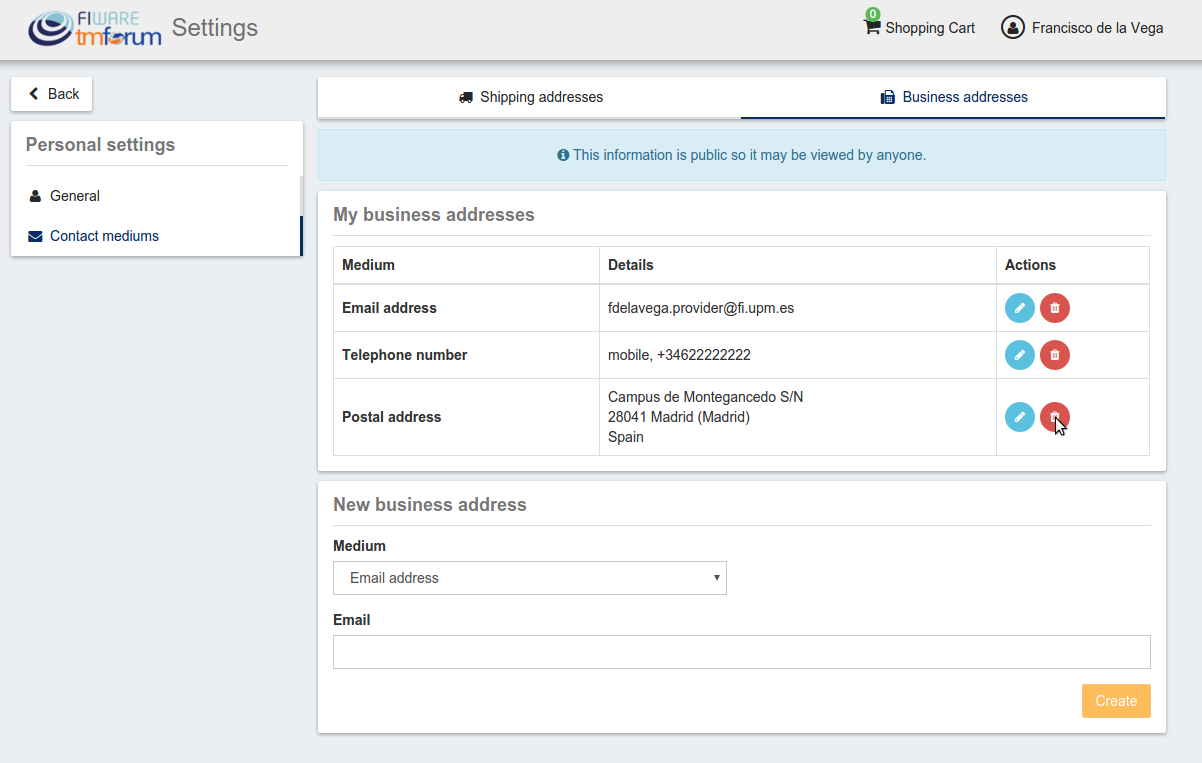
You can Edit or Remove the contact medium by clicking on the corresponding button
Admin
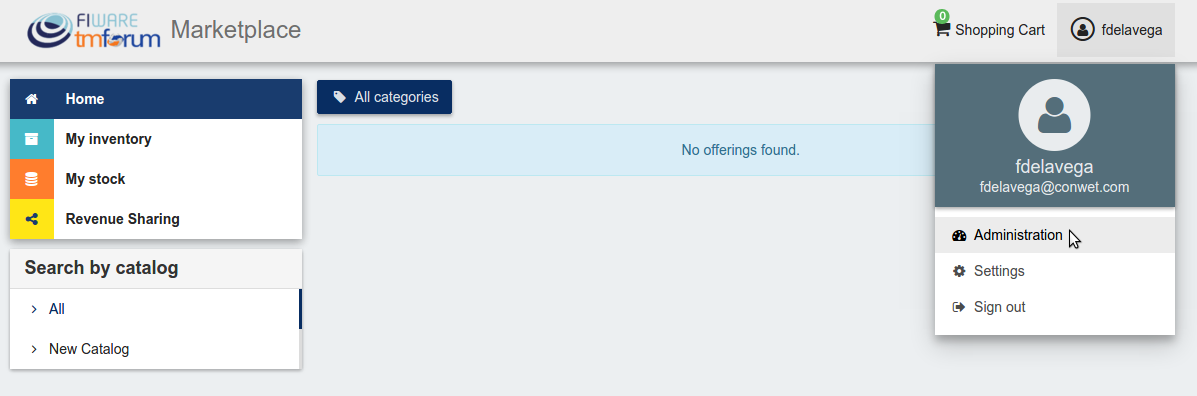
If the user of the Business API Ecosystem is an admin, he will be able to access the Administration section of the web portal. This section is located in the user menu.
Manage Categories
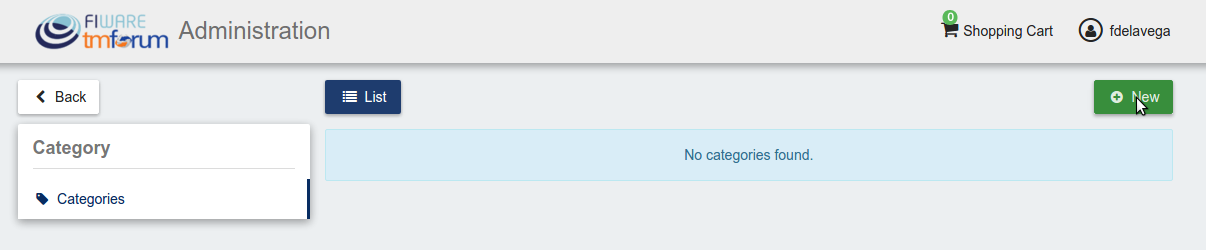
Admin users are authorized to create the system categories that can be used by Sellers to categorize their catalogs, products, and offerings.
To create categories, go to the Administration section, and click on New
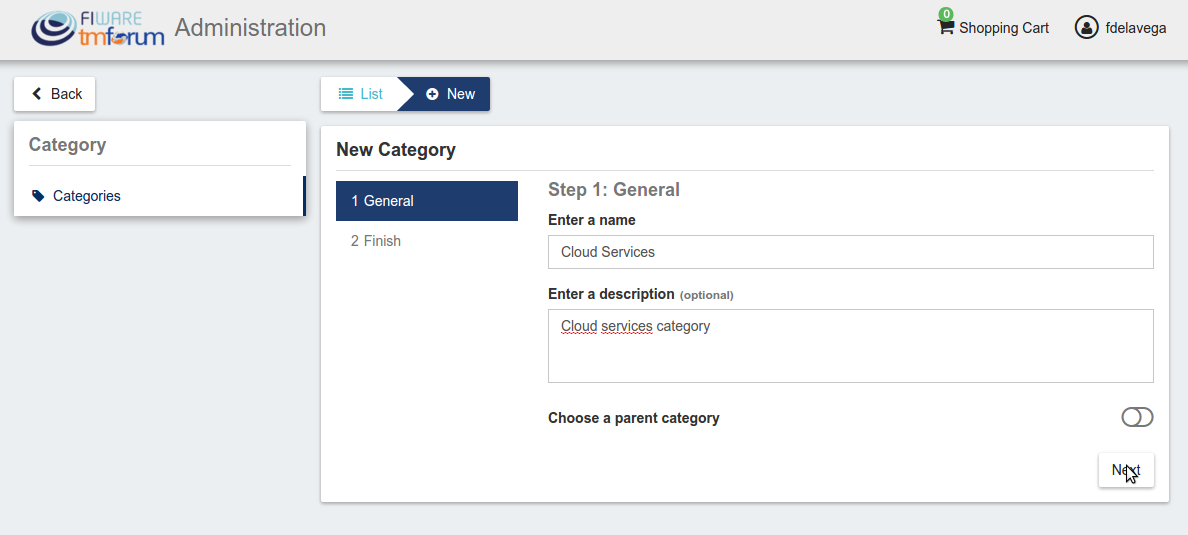
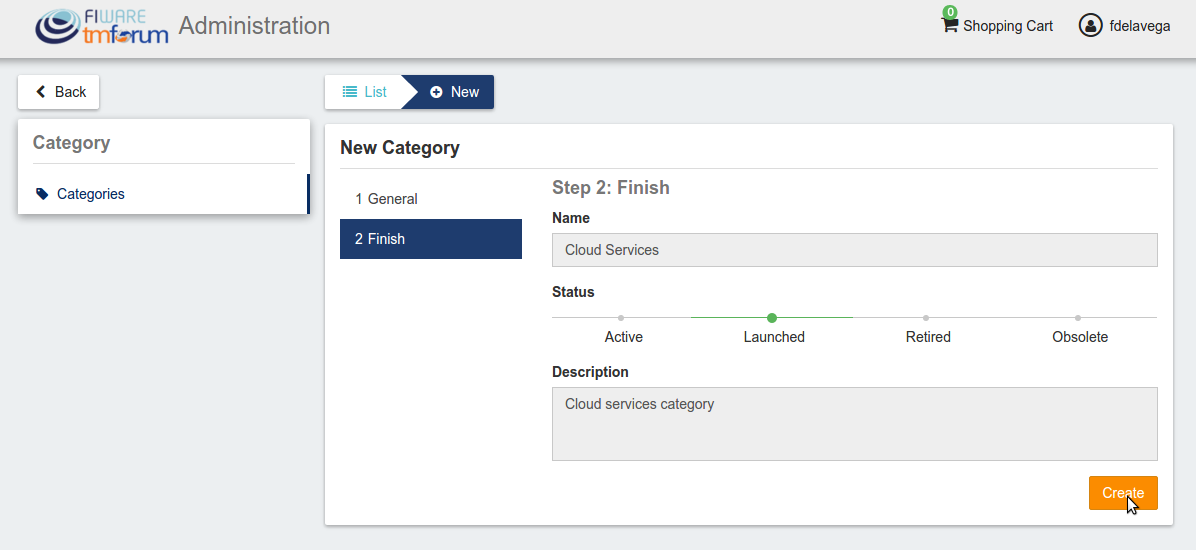
Then, provide a name and an optional description for the category. Once the information has been included, click on Next, and then on Create
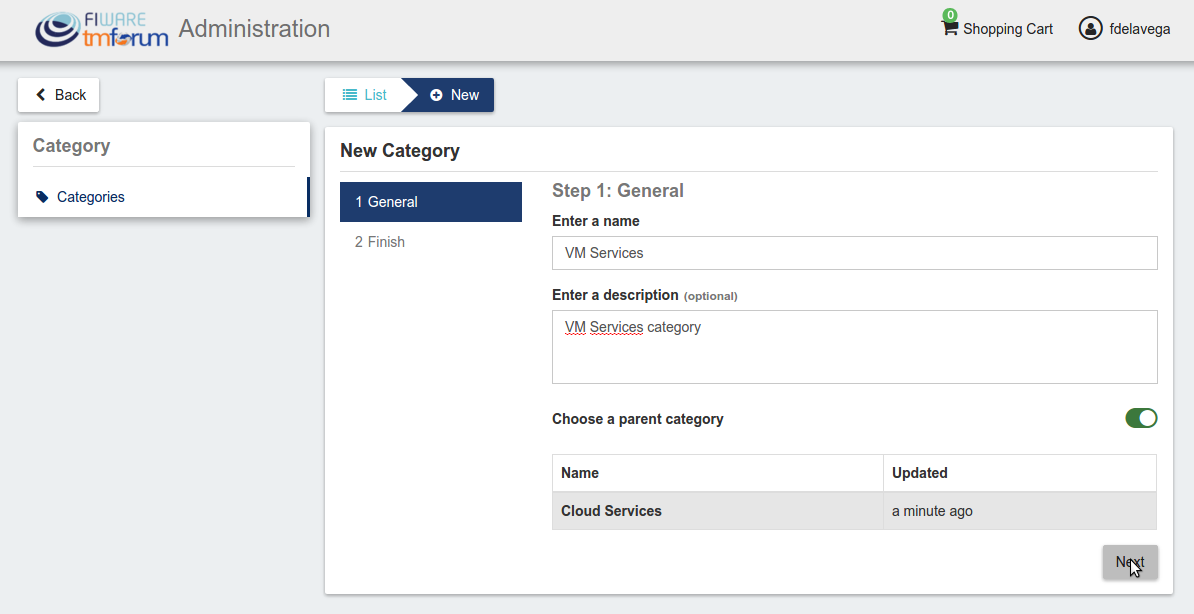
Categories in the Business API Ecosystem can be nested, so you can choose a parent category if you want while creating.
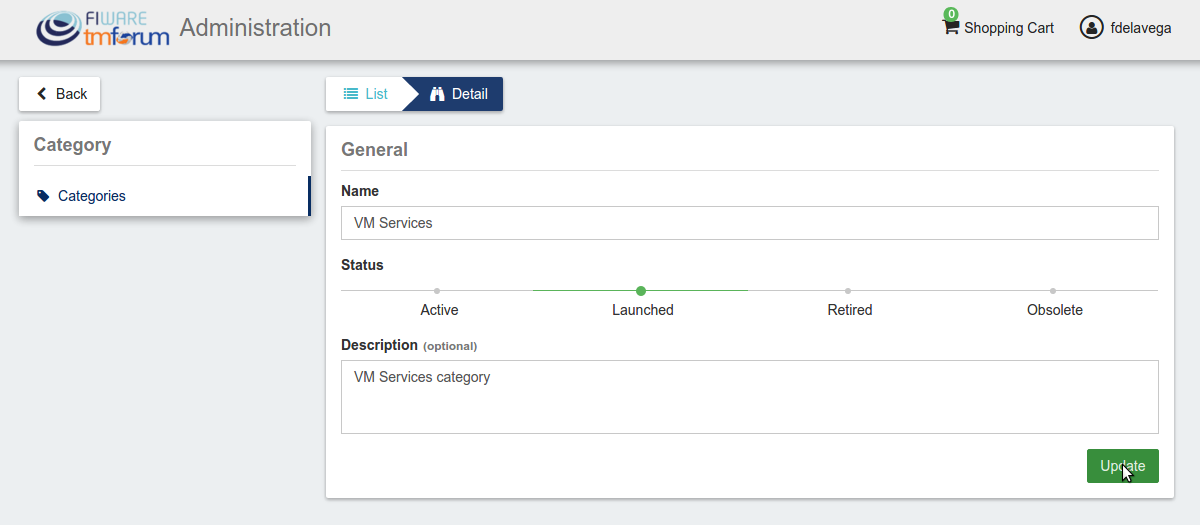
Existing categories can be updated. To edit a category click on the category name.
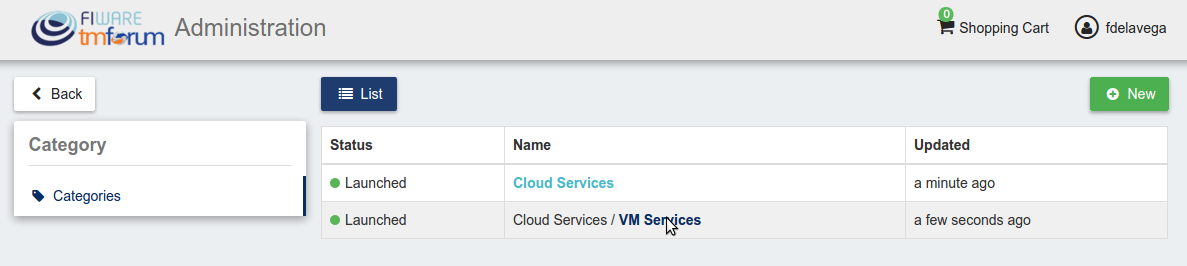
Then edit the corresponding fields and click on Update.
Seller
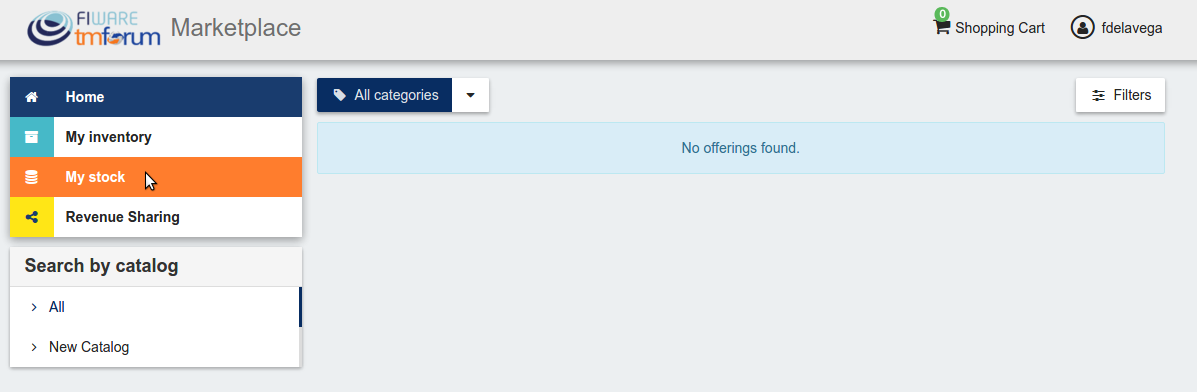
If the user of the Business API Ecosystem has the Seller role, he will be able to monetize his products by creating, catalogs, product specifications and product offerings. All these objects are managed accessing My Stock section.
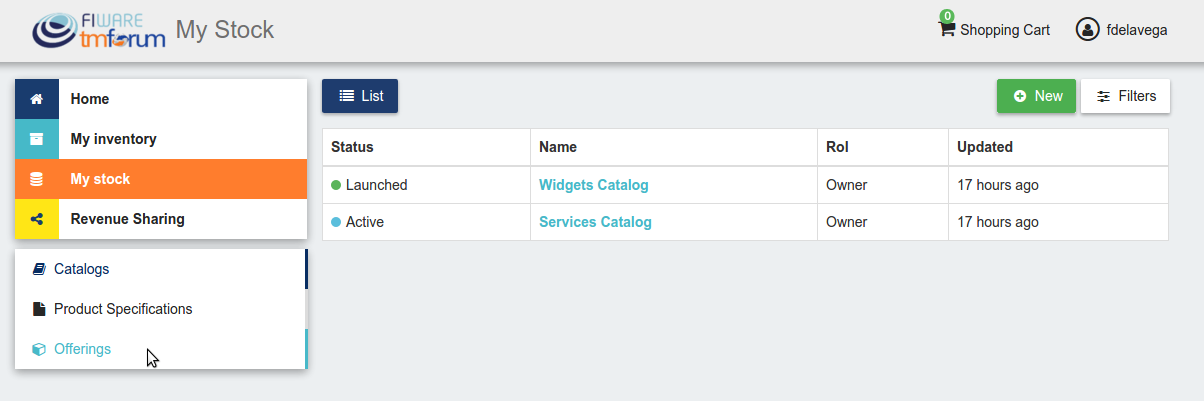
Manage Catalogs
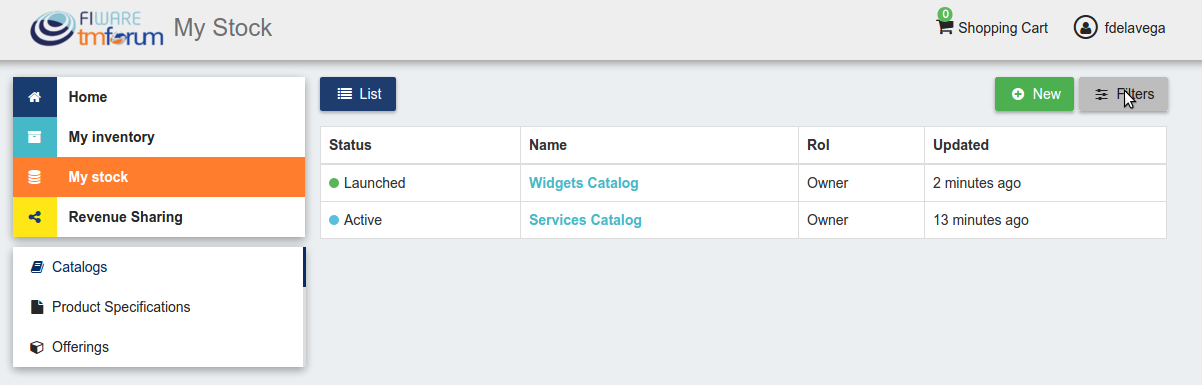
The Catalogs section is the one that is open by default when the seller accesses My Stock section. This section contains the catalogs the seller has created.
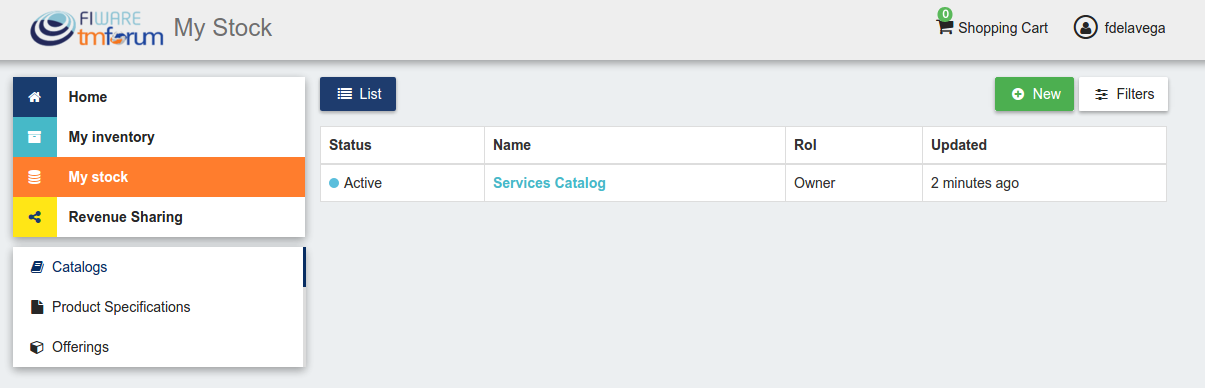
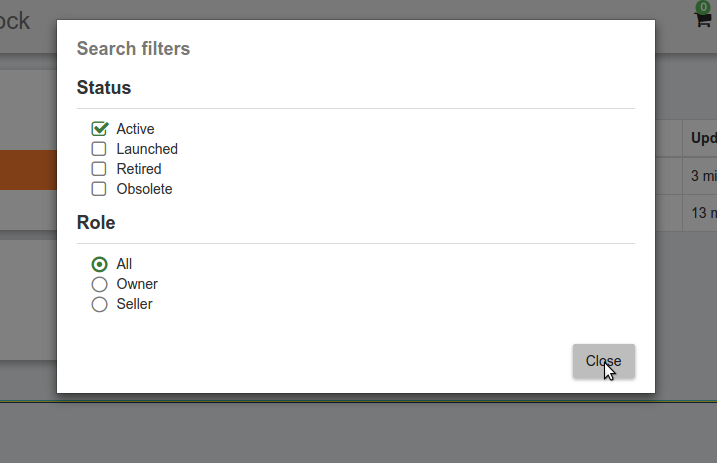
Additionally, it is possible to filter the shown catalogs by status and the role you are playing by clicking on Filters, choosing the required ones, and clicking on Close
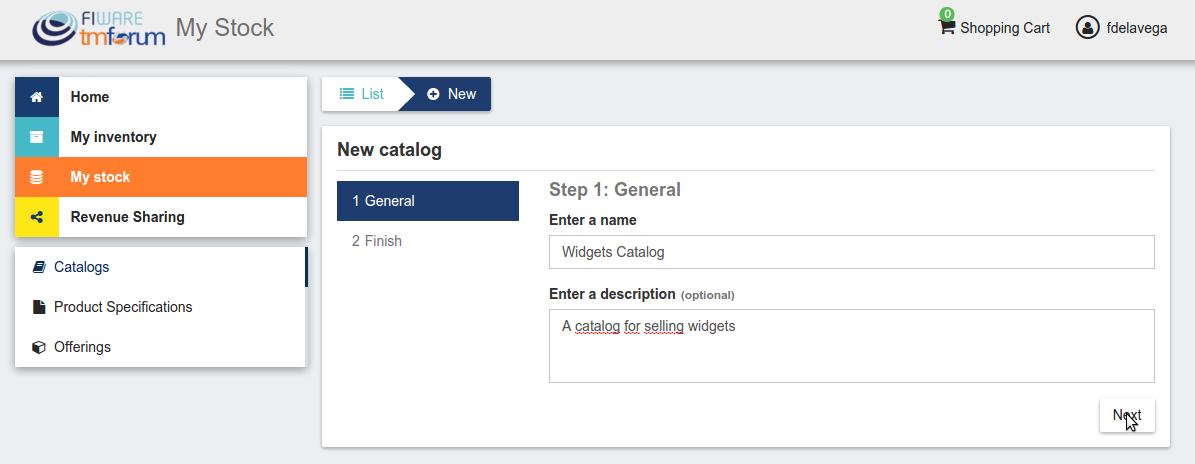
To create a new catalog click on the New button.

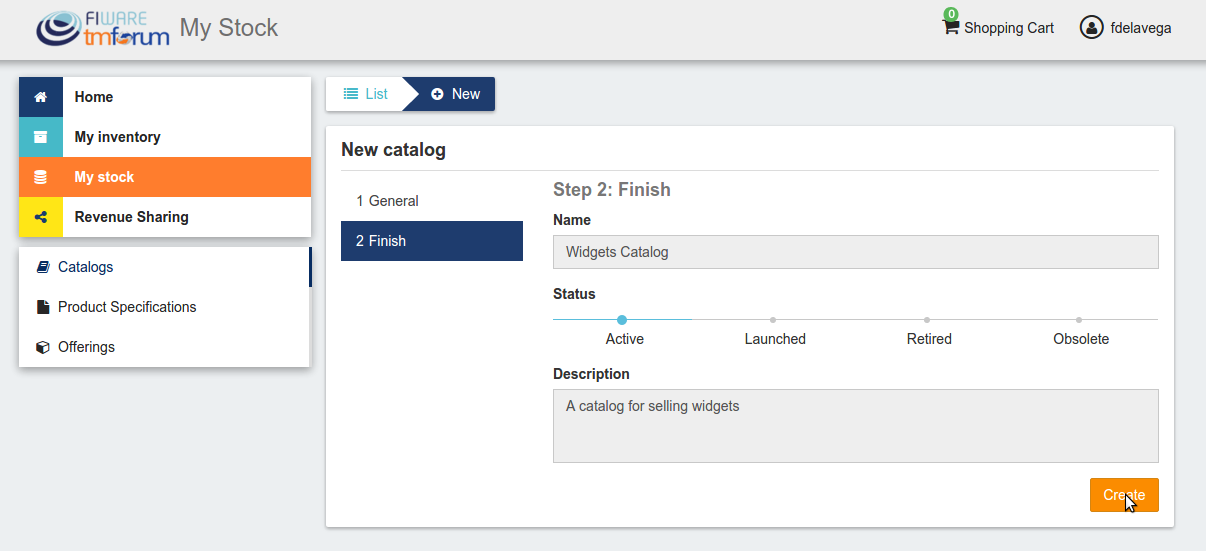
Then, provide a name and an optional description for the catalog. Once you have filled the fields, click on Next, and then on Create
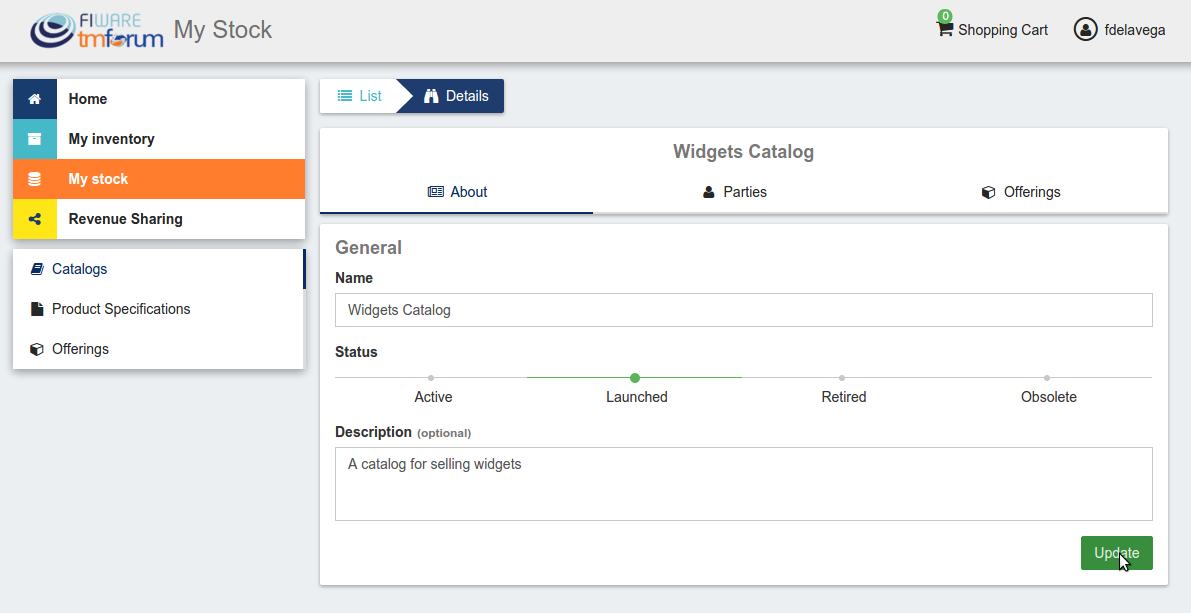
Sellers can also update their catalogs. To do that, click on the name of the catalog to open the update view.

Then, update the fields you want to modify and click on Update. In this view, it is possible to change the Status of the catalog. To start monetizing the catalog, and make it appear in the Home you have to change its status to Launched
Manage Product Specifications
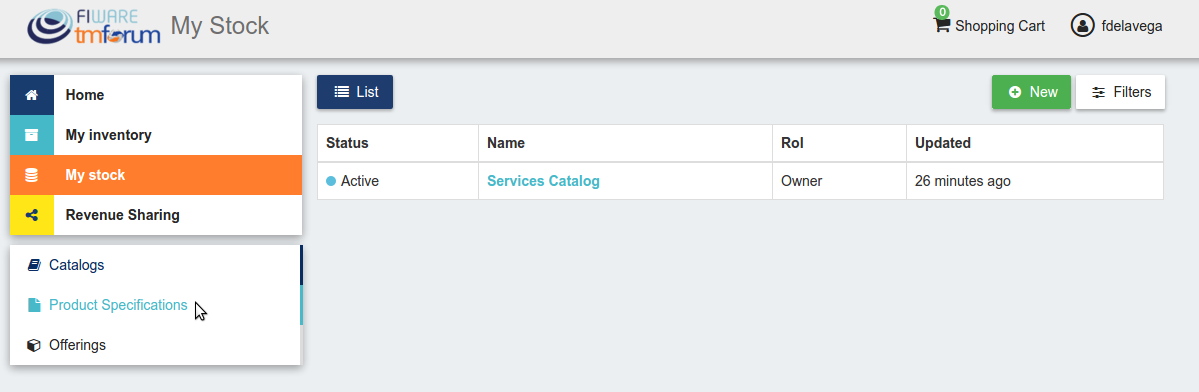
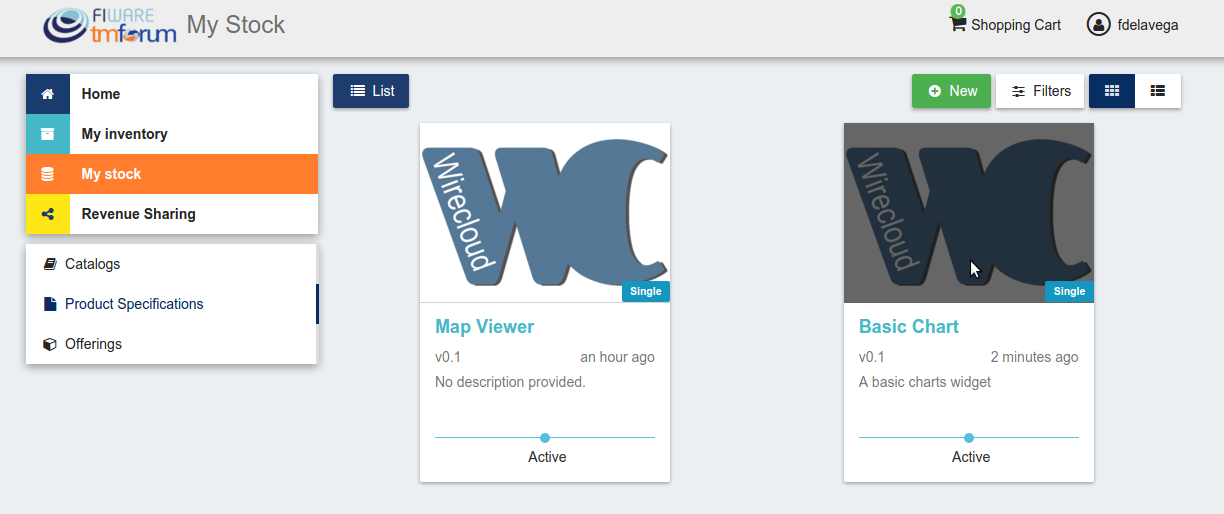
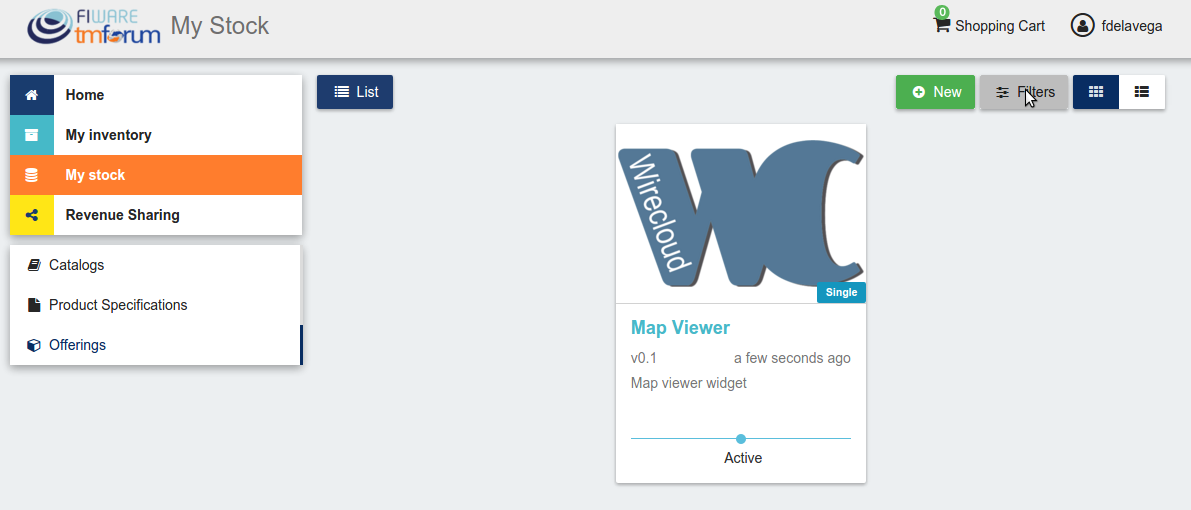
Product Specifications represent the product being offered, both digital and physical. To list your product specifications go to My Stock section and click on Product Specifications
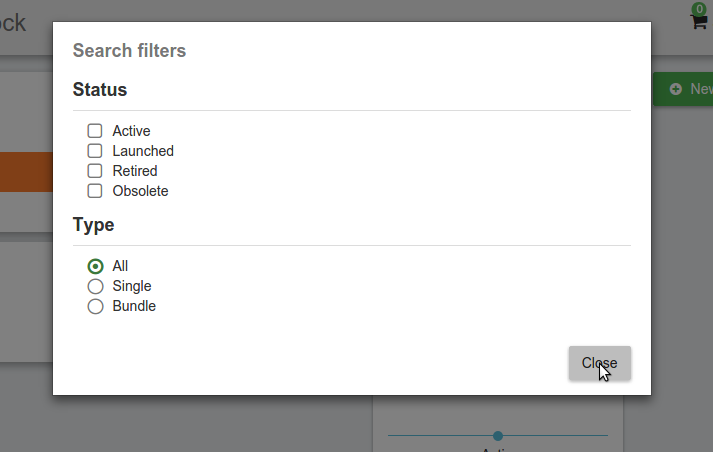
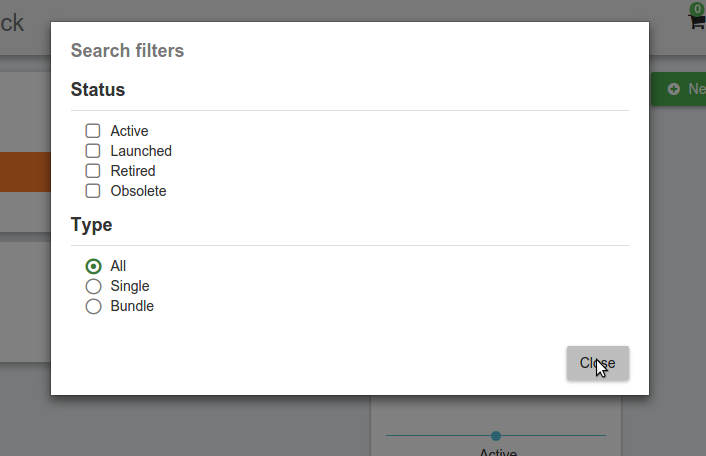
The different product specifications can be filtered by status or by if they are bundles or not. To filter products, click on Filters, choose the appropriate ones, and click on Close

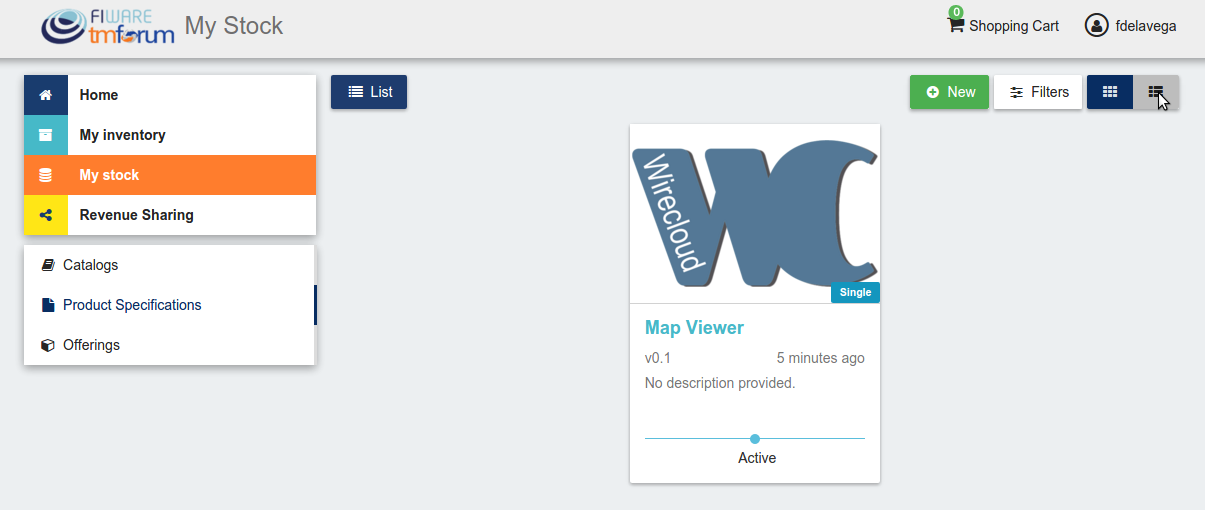
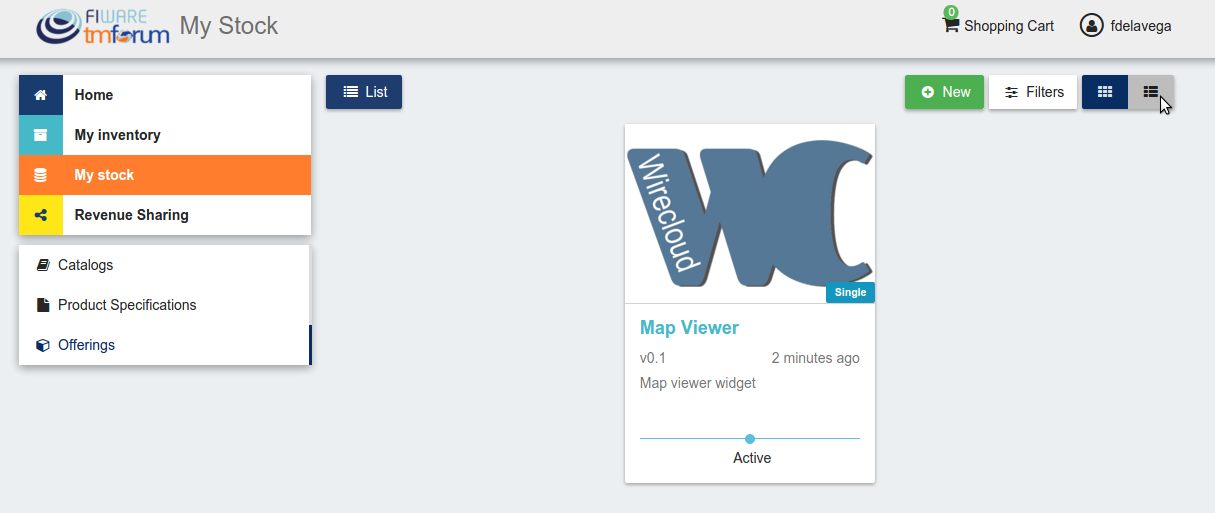
Additionally, it is possible to switch between the grid view and the tabular view using the provided buttons.

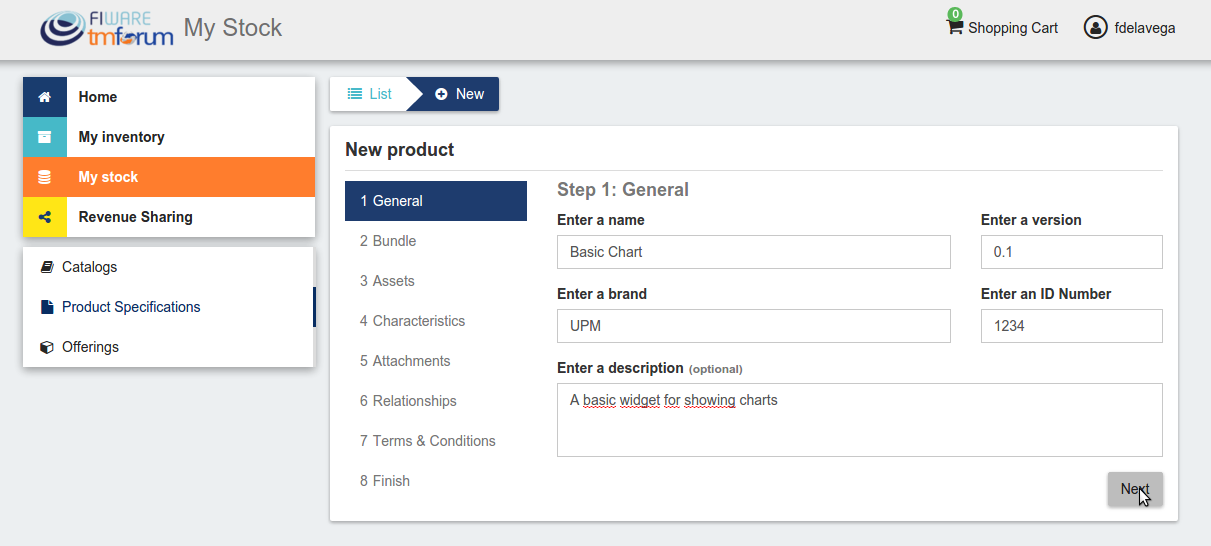
To create a new product specification click on New

In the displayed view, provide the general information of the product spec. including its name, version, and an optional description. In addition, you have to include the product brand (Your brand), and an ID number which identifies the product in your environment. Then, click on Next.
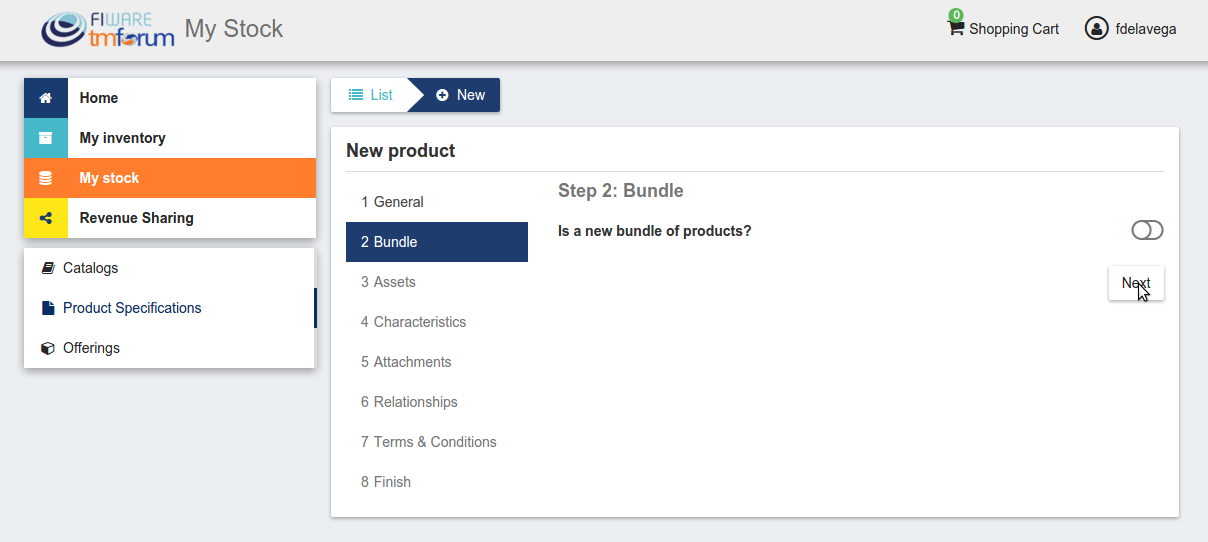
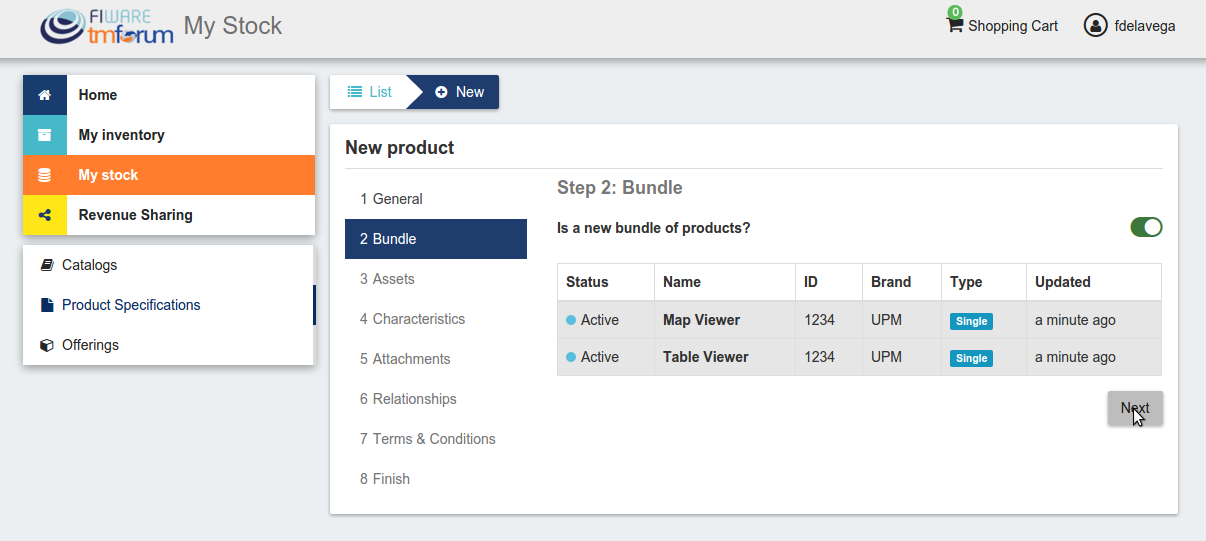
In the next step, you can choose whether your product specification is a bundle or not. Product bundles are logical containers that allow you to sell multiple products as if it were a single one. Once you have selected the right option click on Next
If you have decided to create a bundle, you will be required to choose 2 or more product specs to be included in the bundle.
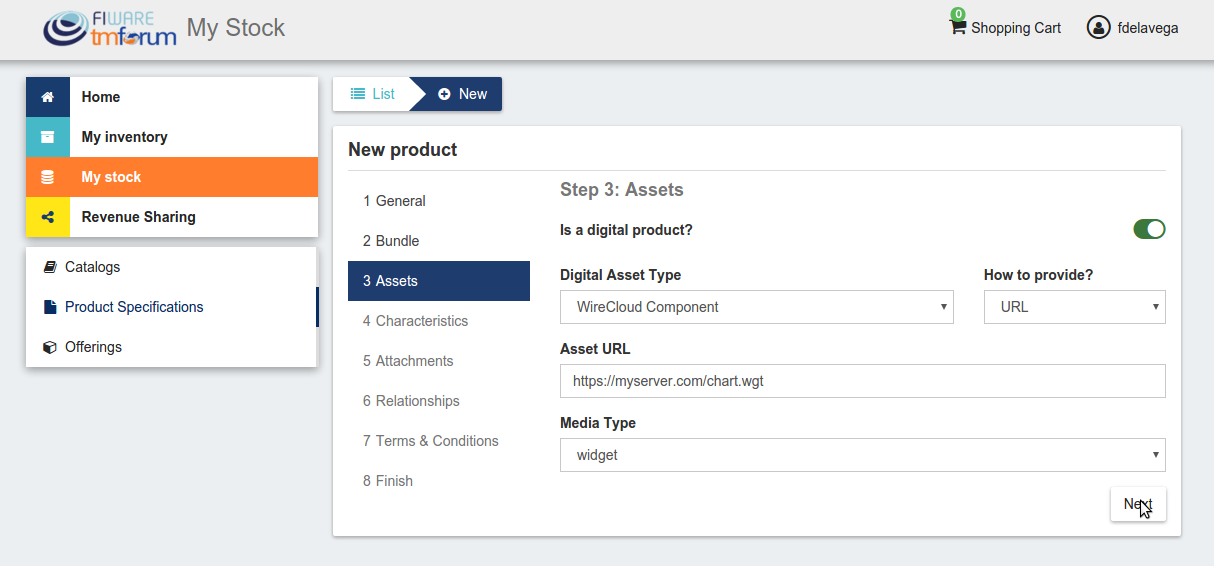
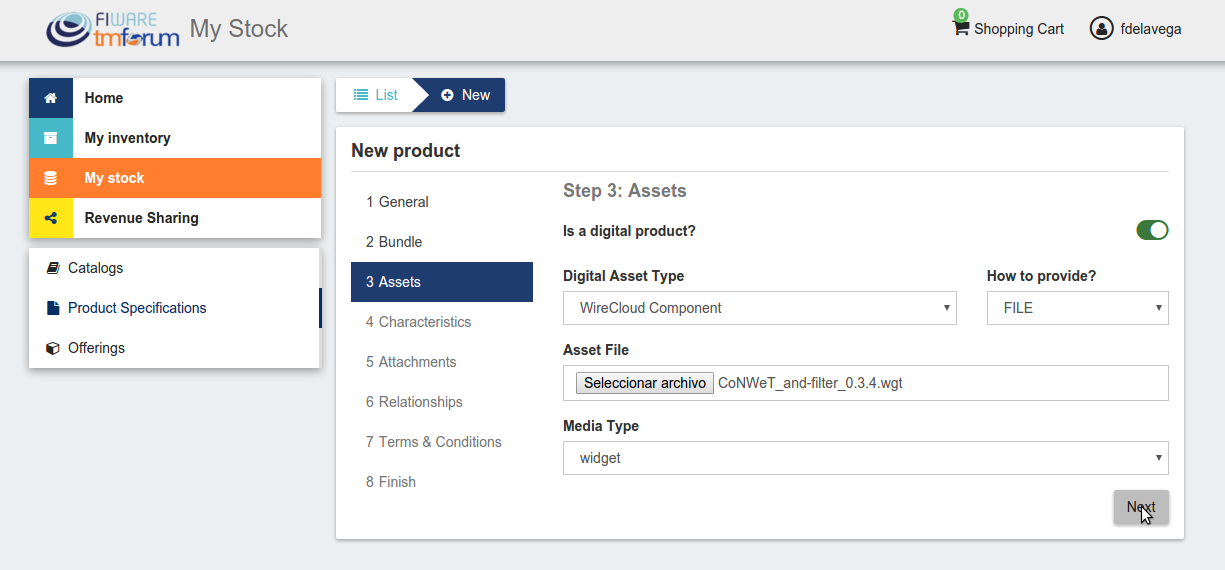
In the next step you can choose if your product is a digital product. If this is the case, you will be required to provide the asset.
Note
If you are creating a product bundle, you will not be allowed to provide a digital asset since the offered ones will be the included in the bundled products
For providing the asset, you have to choose between the available asset types, choose how to provide the asset between the available options, provide the asset, and include its media type.
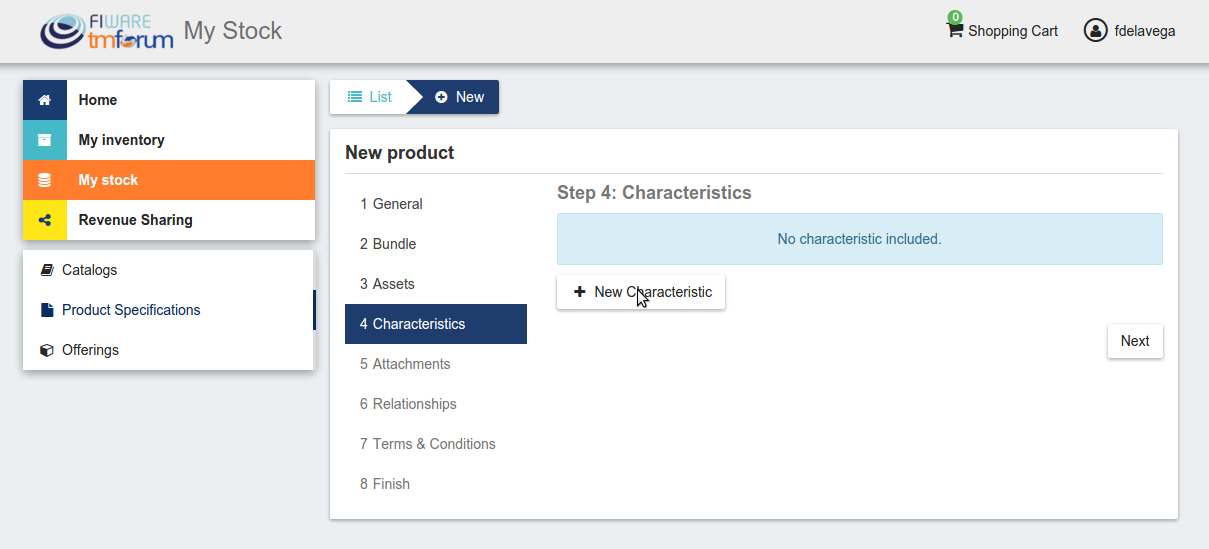
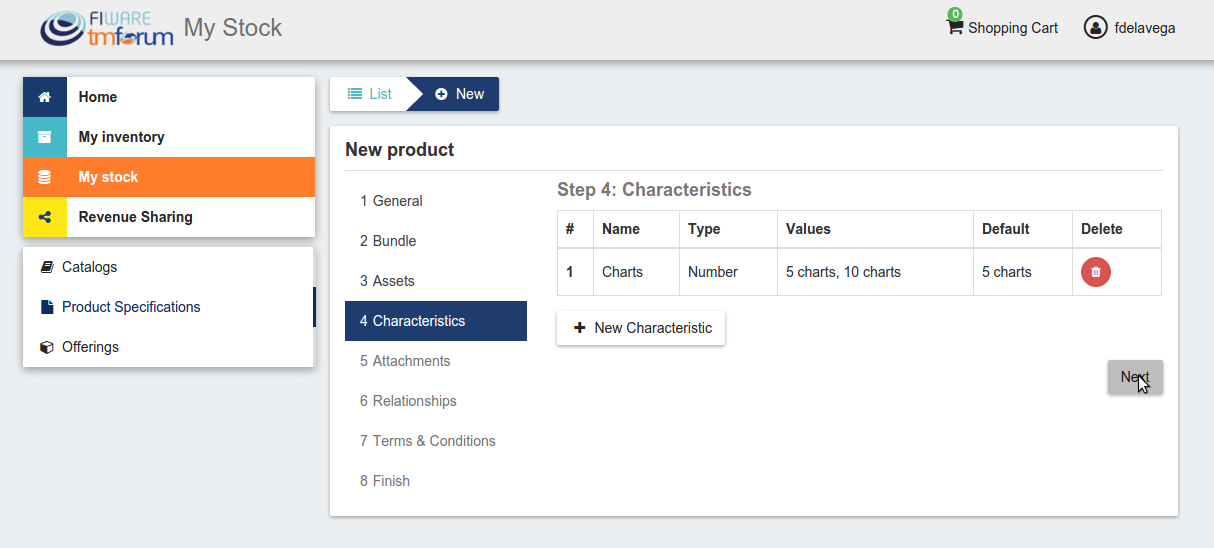
The next step in the creation of a product is including its characteristics. For including a new characteristic click on New Characteristic
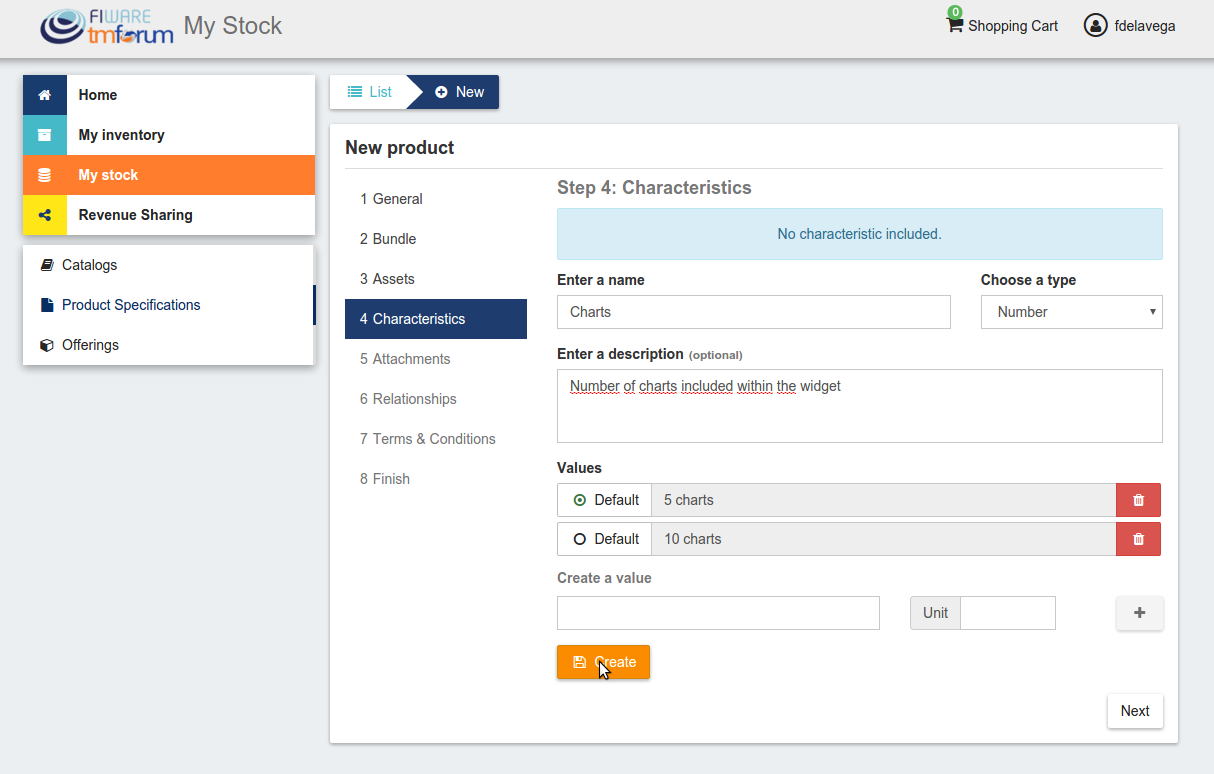
In the form, include the name, the type (string or number) and an optional description. Then create the values of the characteristic by filling the Create a value input and clicking on +.
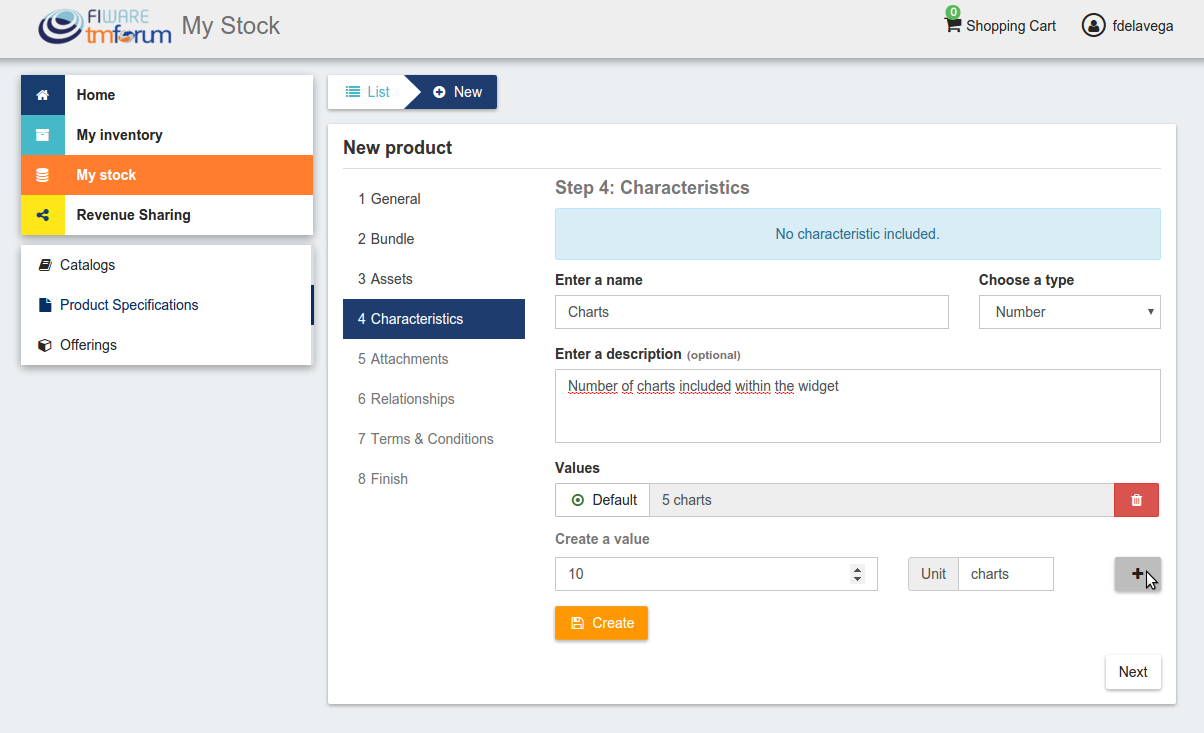
Once you have included all the characteristic info, save it clicking on Create
Once you have included all the required characteristics click on Next
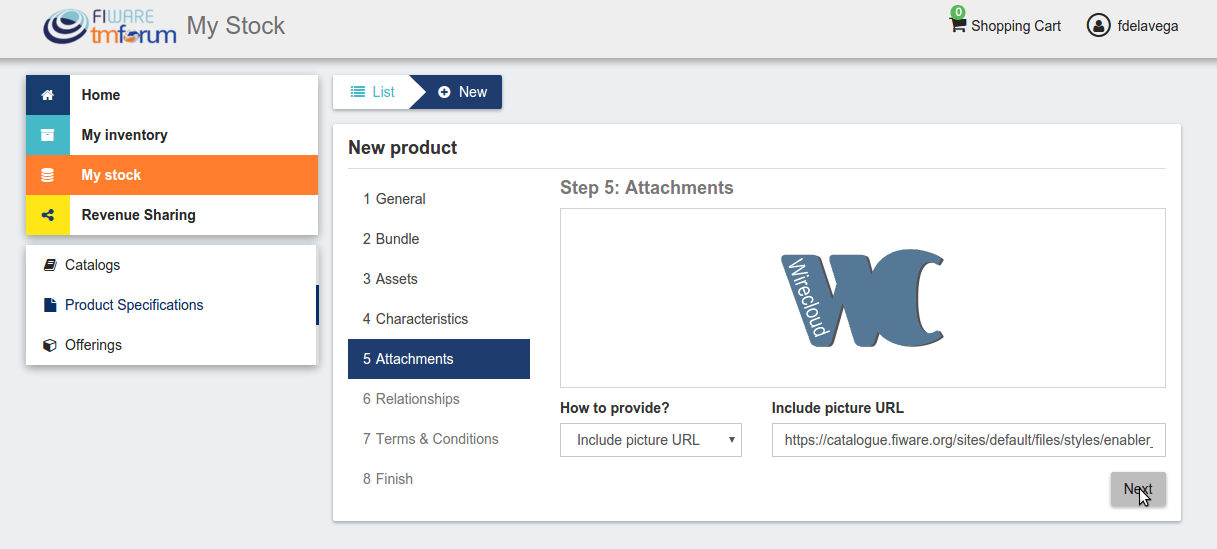
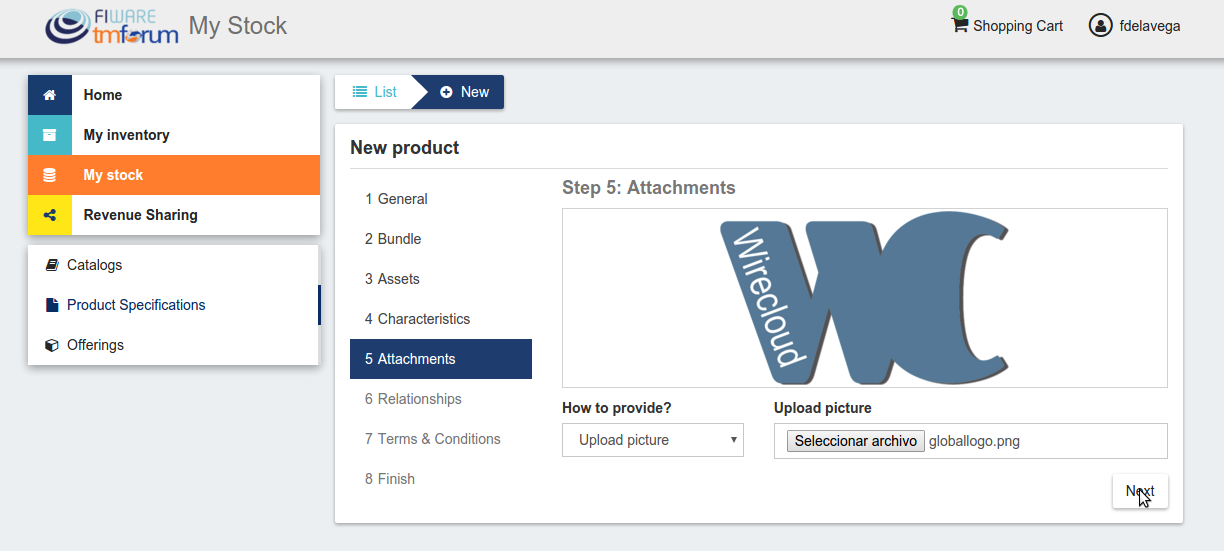
In the next step you can include a picture for your product spec. You have two options, providing an URL pointing to the picture or directly uploading it. Once provided click Next
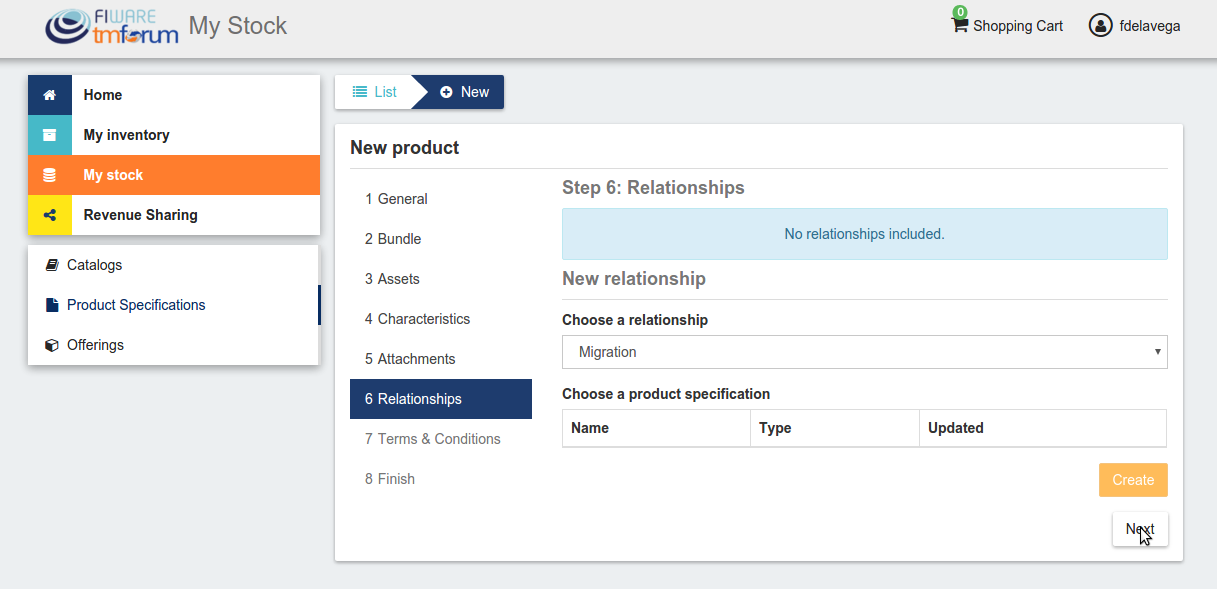
Then, you can specify relationships of the product you are creating with other of your product specs.
In the last step, you can specify the terms and conditions that apply to your product and that must be accepted by those customers who want to acquire it. To do that, include a title and a text for your terms and click on Next. Note that the terms and conditions are not mandatory.
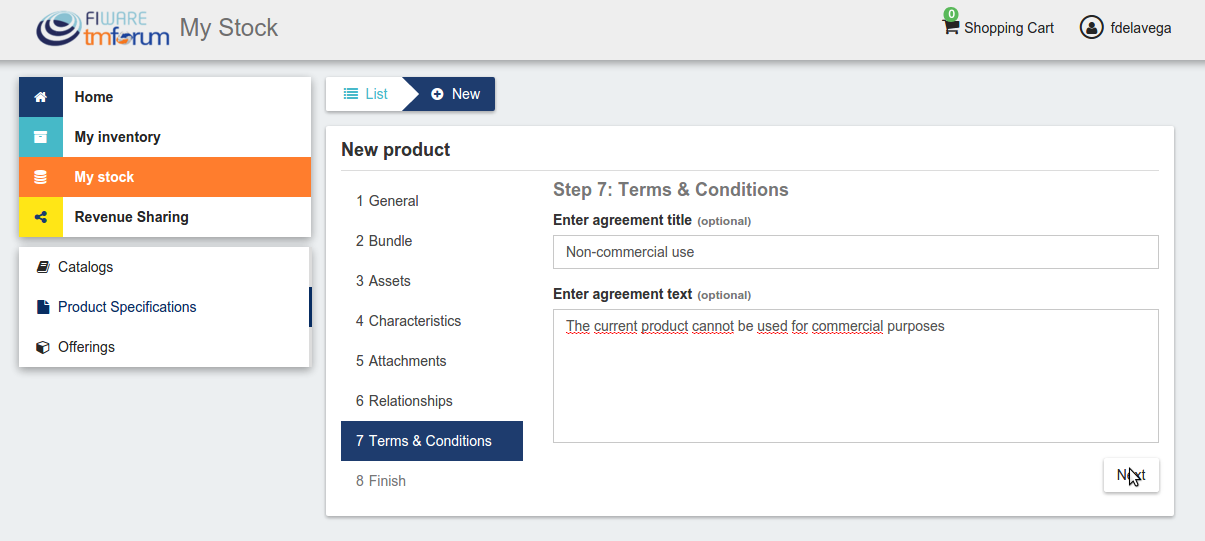
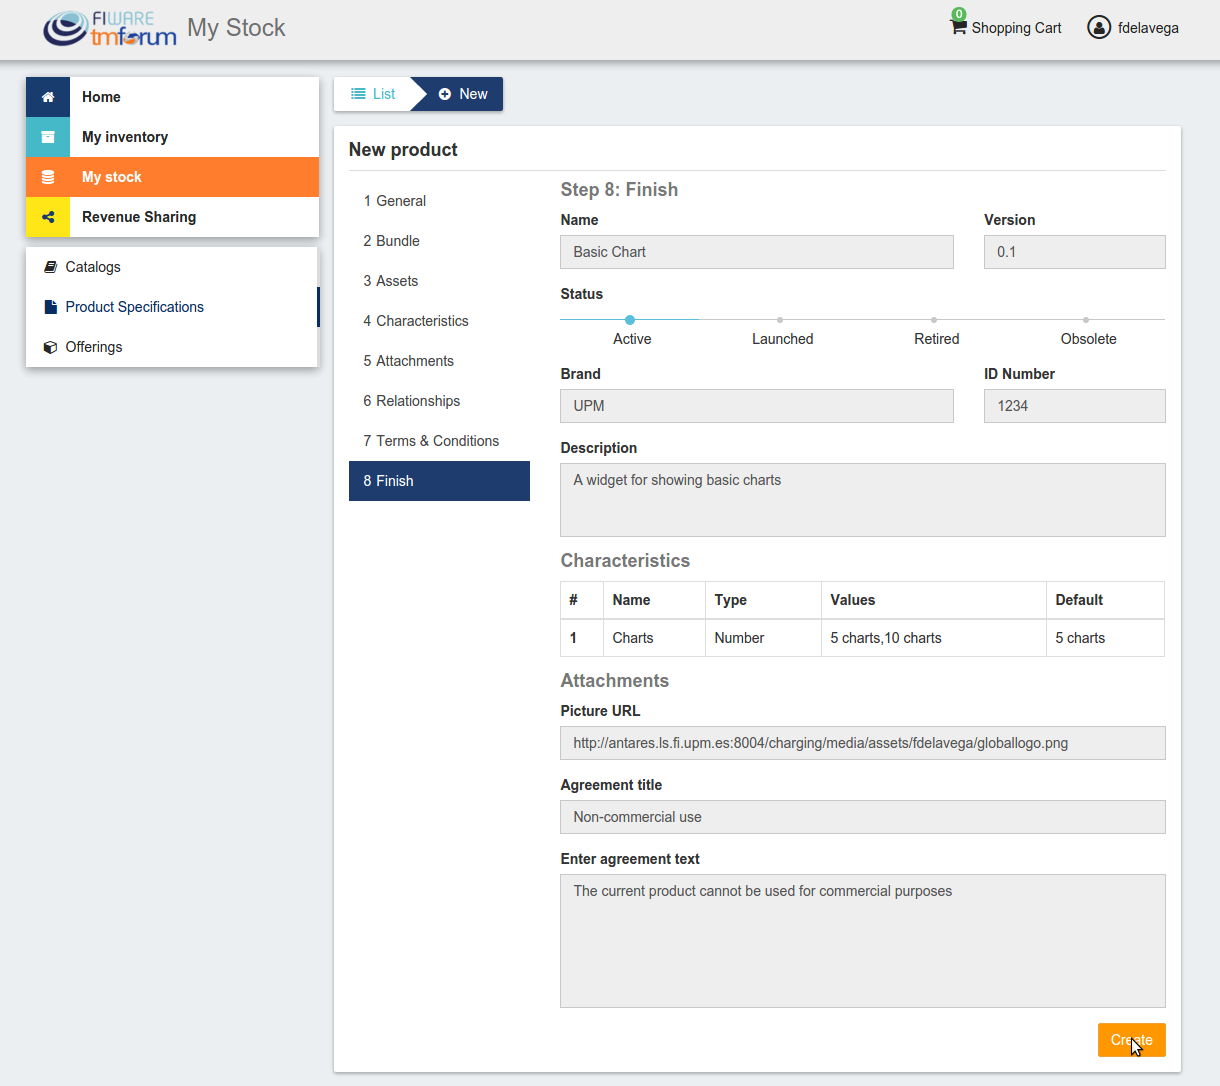
Once done click on Next and then on Create
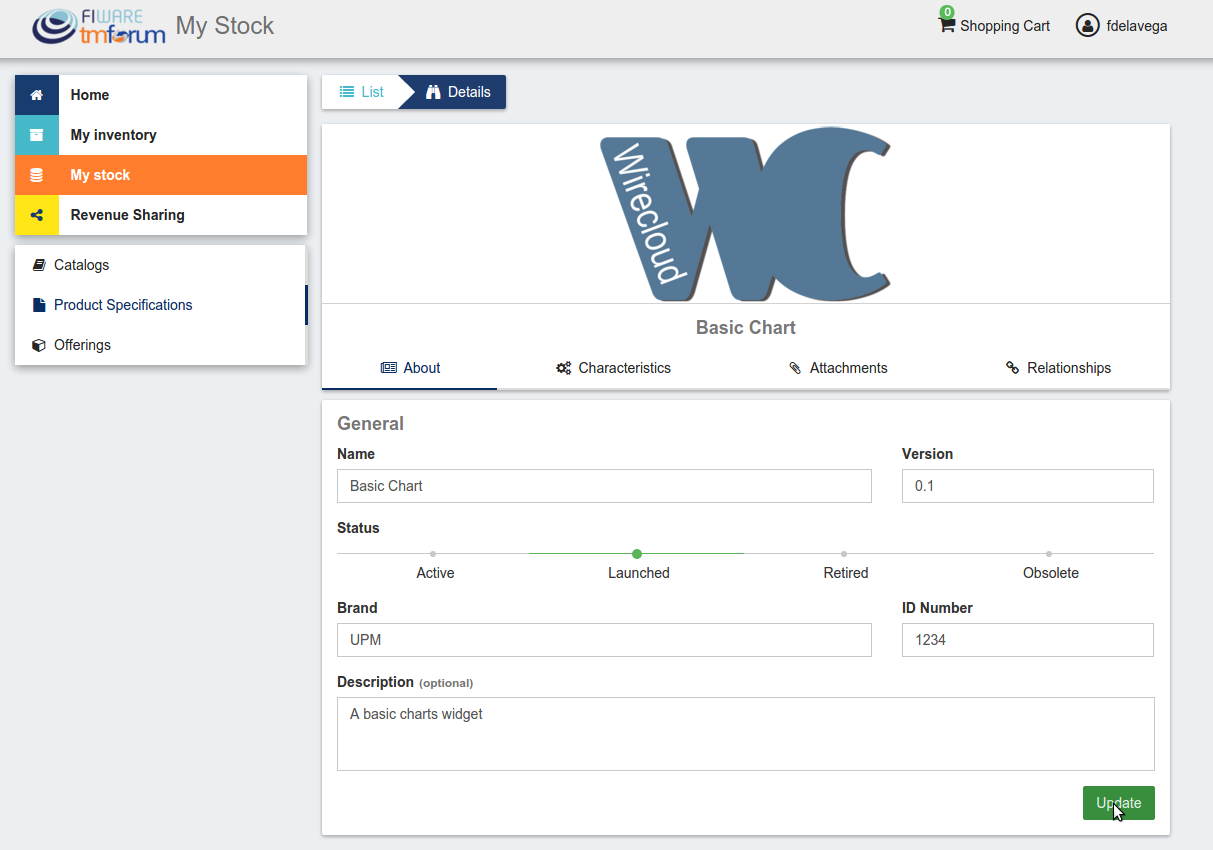
Sellers can update their products. To do that click on the product specification to be updated.
Update the required values and click on Update. Note that for start selling an offering that includes the product specification you will be required to change its status to Launched
Manage Product Offerings
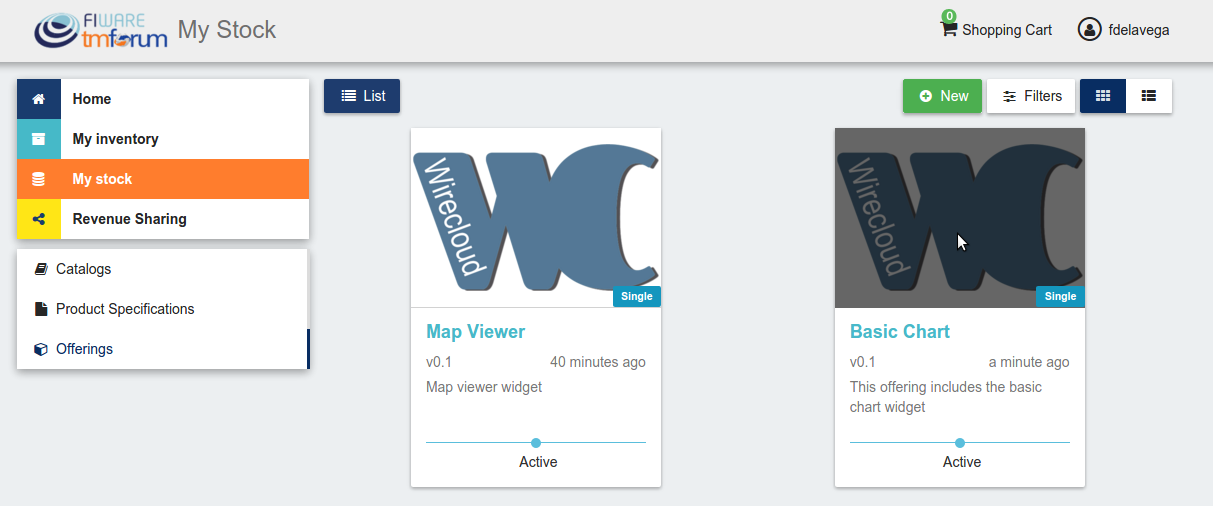
Product Offerings are the entities that contain the pricing models and revenue sharing info used to monetize a product specification. To list your product offerings, go to My Stock section and click on Offerings
The existing product offerings can be filtered by status or by if they are a bundle or not. To filter offerings click on Filters choose the appropriate ones and click on Close
Additionally, it is possible to switch between the grid view and the tabular view by clicking on the specific button.
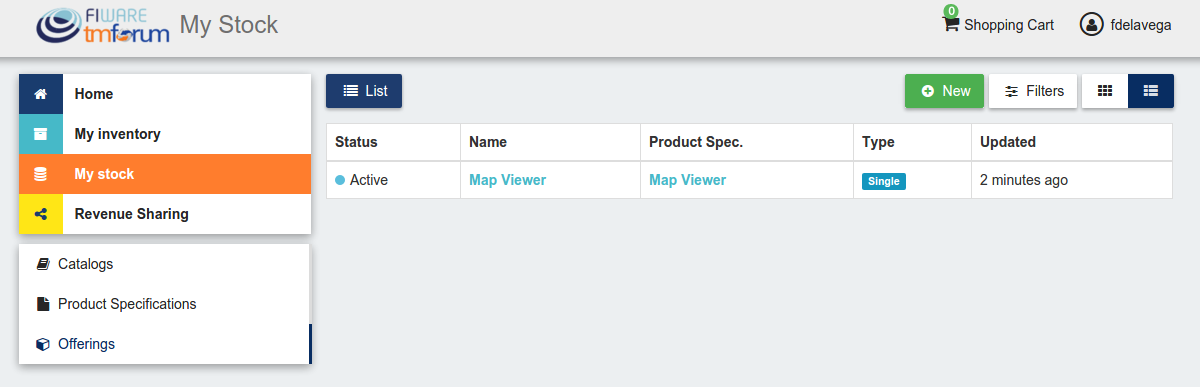
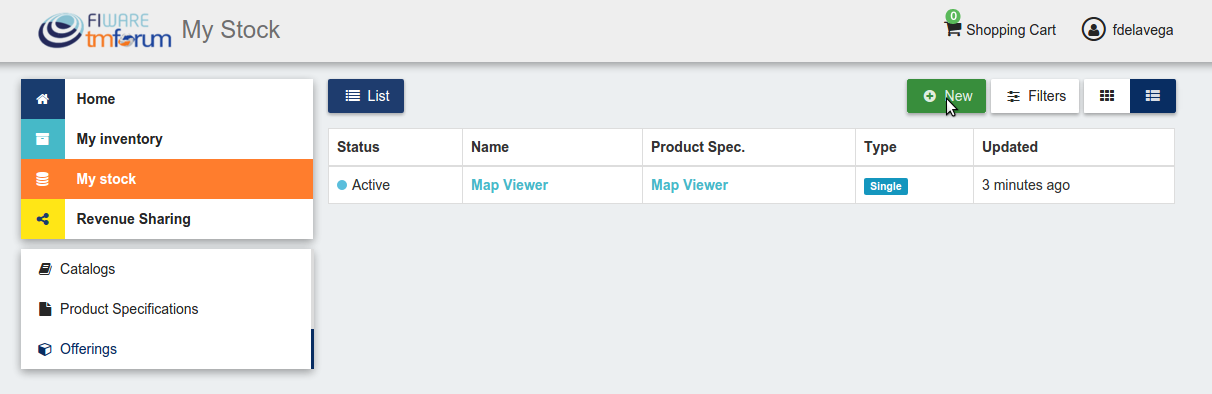
To create a new offering click on New
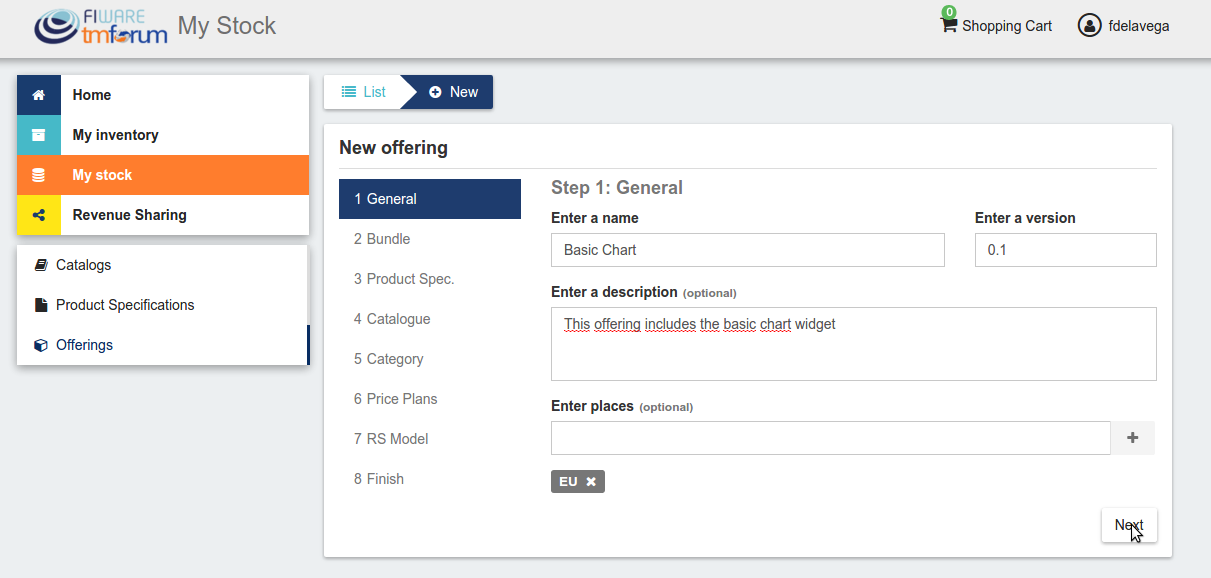
In the displayed form, include the basic info of the offering. Including, its name, version, an optional description, and an optional set of places where the offering is available. Once the information has been provided click on Next
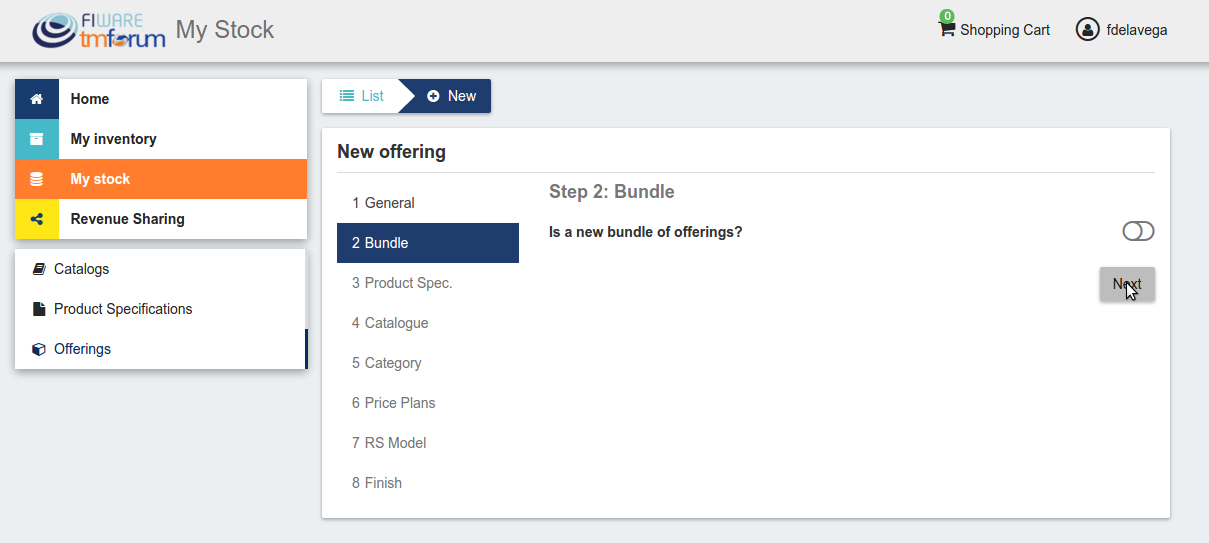
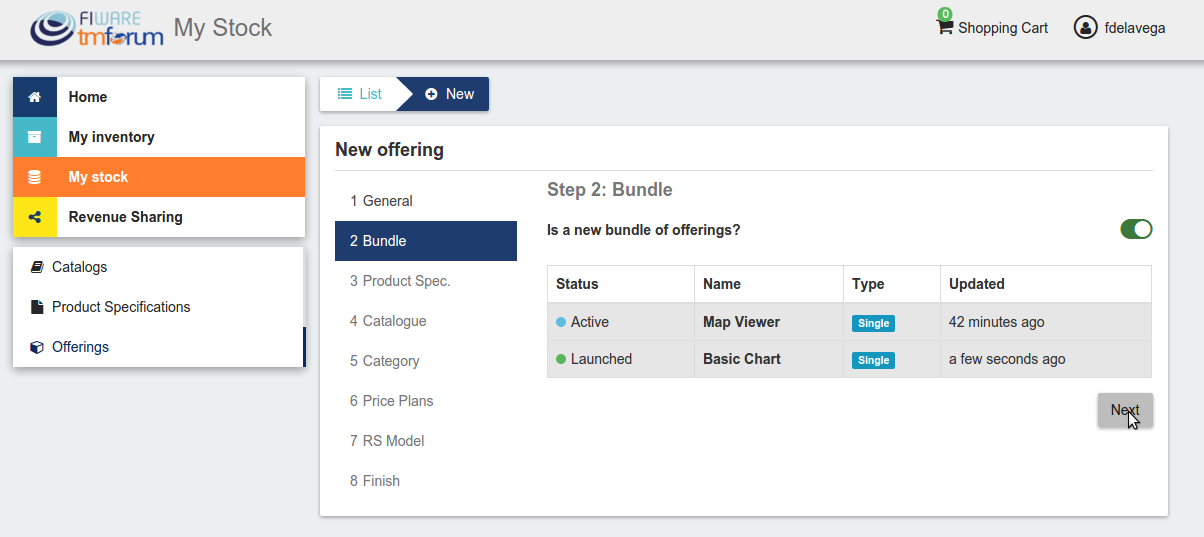
In the next step, you can choose whether your offering is a bundle or not. In this case, offering bundles are logical containers that allow you to provide new pricing models when a set of offerings are acquired together. Once selected click on Next
If you want to create a bundle you will be required to include at least two bundled offerings.
In the next step you have to select the product specification that is going to be monetized in the current offering. Once selected click on Next.
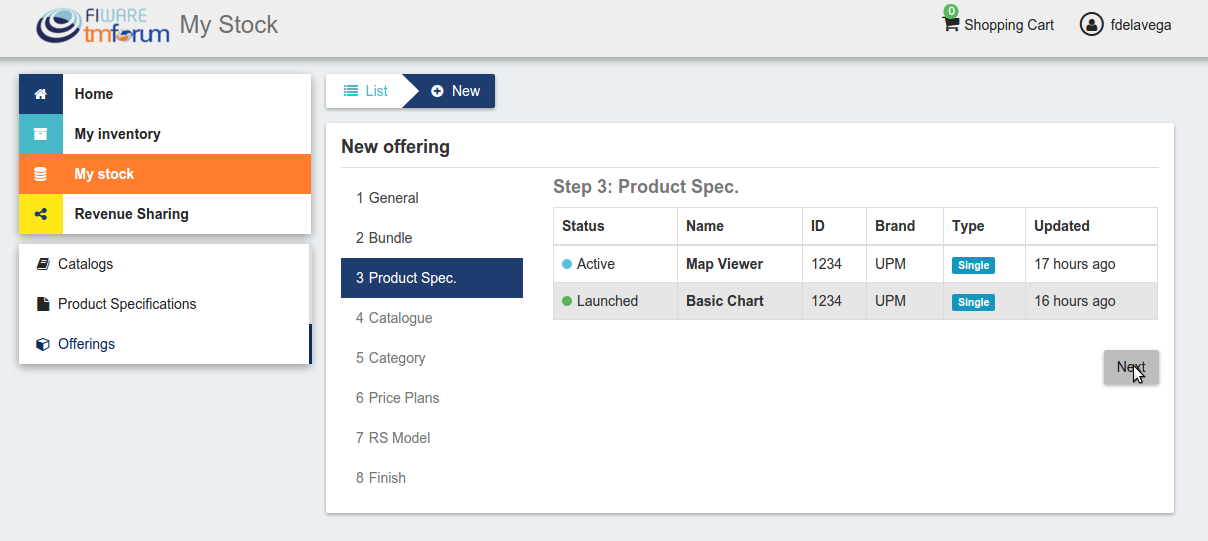
Note
If you are creating an offering bundle, you will not be allowed to include a product specification
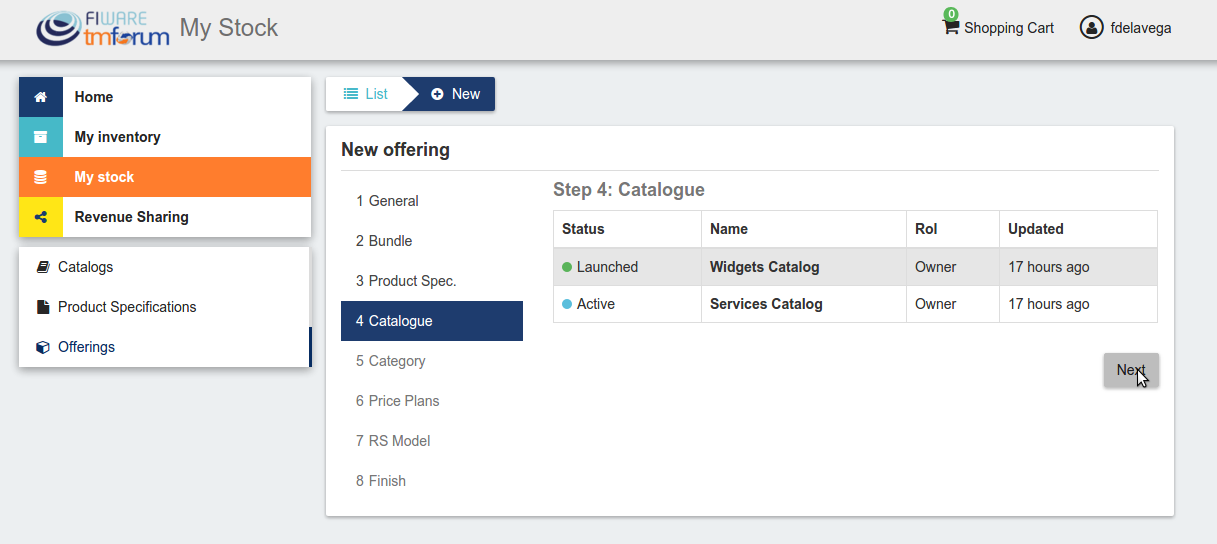
Then, you have to select the catalog where you want to publish you offering and click on Next
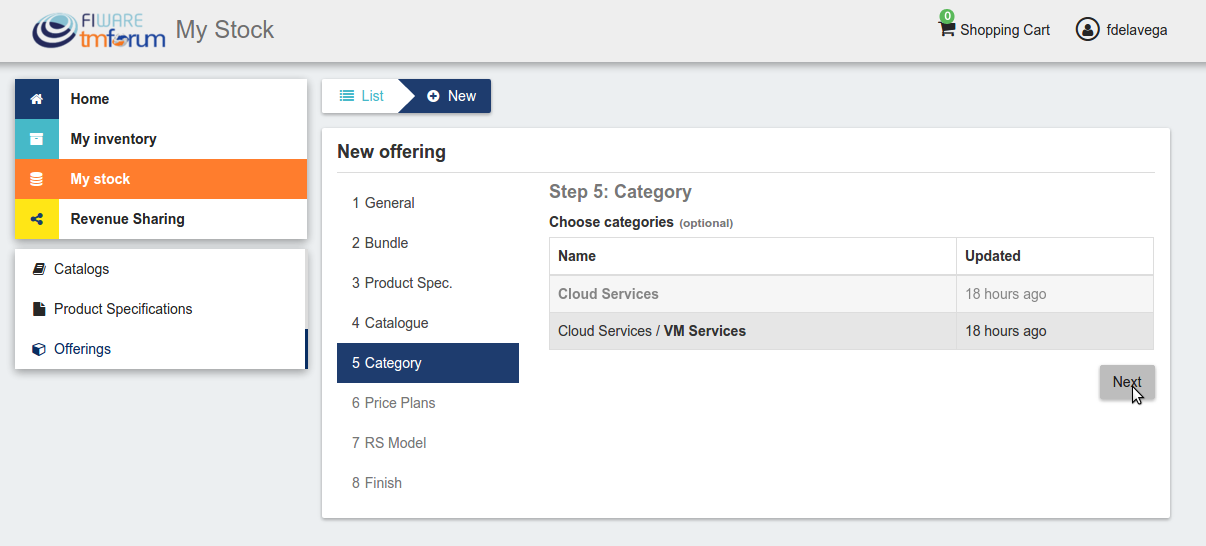
In the next step, you can optionally choose categories for you offering. Once done, click on Next
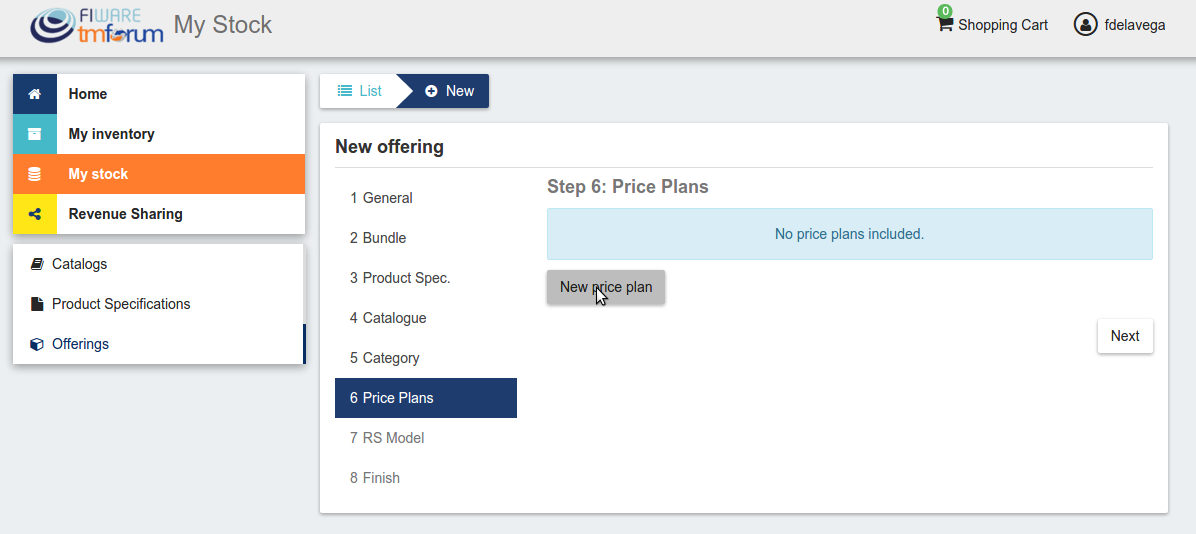
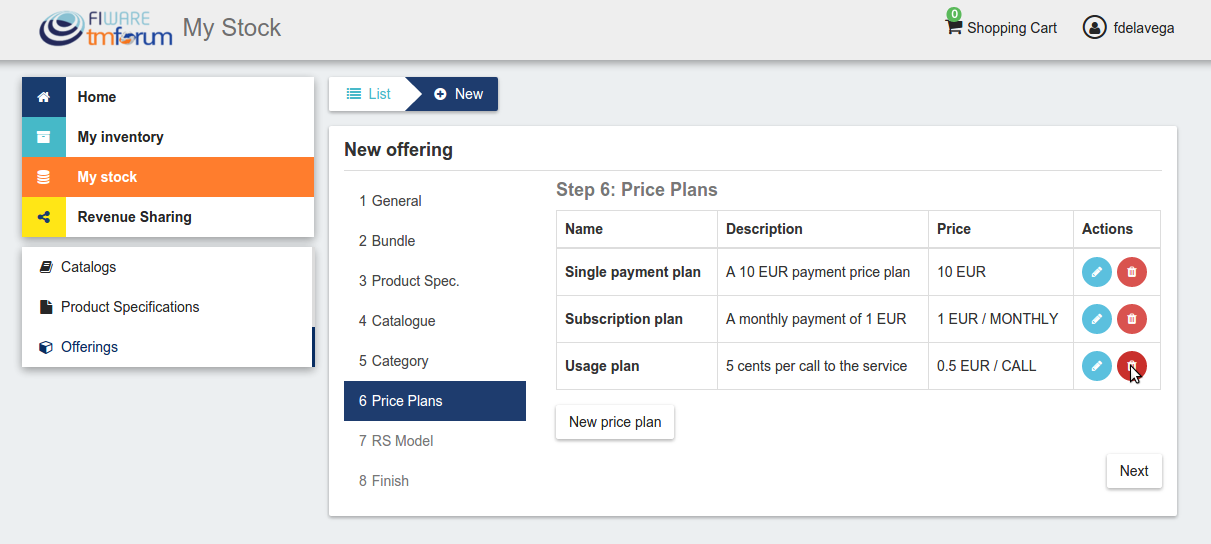
The next step is the more important for the offering. In the displayed form you can create different price plans for you offering, which will be selectable by customers when acquiring the offering. If you do not include any price plan the offering in considered free.
To include a new price plan the first step is clicking on New Price Plan
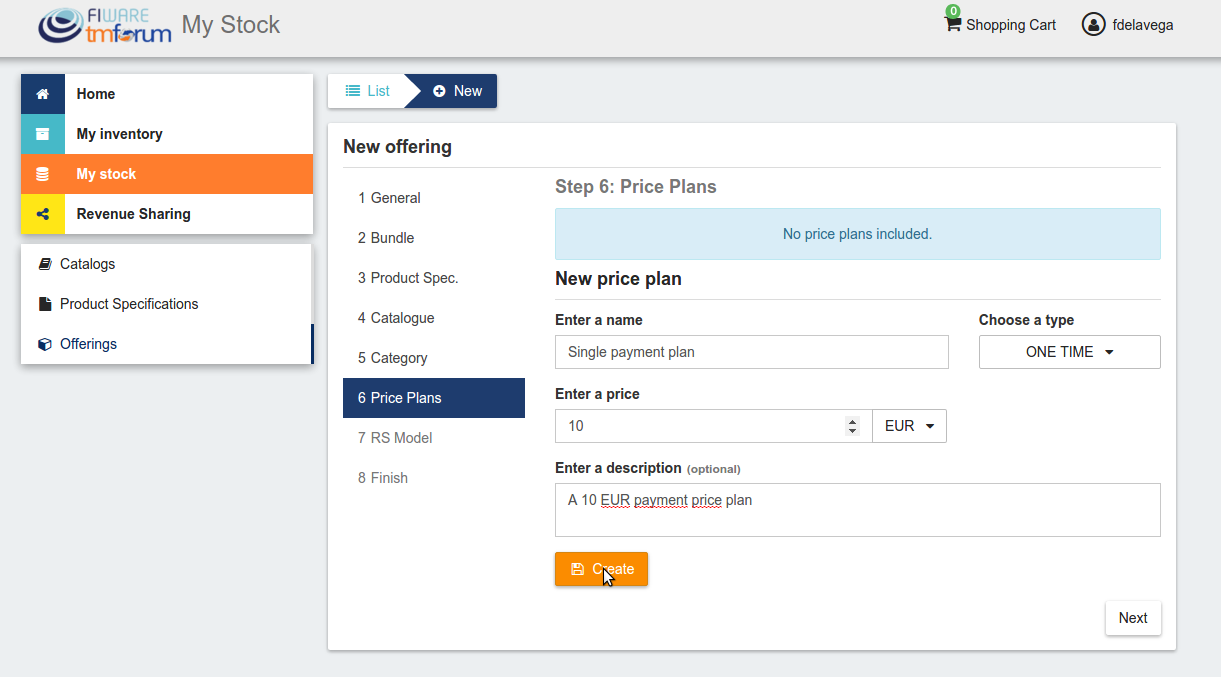
For creating the price plan, you have to provide a name, and an optional description. Then, you have to choose the type of price plan between the provided options.
The available types are: one time for payments that are made once when purchasing the offering, recurring for charges that are made periodically (e.g a monthly payment), and usage for charges that are calculated applying the pricing model to the actual usage made of the acquired service.
If you choose one time, you have to provide the price and the currency.
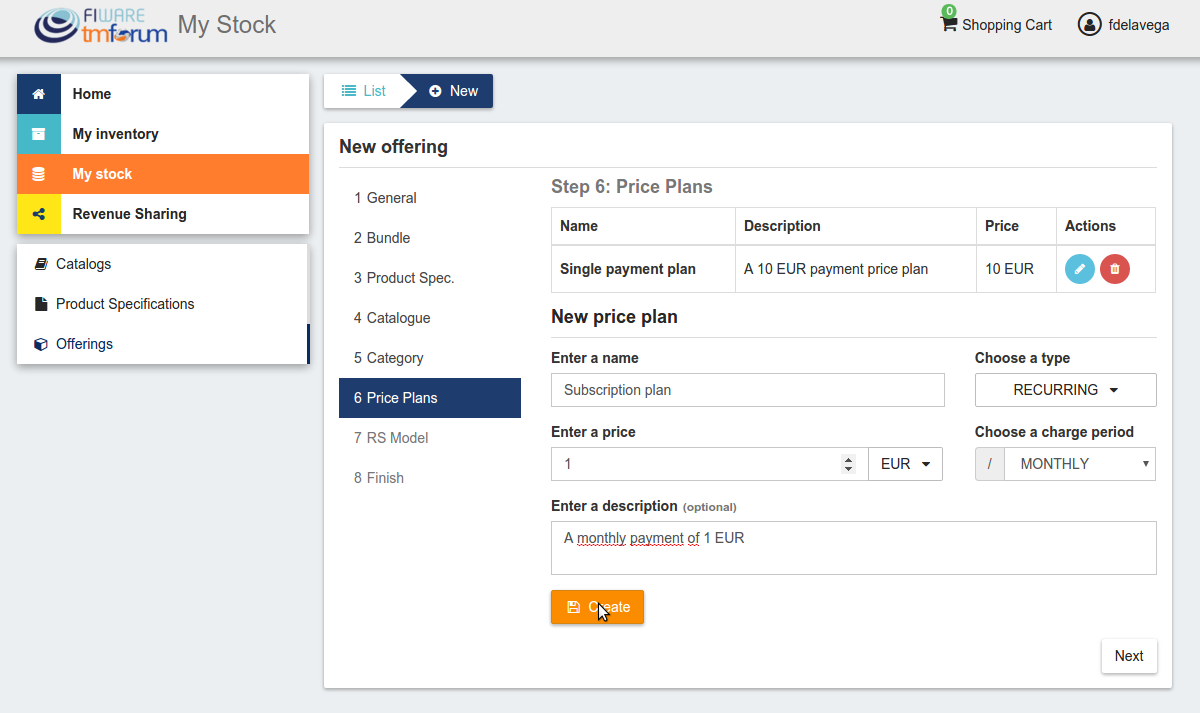
If you choose recurring, you have to provide the price, the currency, and the period between charges.
If you choose usage, you have to provide the unit to be accounted, the currency, and the price per unit
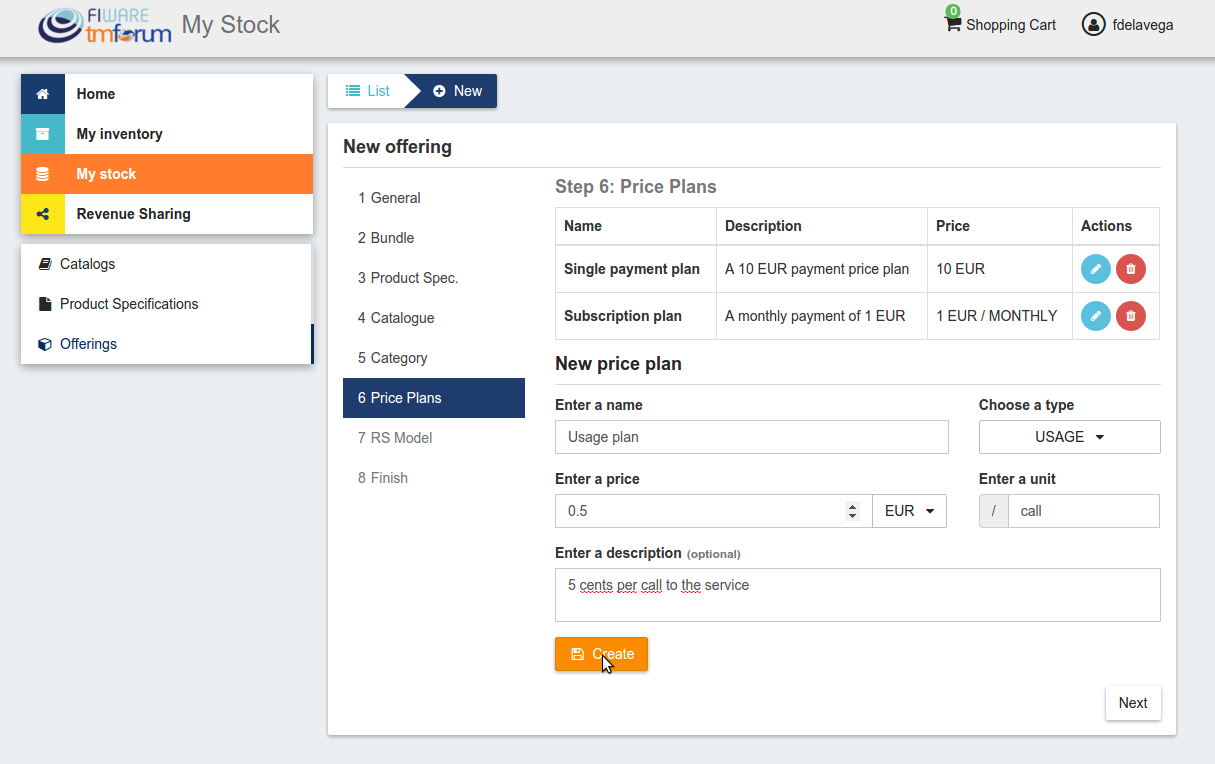
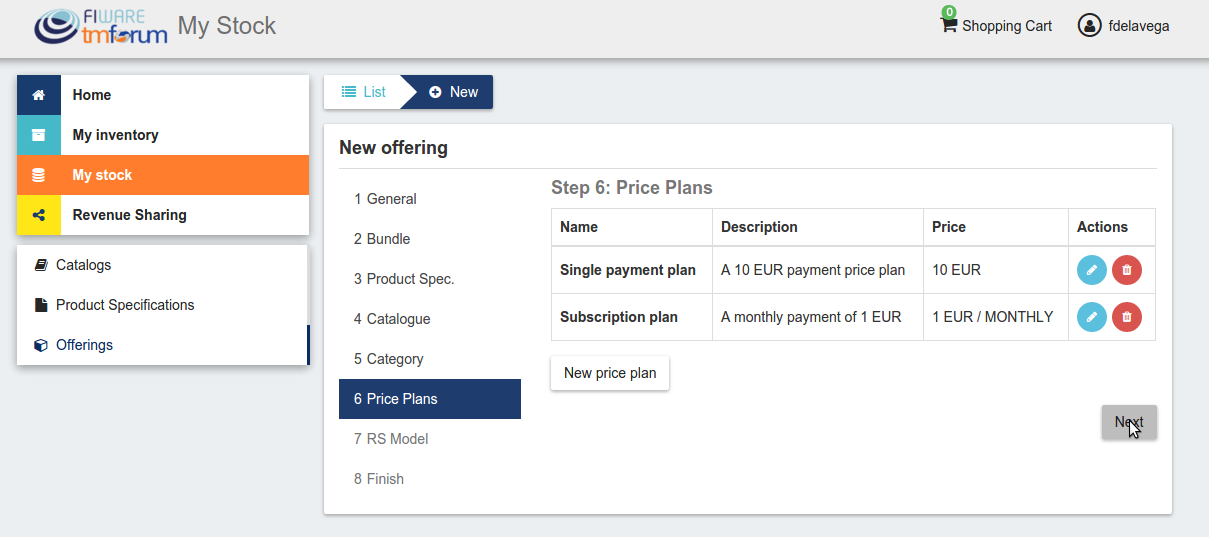
You can update or remove plans by clicking on the corresponding action button.
Once you have created you pricing model click on Next
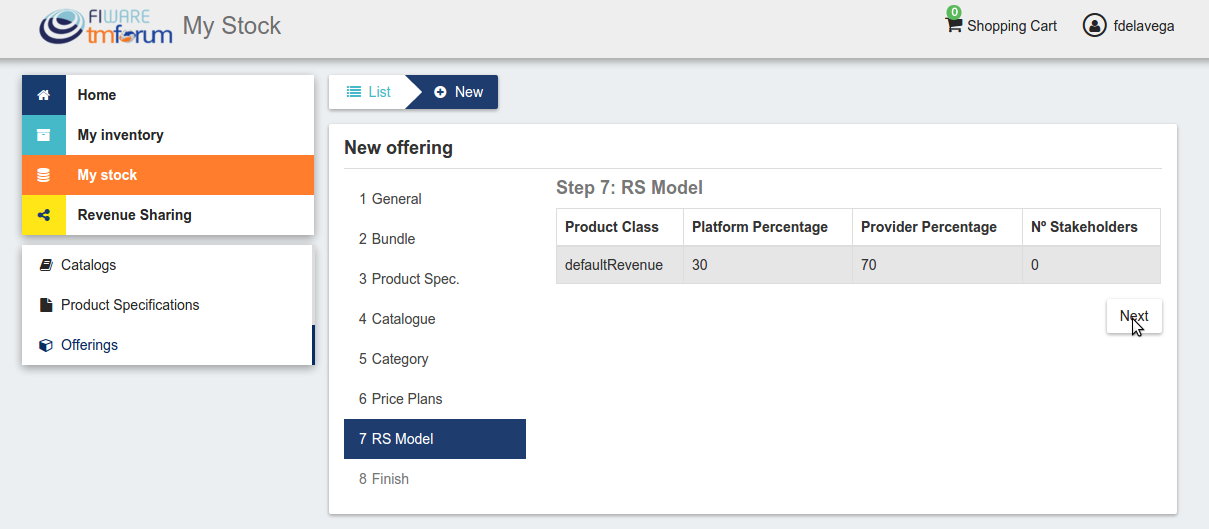
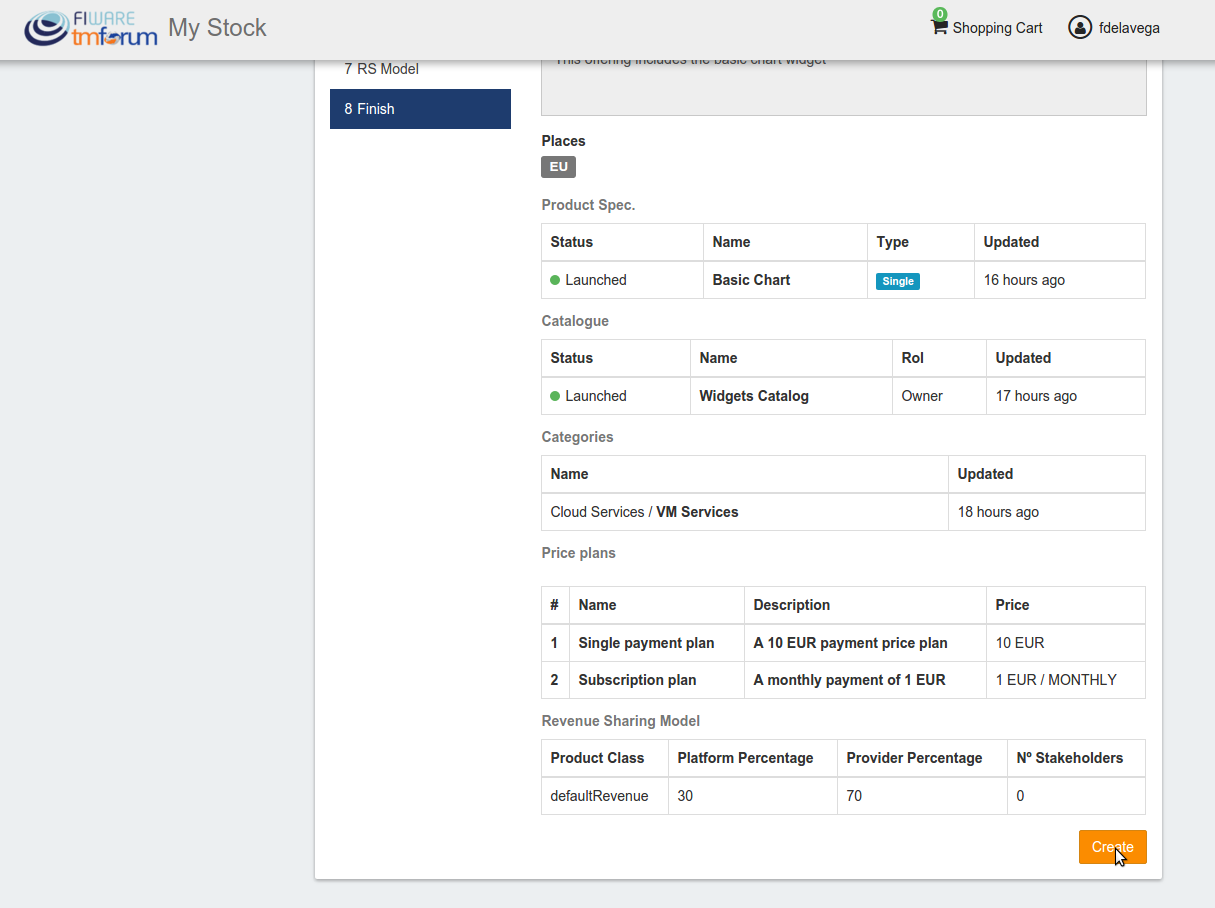
In the last step of the process, you have to choose the revenue sharing model to be applied to you offering between the available ones. Once done, click on Next and then on Create.
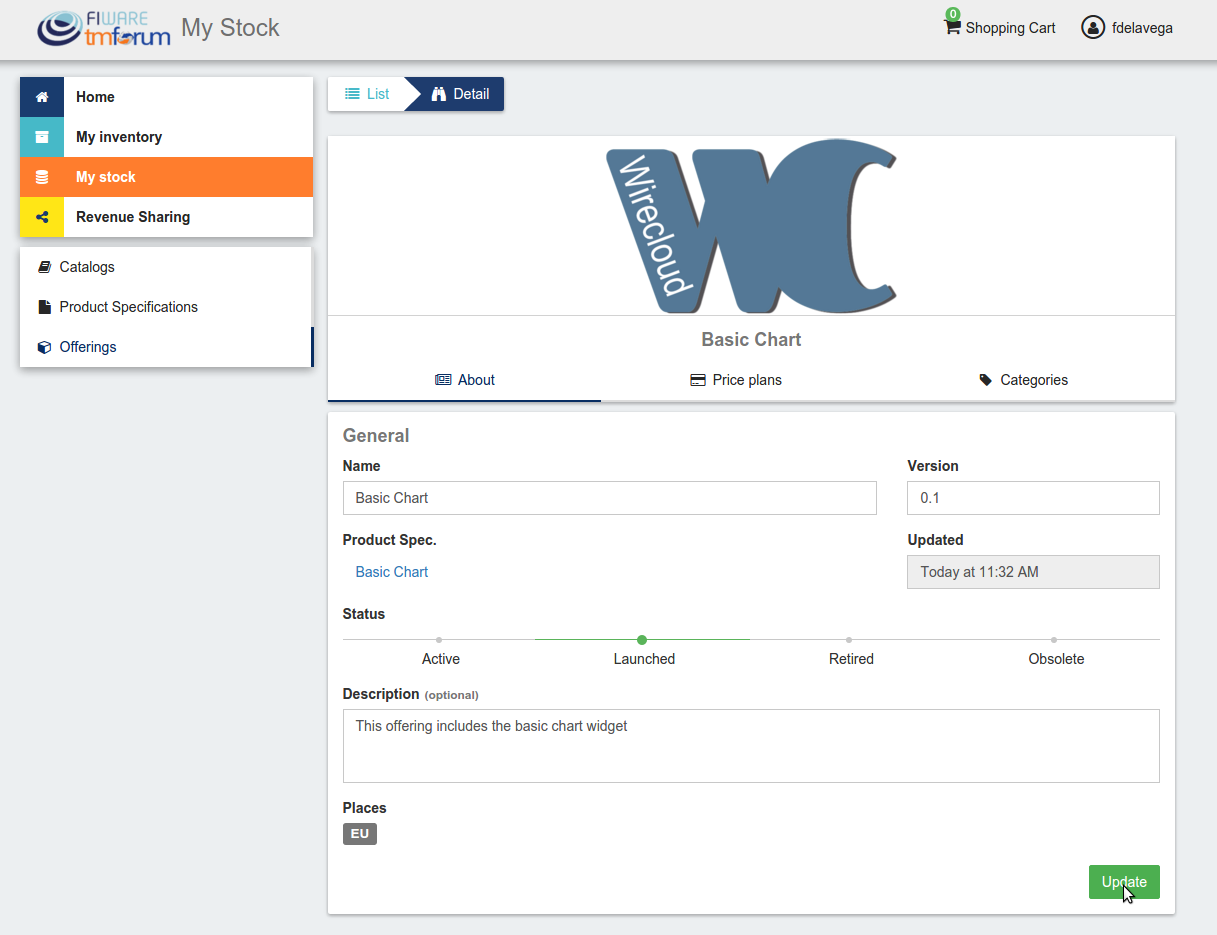
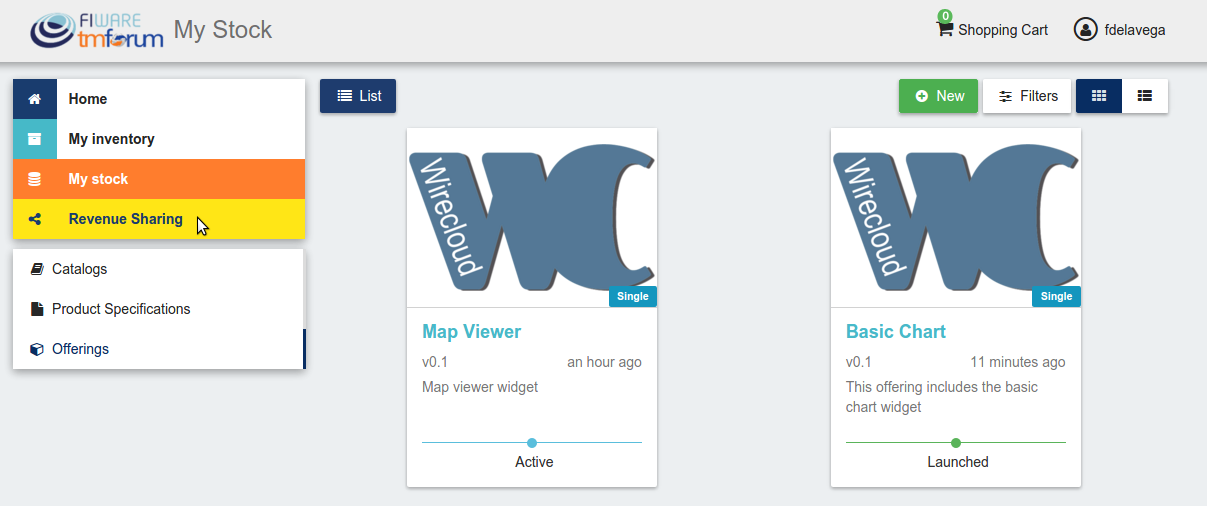
Sellers can also edit their offerings. To do that click on the offering to be updated.
In the displayed form, change the fields you want to edit and click on Update. Note that for start selling you offering you have to update its status to Launched
Manage Revenue Sharing Models
Revenue Sharing Models specify how the revenues generated by an offering or set of offerings must be distributed between the owner of the Business API Ecosystem instance, the provider of the offering, and the related stakeholders involved.
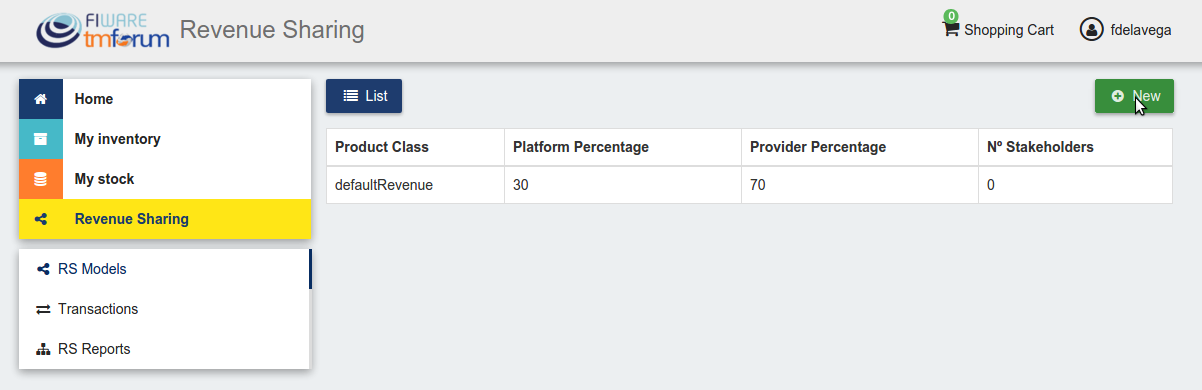
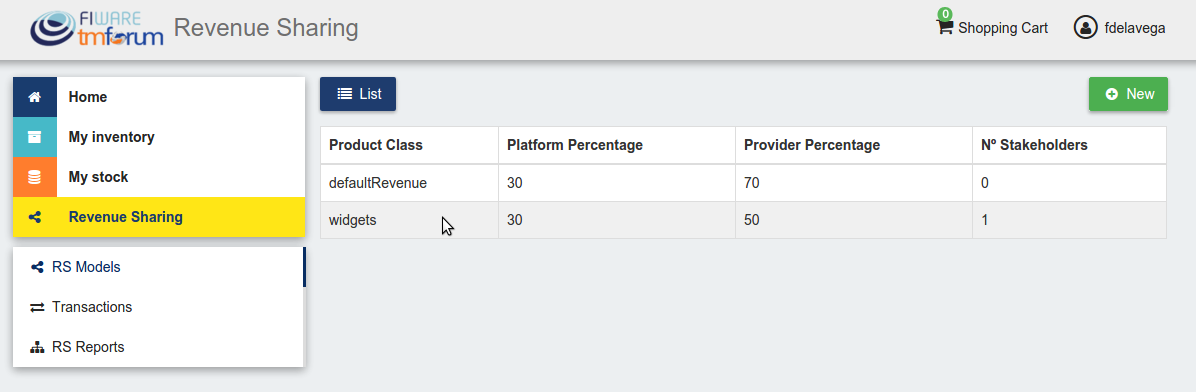
To manage RS models go to the Revenue Sharing section.
In this view, you can see the revenue sharing models you have available. By default it will appear the default RS model which establishes the revenue distribution between you and the Business API Ecosystem instance owner.
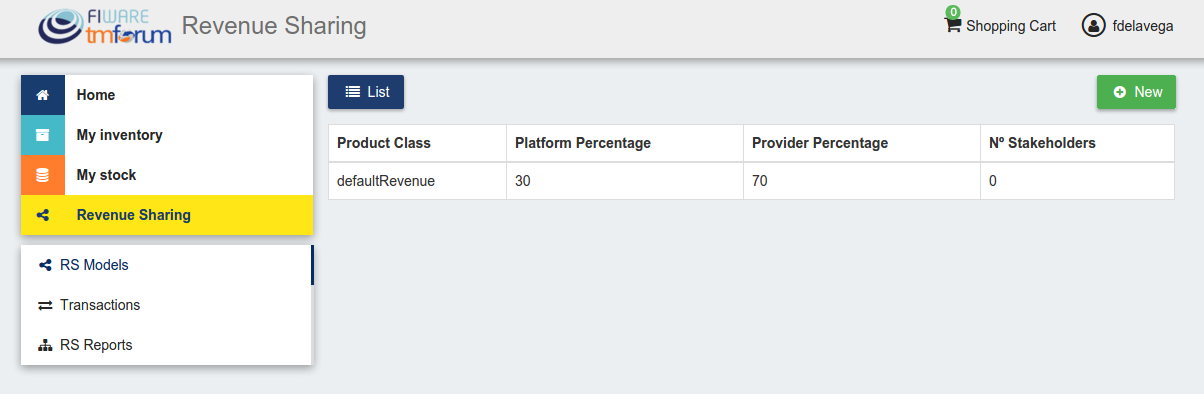
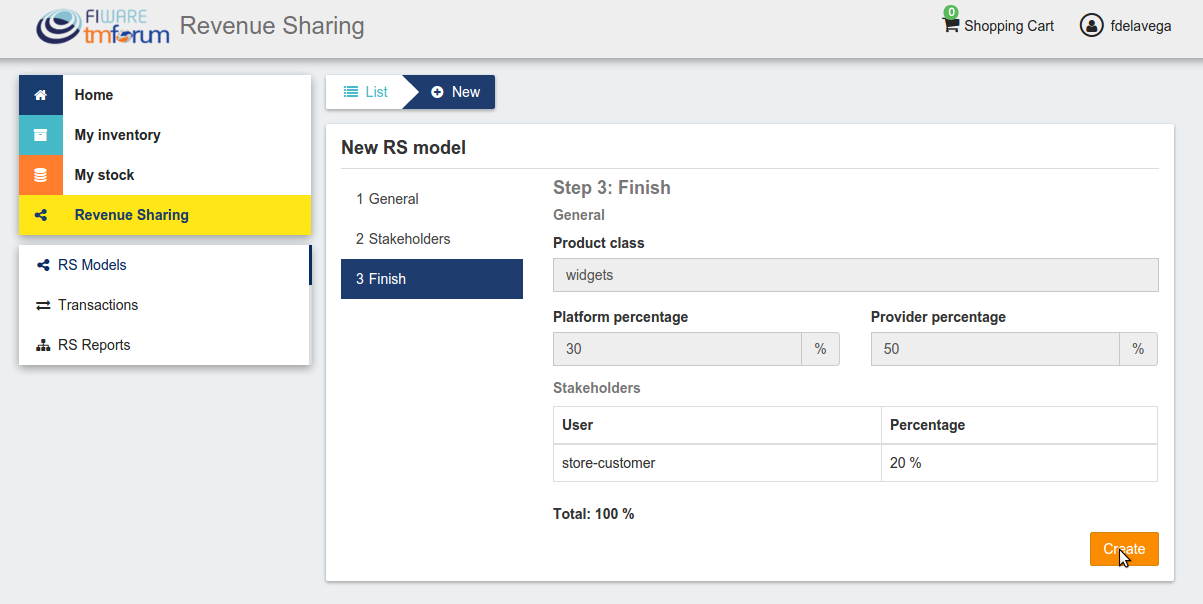
You can create a new RS model clicking on New
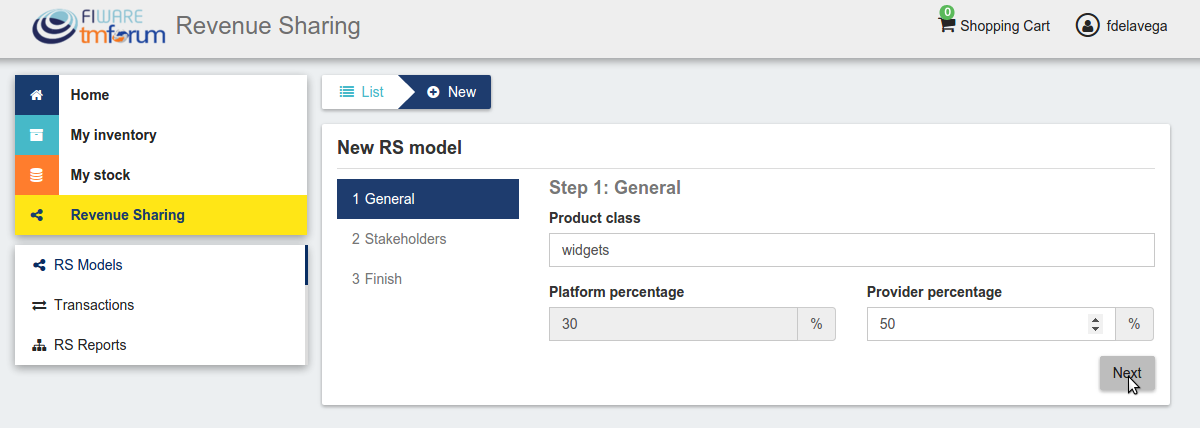
In the first step of the process you have to provide a product class, which identifies the RS model, and the percentage you want to receive. The platform percentage is fixed and cannot be modified. Once provided click on Next
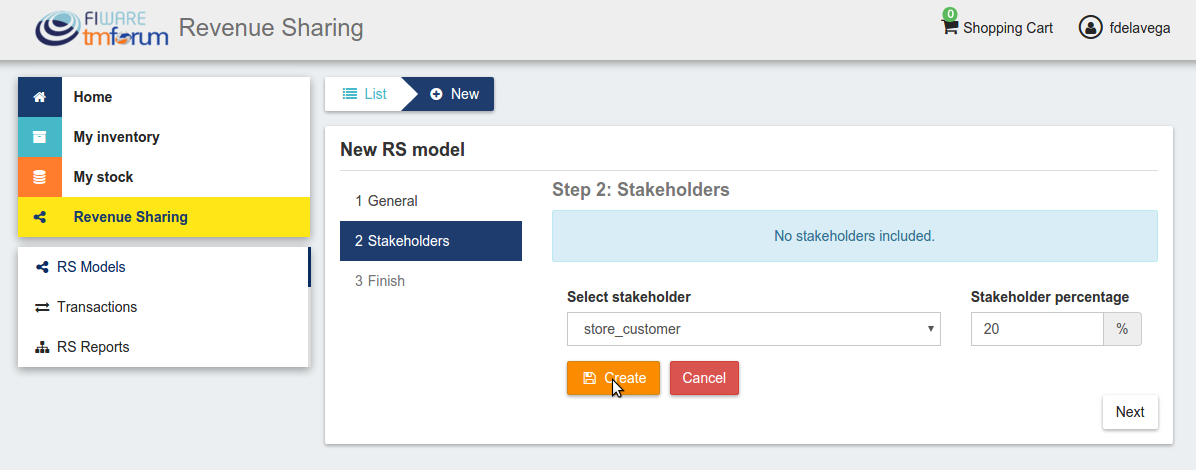
In the next step, you can optionally add more stakeholders to the RS model. To do that click on New Stakeholder

Then, select the Stakeholder between the available users, and provide its percentage. Finally, save it clicking on Create
Note
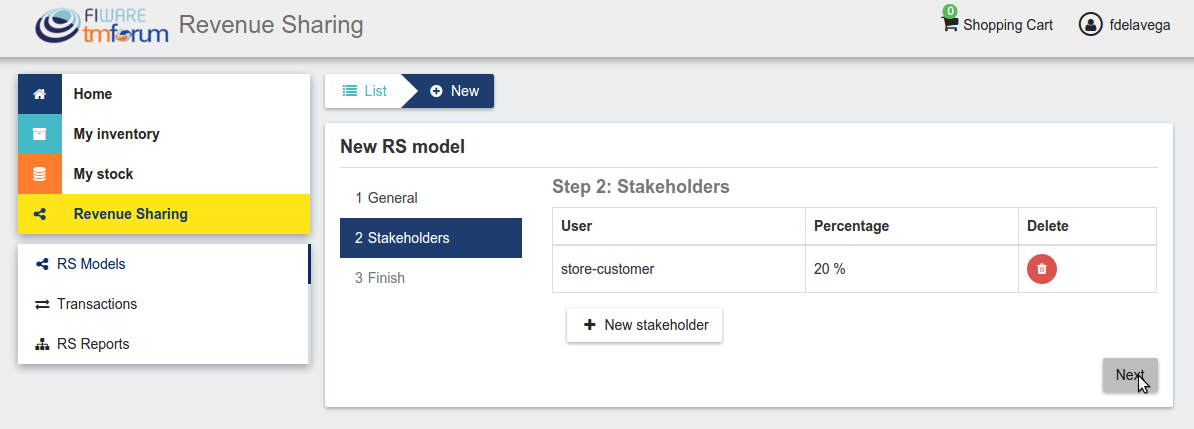
The total percentage (provider + platform + stakeholders) must be equal to 100
Finally, click on Next and then on Create
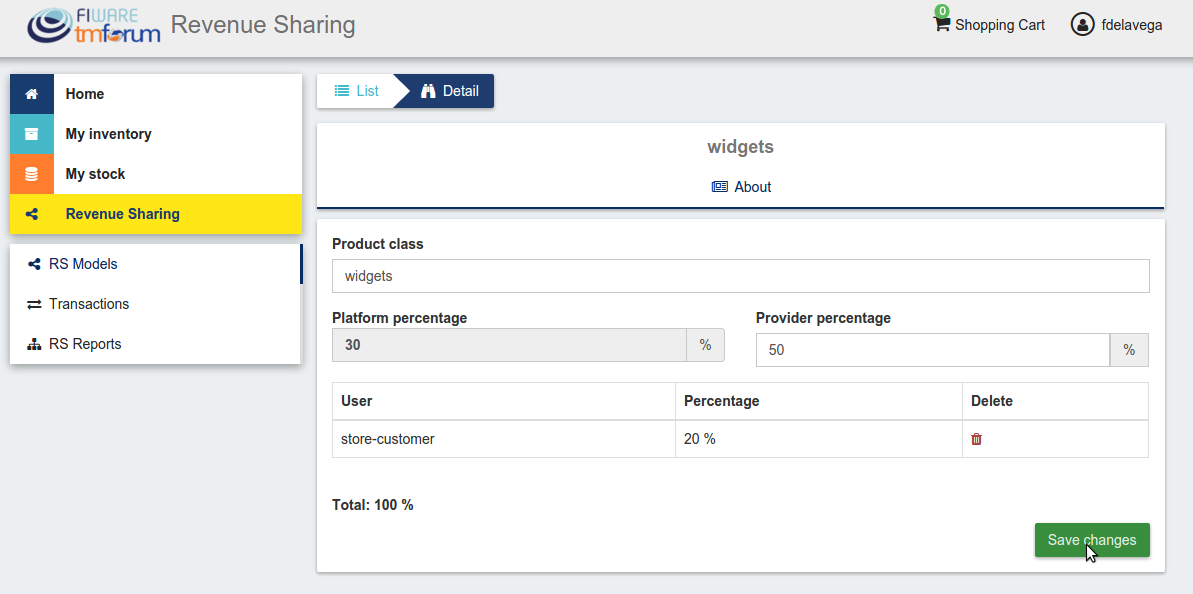
Sellers can also update their RS model. To do that click on the RS model to be updated.
Then, update the required fields (including the stakeholders if you want), and click on Save Changes
Manage Transactions
Sellers can manage the transactions related to their products in order to know how much money their products are generating, and to launch the revenue sharing process. To manage your seller transactions go to Revenue Sharing and click on Transactions
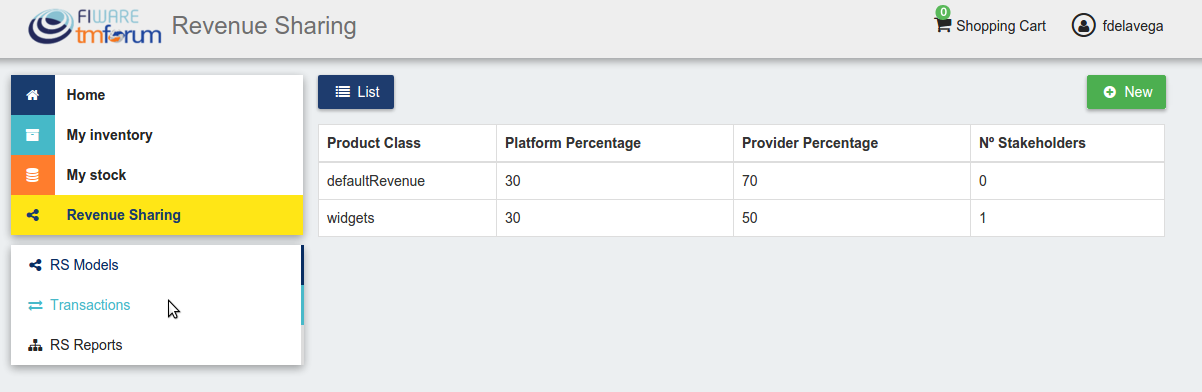
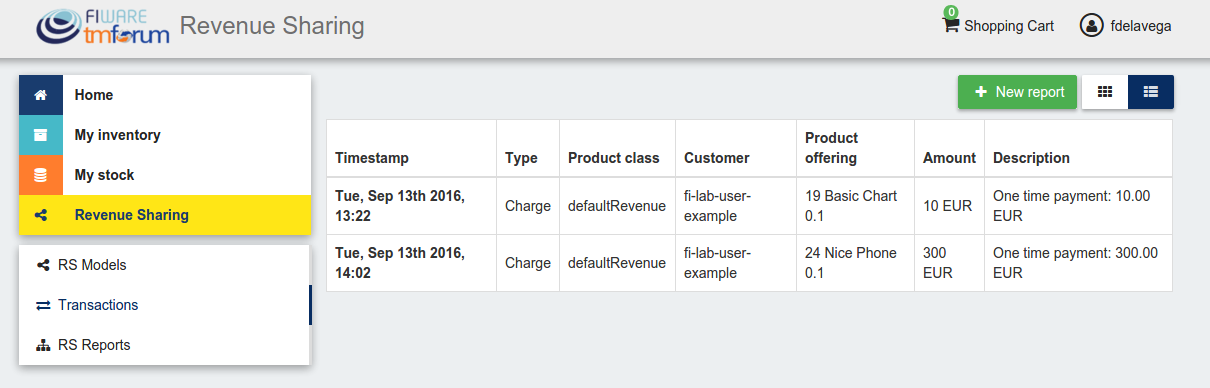
In the displayed view, you can see the transactions pending to be paid to you and your stakeholders. It is also possible to display the transactions in tabular way
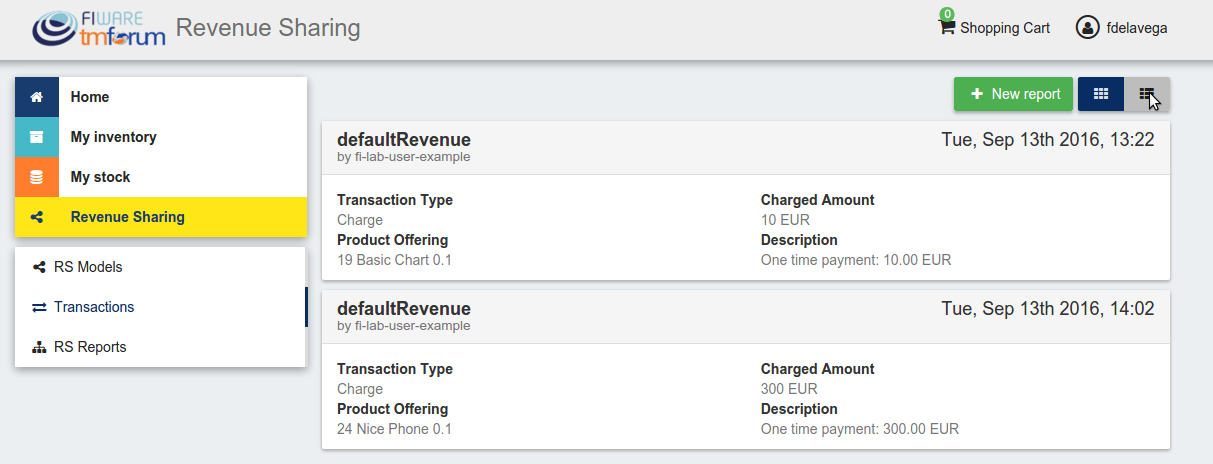
These transactions are aggregated and paid by the Business API Ecosystem periodically once a month. Nevertheless, if you need to be paid, you can force the revenue sharing calculus and payment of your pending transactions by manually generating a revenue sharing report.
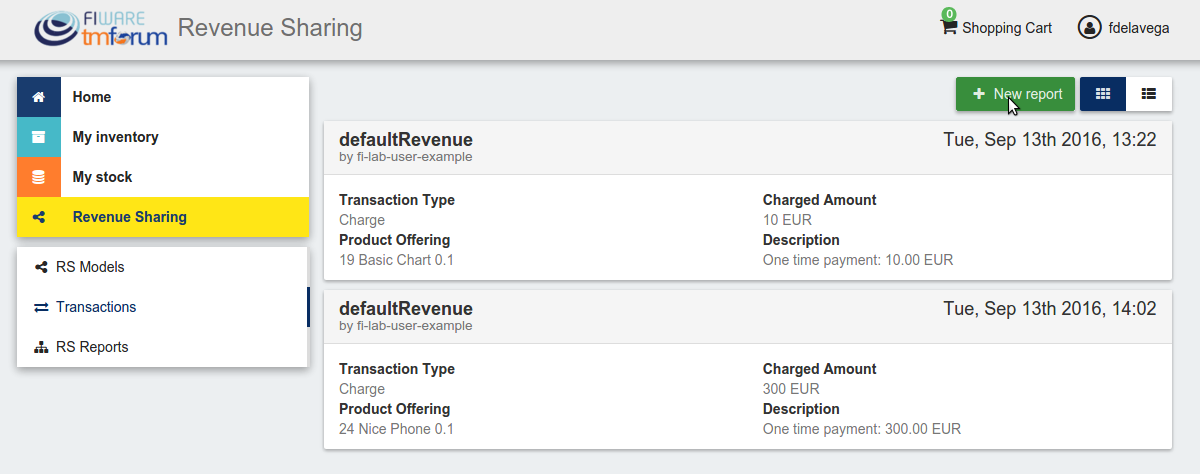
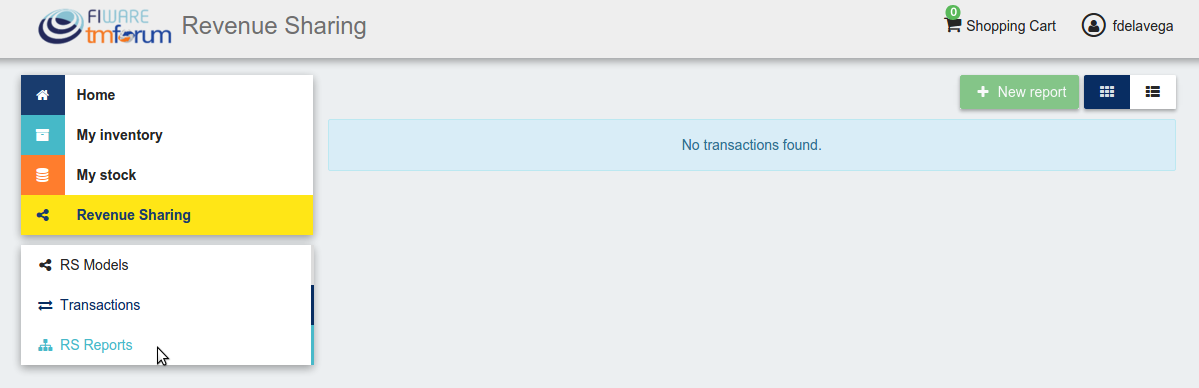
To create a new report click on New Report
In the displayed modal, choose the product classes to be calculated and click on Create
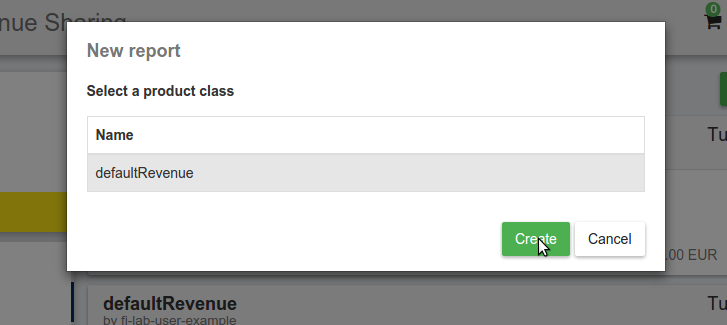
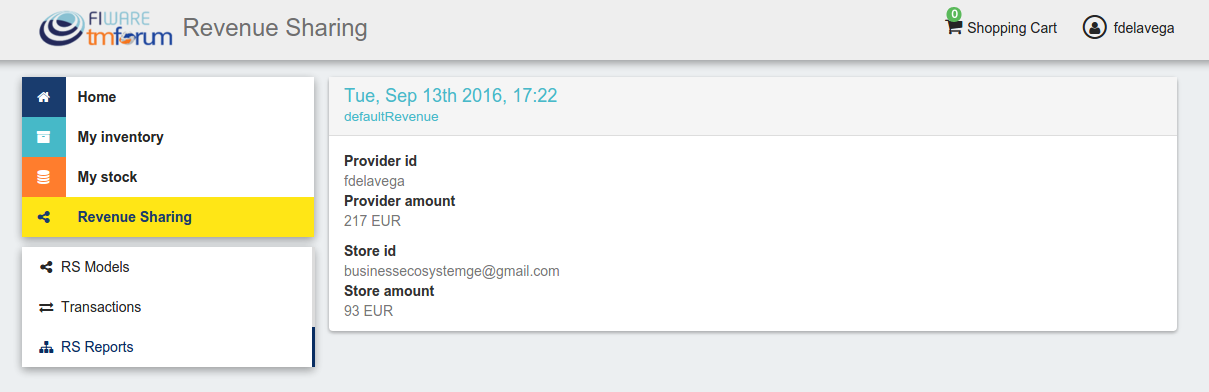
This process will aggregate all the transactions with the selected product classes, calculate the amount to be paid to each stakeholder using the related revenue sharing model, generate a revenue sharing report, and pay the seller and the stakeholders using their PayPal account.
You can see the generated reports clicking on RS Reports
Note
Sellers would need to have a PayPal account associated to the email of their FIWARE IdM account in order to be paid for their products
Manage Received Orders
Sellers can manage the orders they have received in order to see the chosen characteristics, read customer notes, or process the order in case it has been acquired a physical product.
To view your received orders go to My inventory section, click on Product orders, and open the Received section.

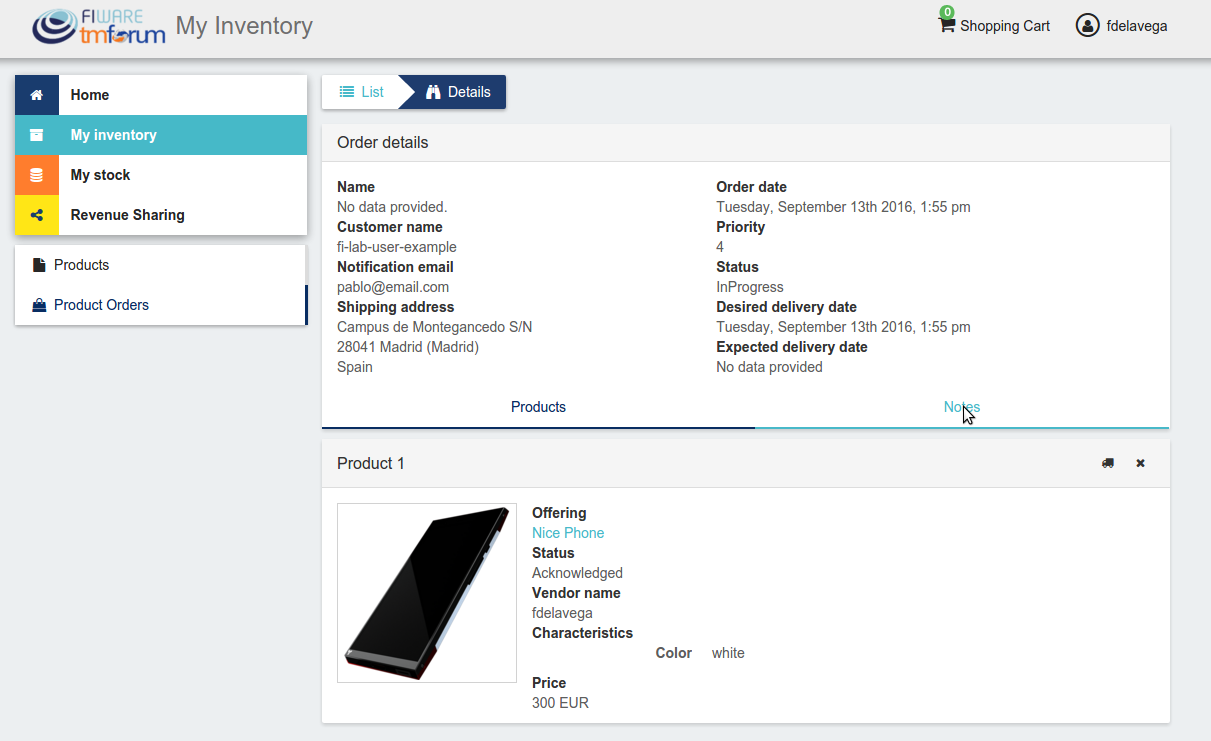
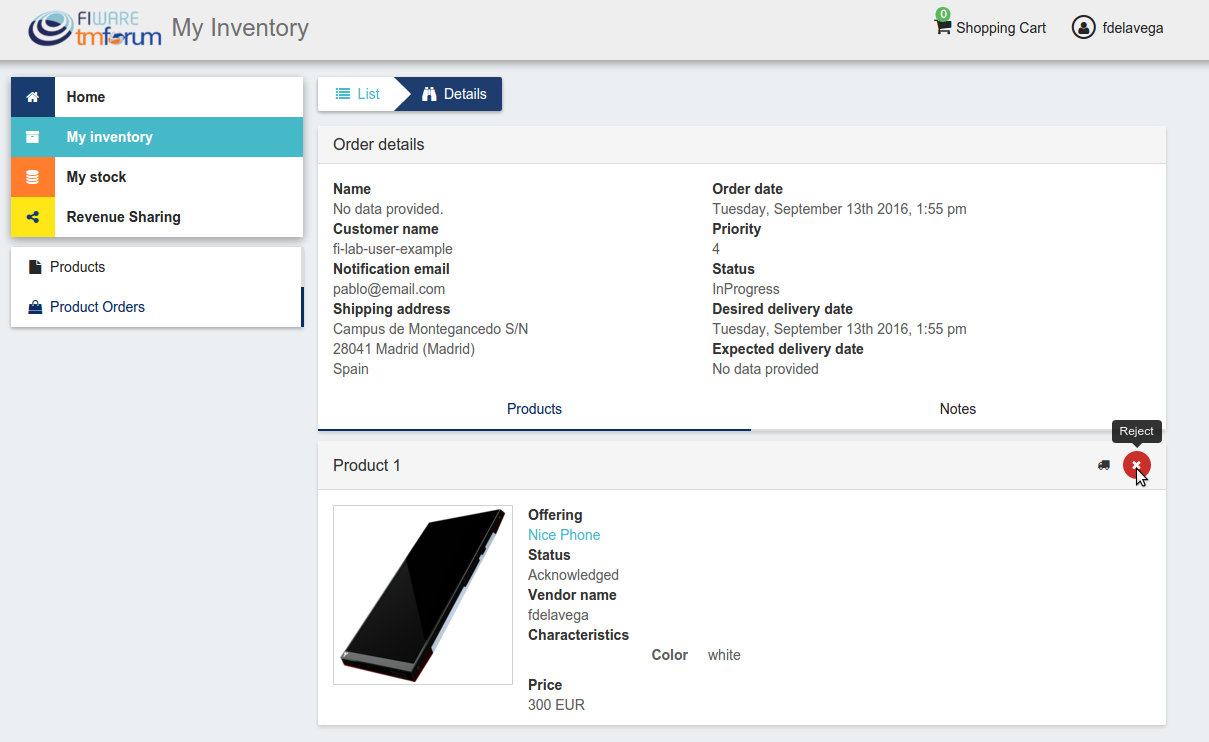
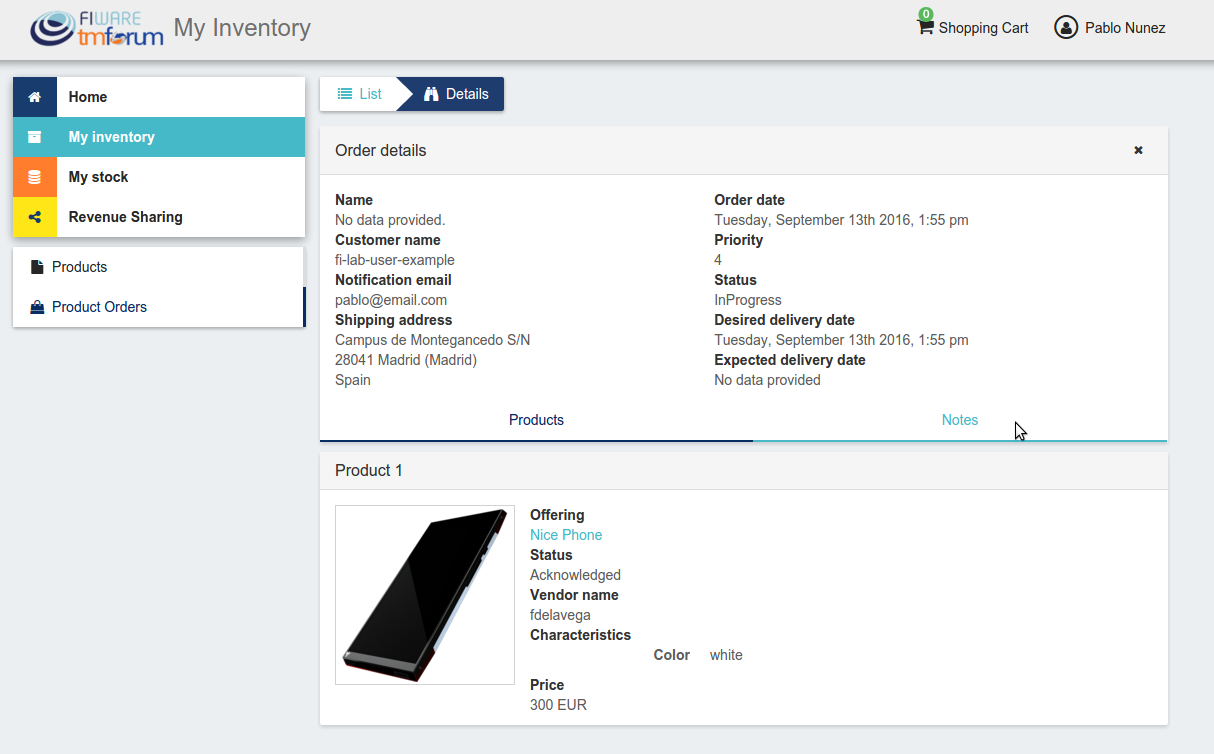
You can view the details of a received order clicking on the order date
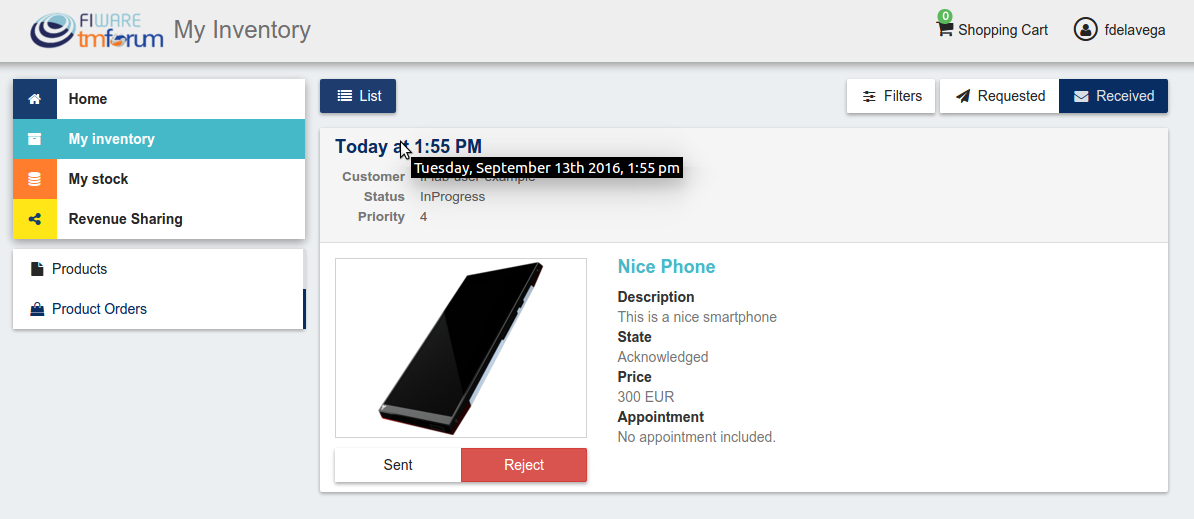
In the displayed view you can review the details of the order and the details of your products acquired by the customer, including the chosen characteristics.
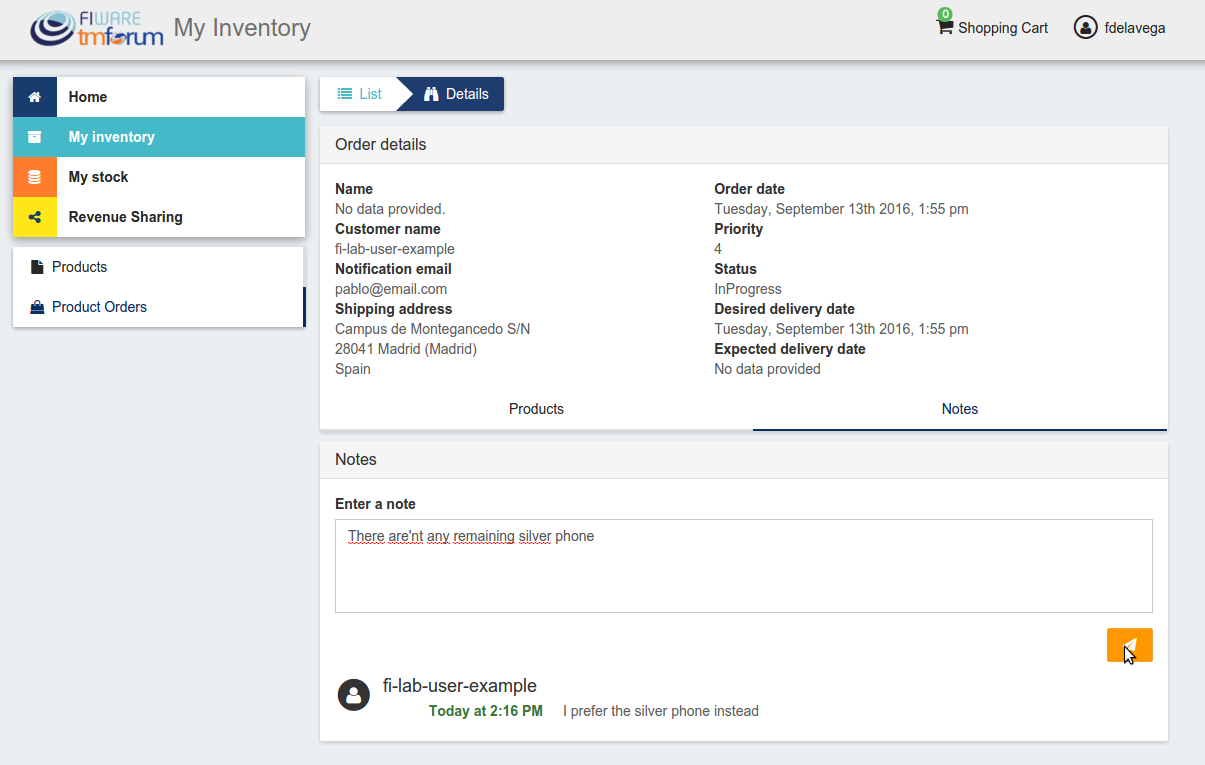
Additionally, you can view the customer notes clicking on the Notes tab
You can also give a reply to customer notes including it in the text area and clicking on the send button
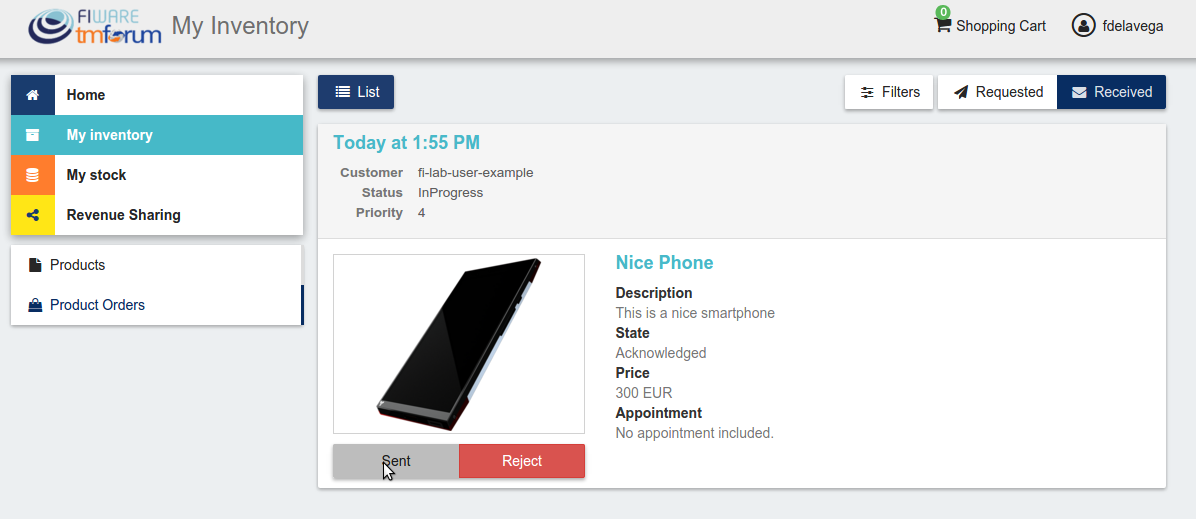
If the acquired product is not digital, the order needs to be processed manually by the seller, in the sense that the seller will have to send the acquired product to the customer. To deal with this situation, the order details view allows sellers to manually change the status of the order.
To reject a received order you have to click in the Reject button located in the search or in the details view of the order.
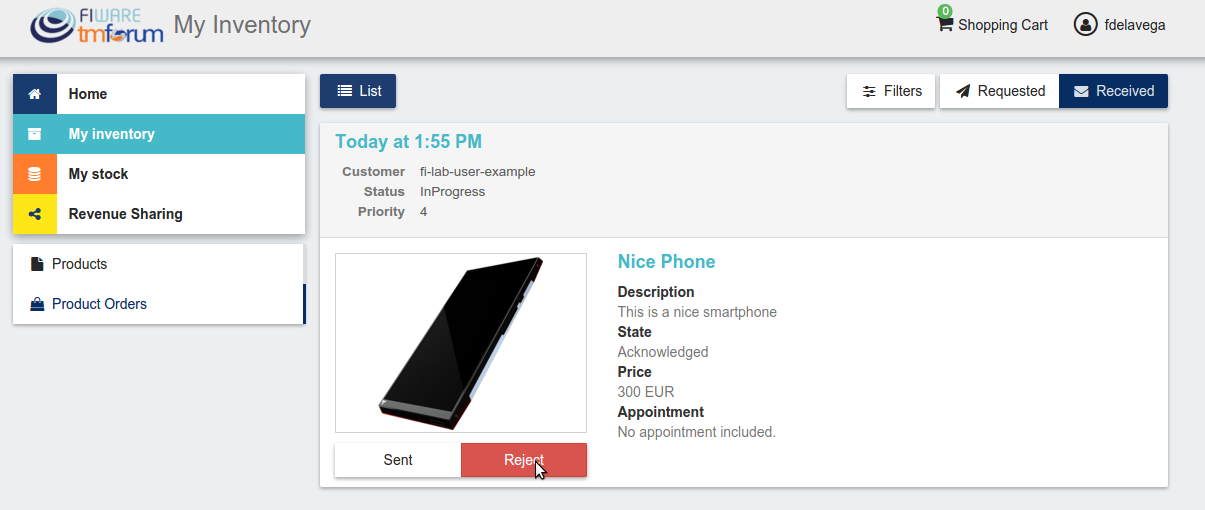
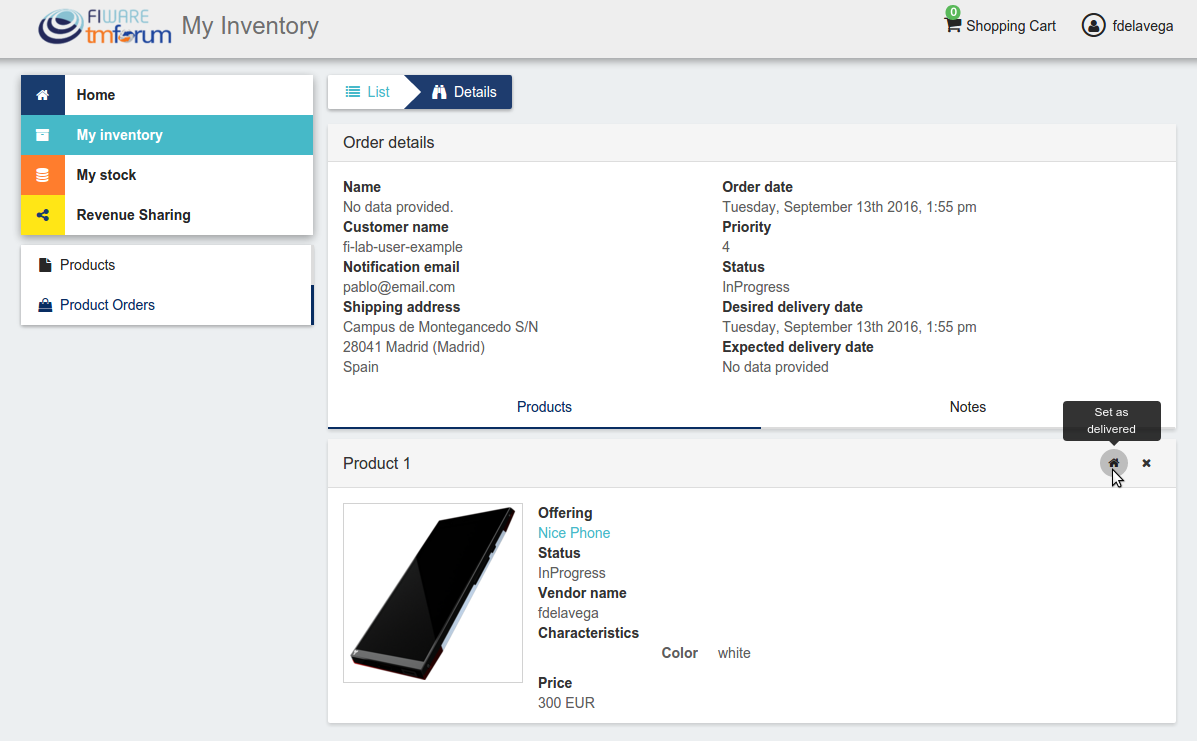
In case you accept the order and send the product to the customer, you have to put it as inProgress clicking on the Sent button

Finally, when the product arrives at its destination, you have to put it as Completed clicking on the Delivered button

Customer
All of the users of the system have by default the Customer role. Customers are able to create orders for acquiring offerings.
List Available Offerings
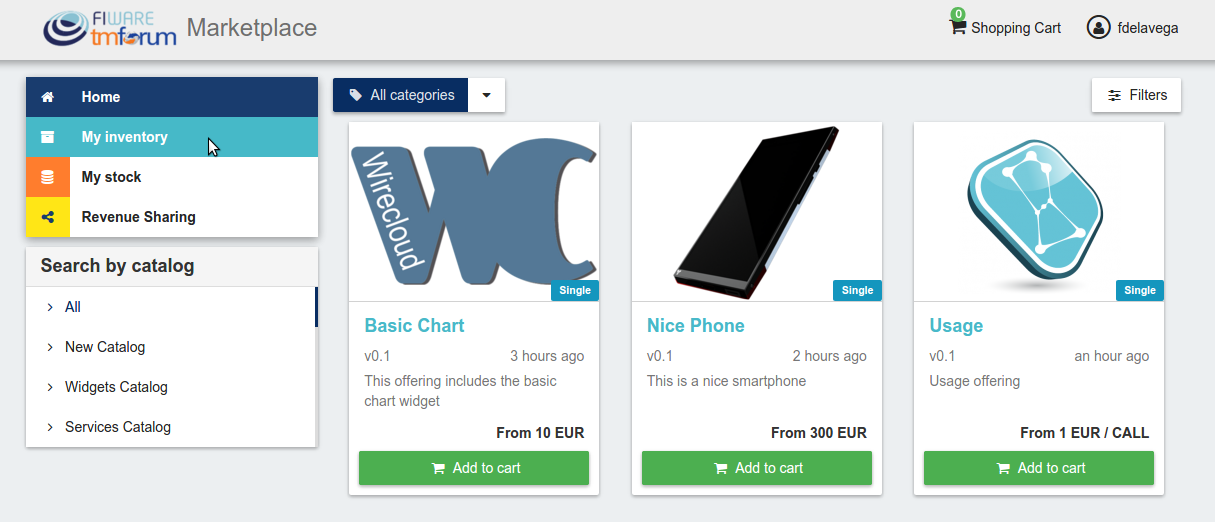
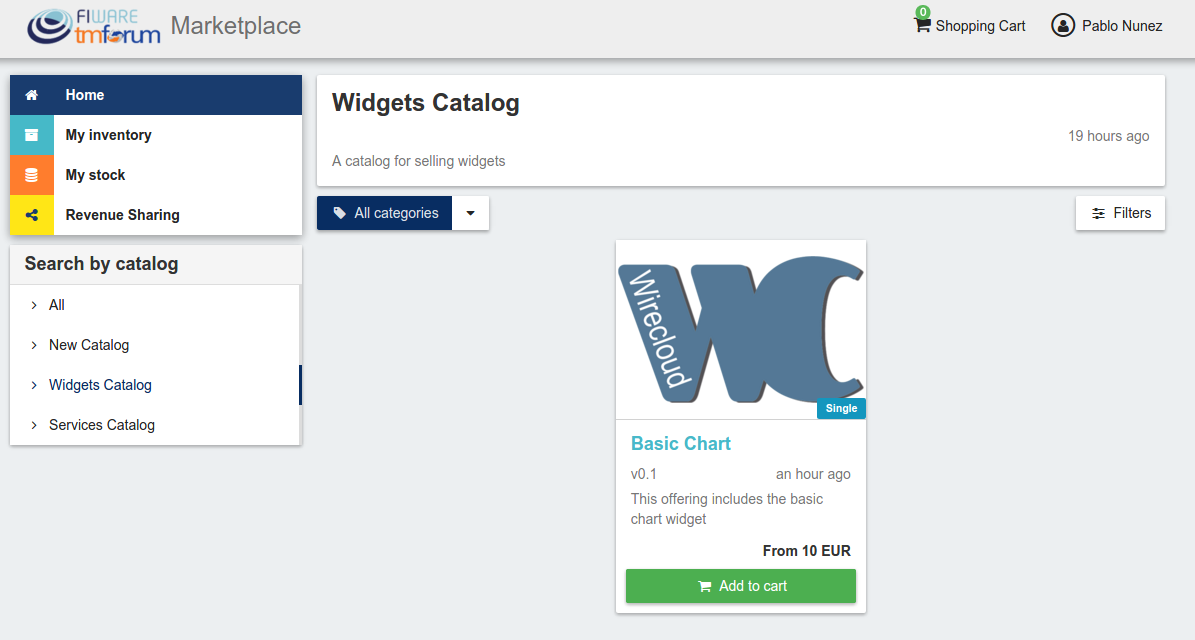
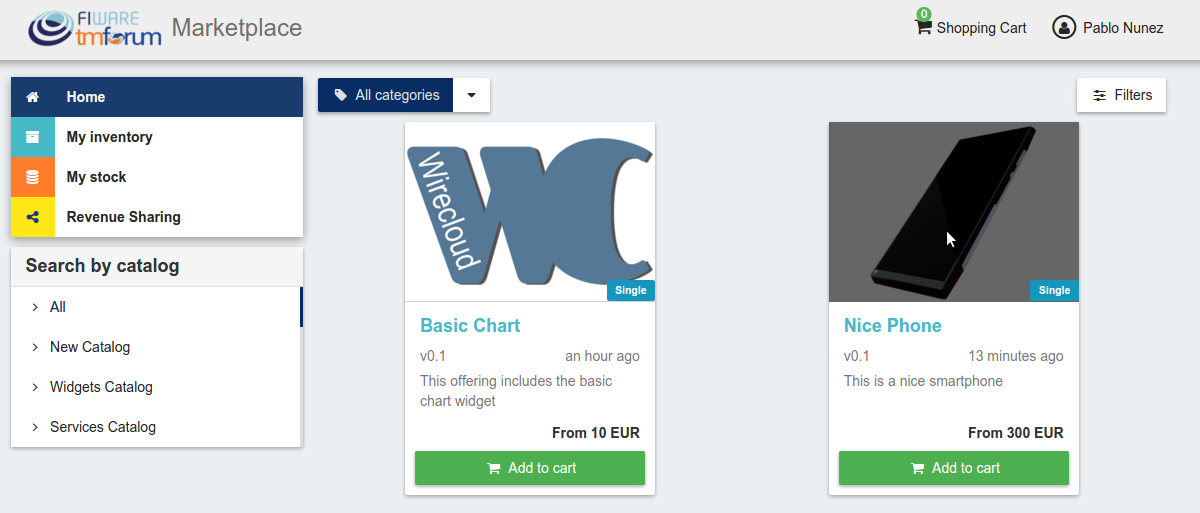
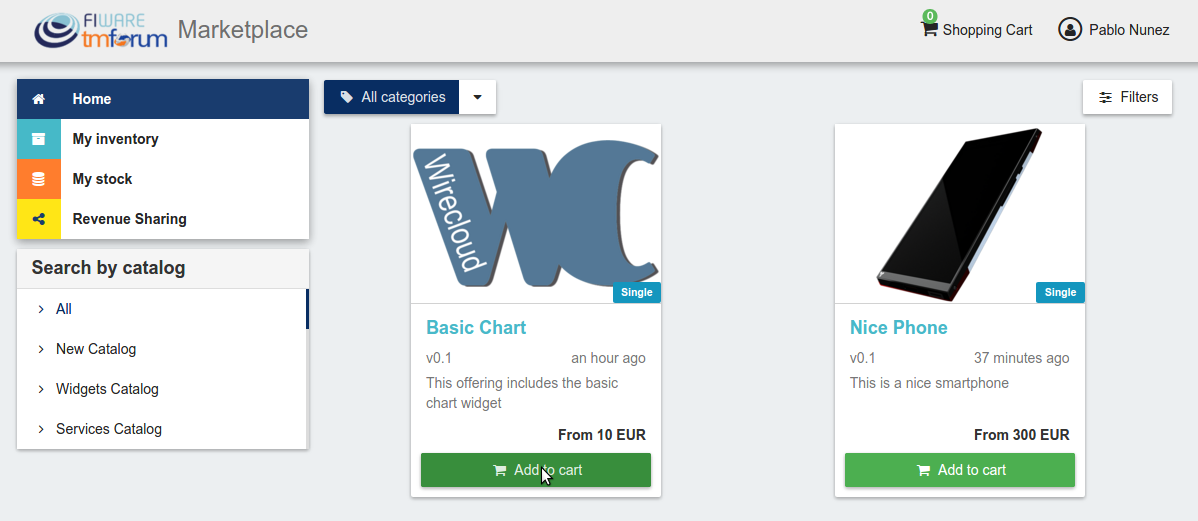
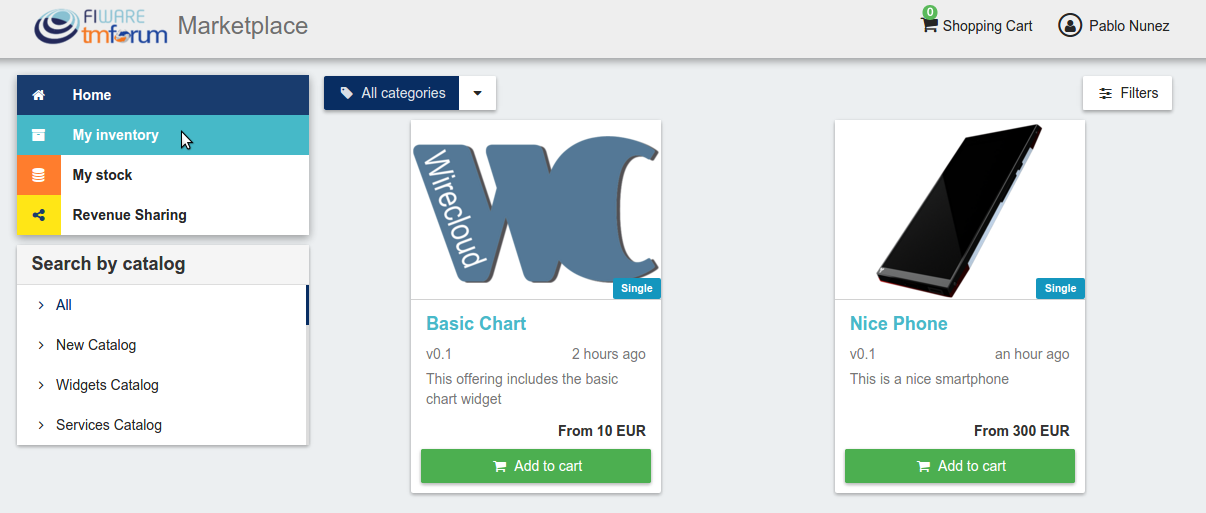
All the available (Launched) offerings appear in the Home page of the Business API Ecosystem, so they can be seen by customers.
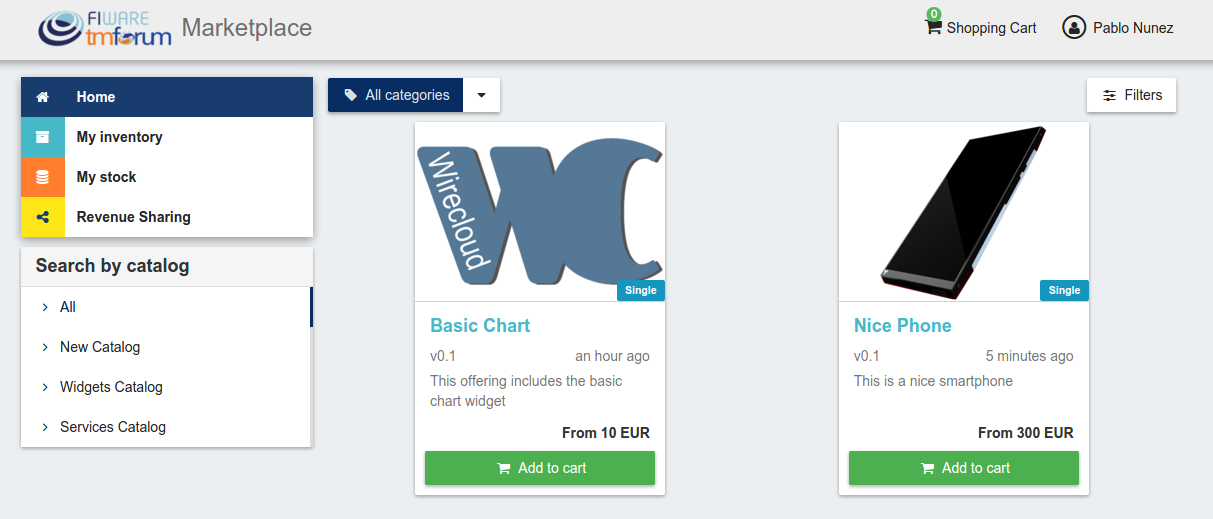
Additionally, customers can select an specific catalog of offerings by clicking on it.

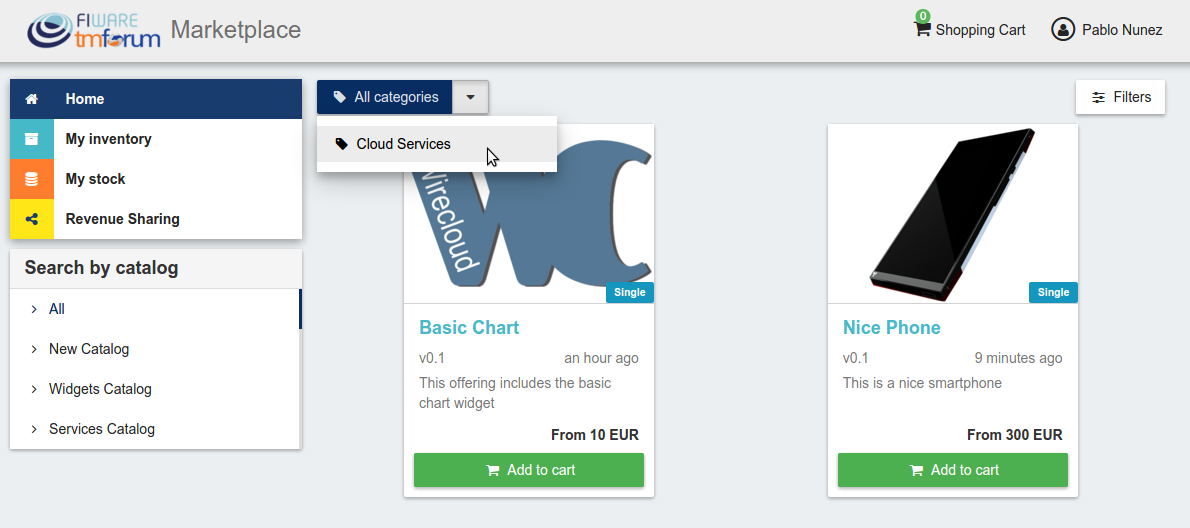
Moreover, customers can filter the shown offerings by category using the categories dropdown and choosing the wanted one.
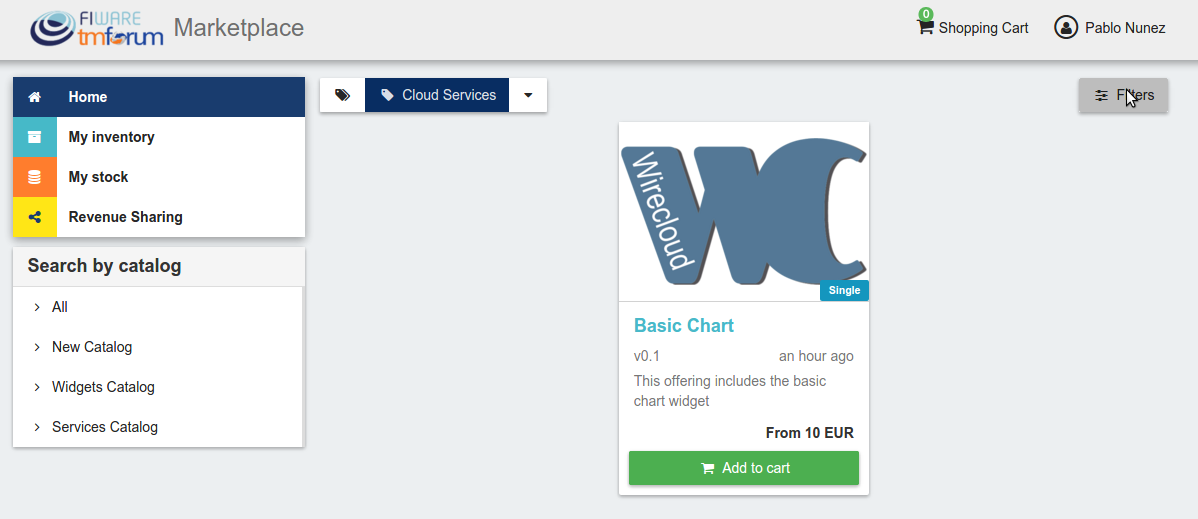
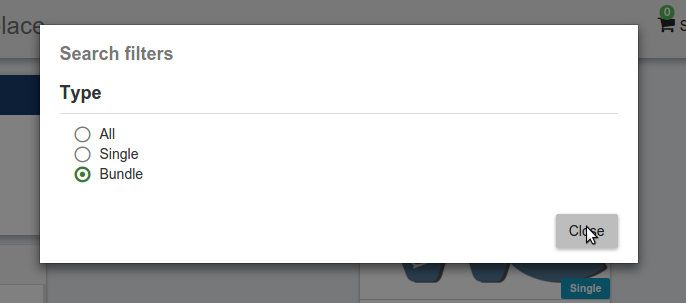
Finally, customers can also filter bundle or single offerings using the Filters modal.
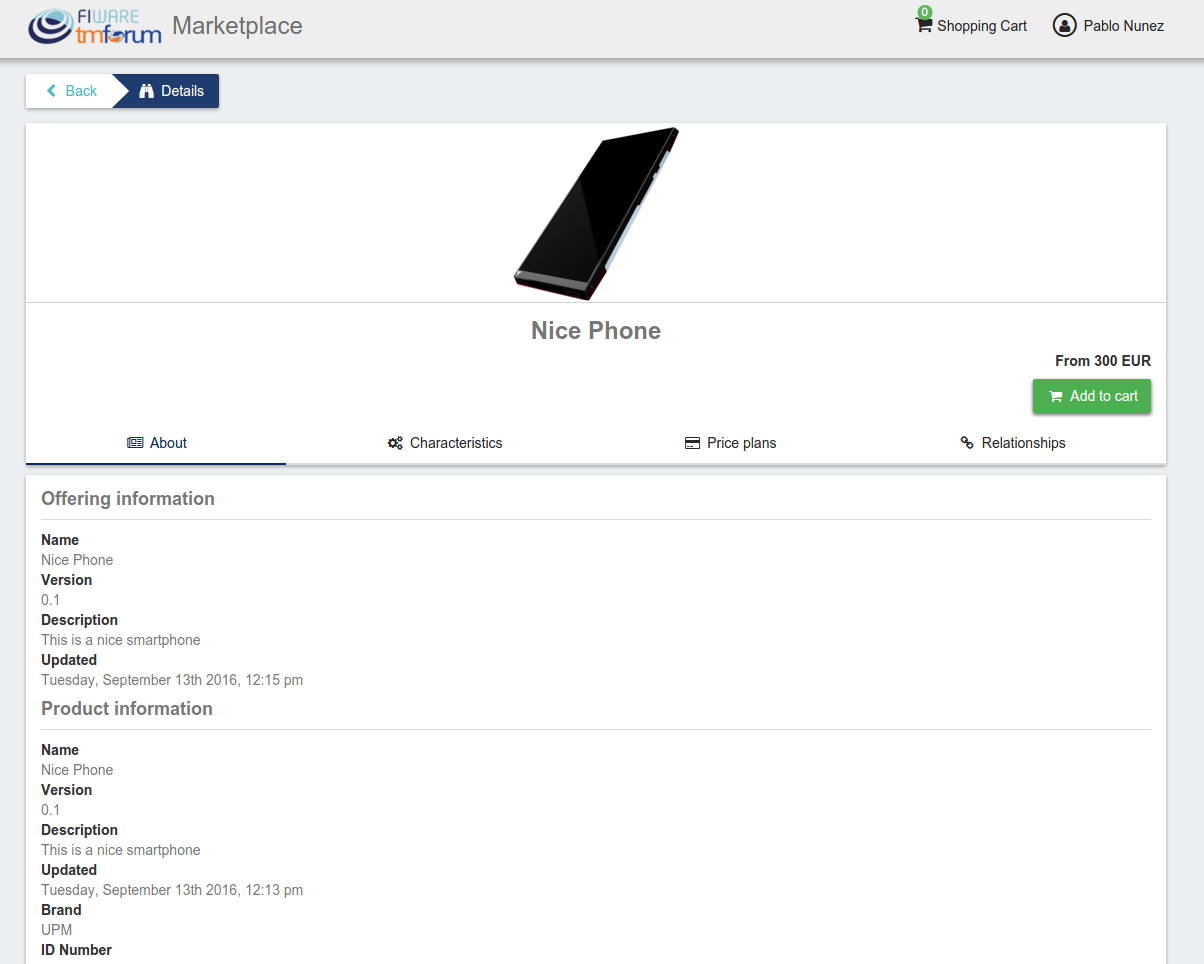
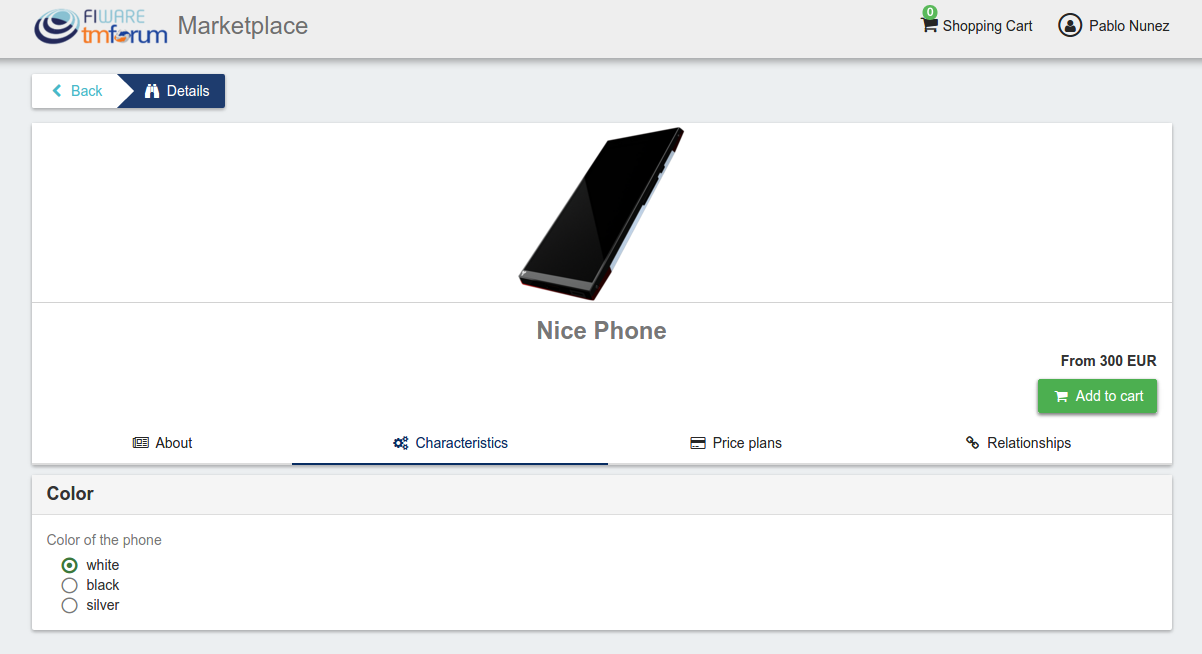
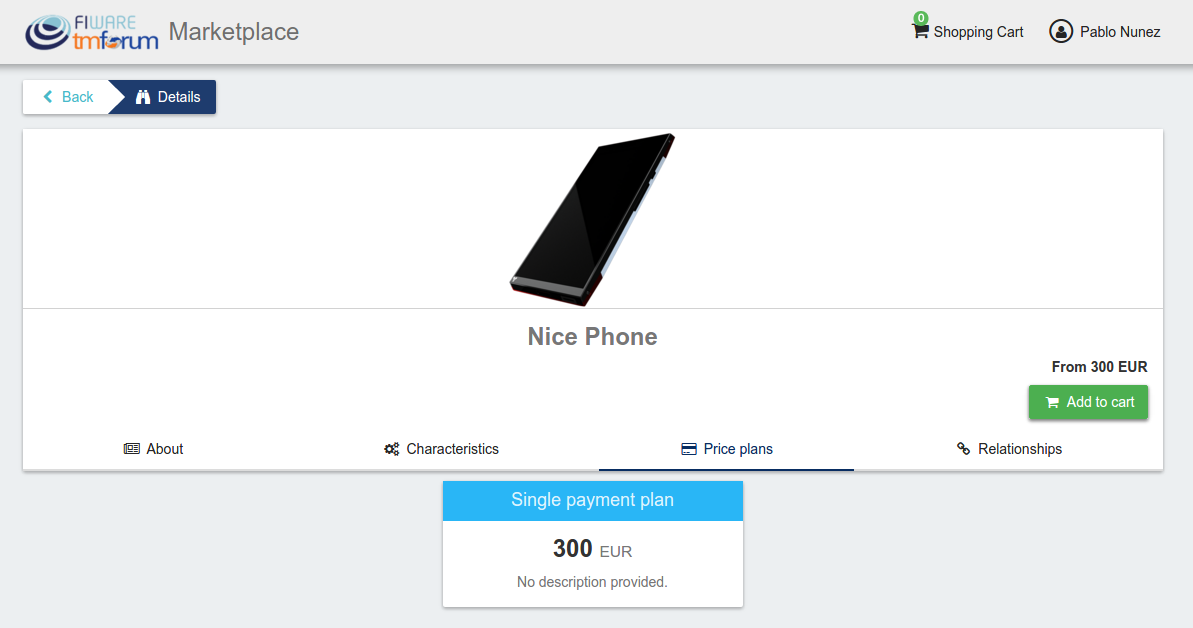
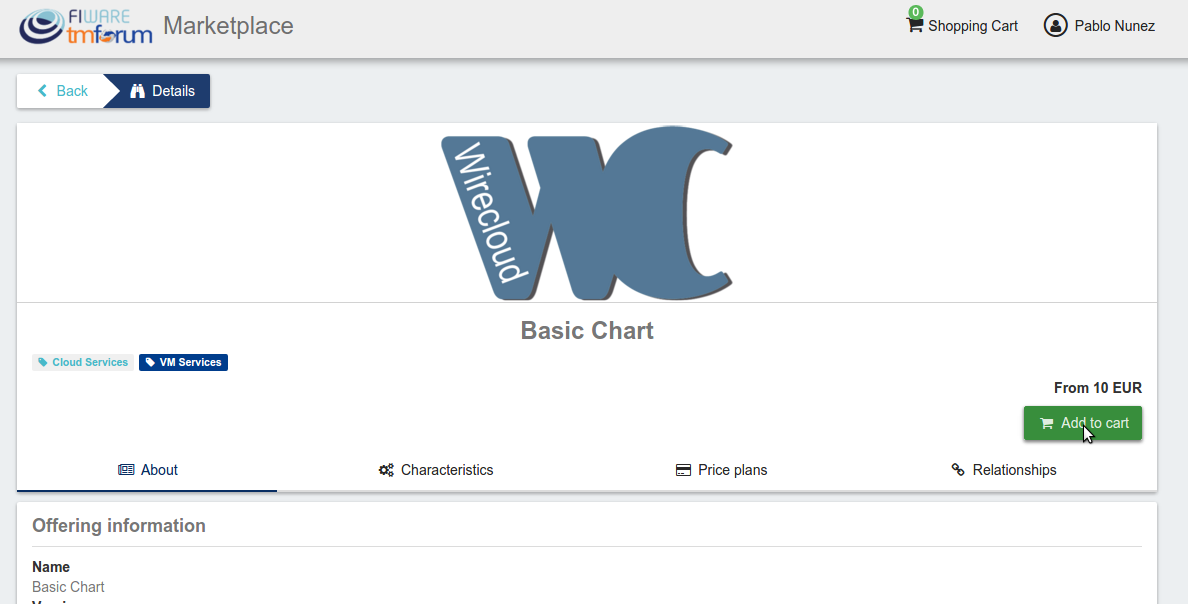
Customers can open the details of an offering by clicking on it
In the displayed view, it is shown the general info about the offering and its included product, the characteristics of the product, the price plans of the offering, and the existing relationships.
Create Order
Customers can create orders for acquiring offerings. The different offerings to be included in an order are managed using the Shopping Cart.
To include an offering in the shopping cart there are two possibilities. You can click on the Add to Cart button located in the offering panel when searching, or you can click on the Add to Cart button located in the offering details view.
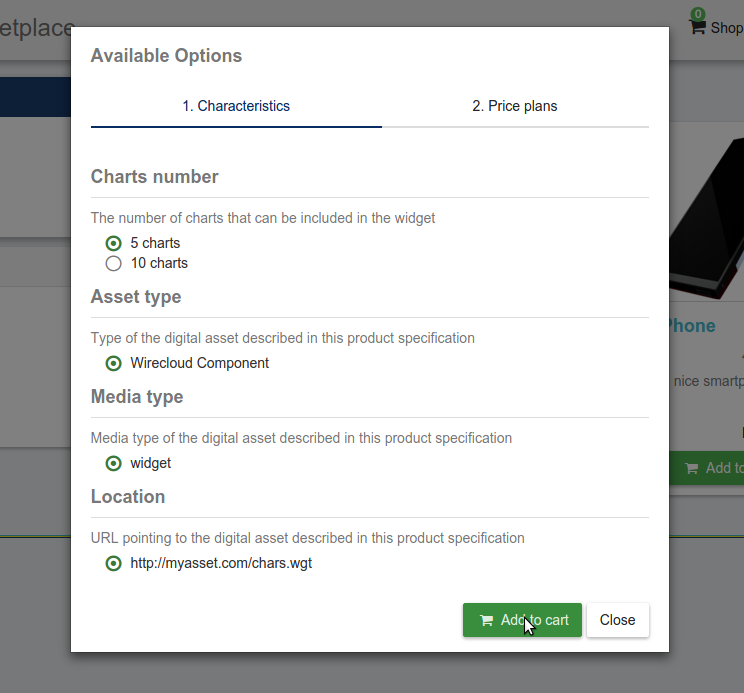
If the offering has configurable characteristics or multiple price plans, a modal will be displayed where you can select your preferred options
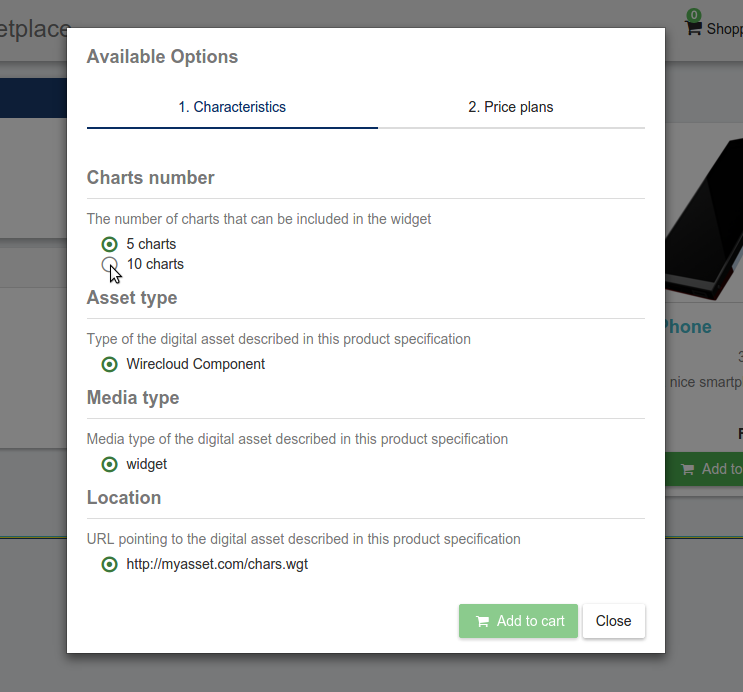
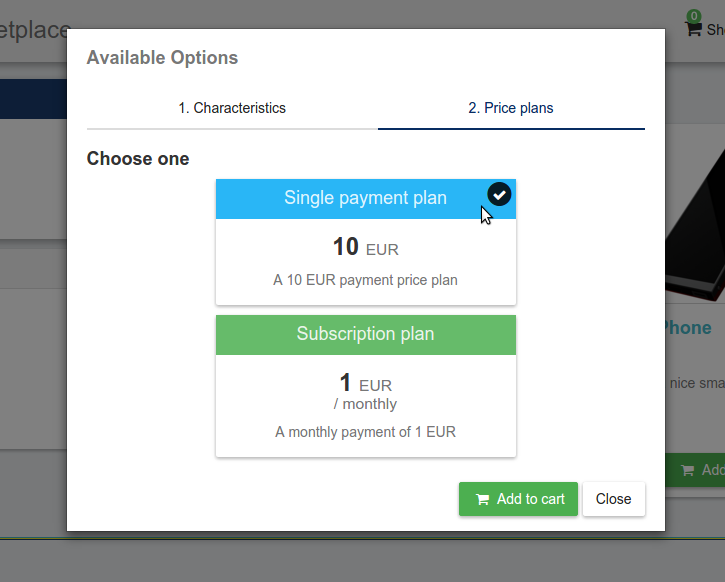
Once you have selected your preferences for the offering click on Add to Cart
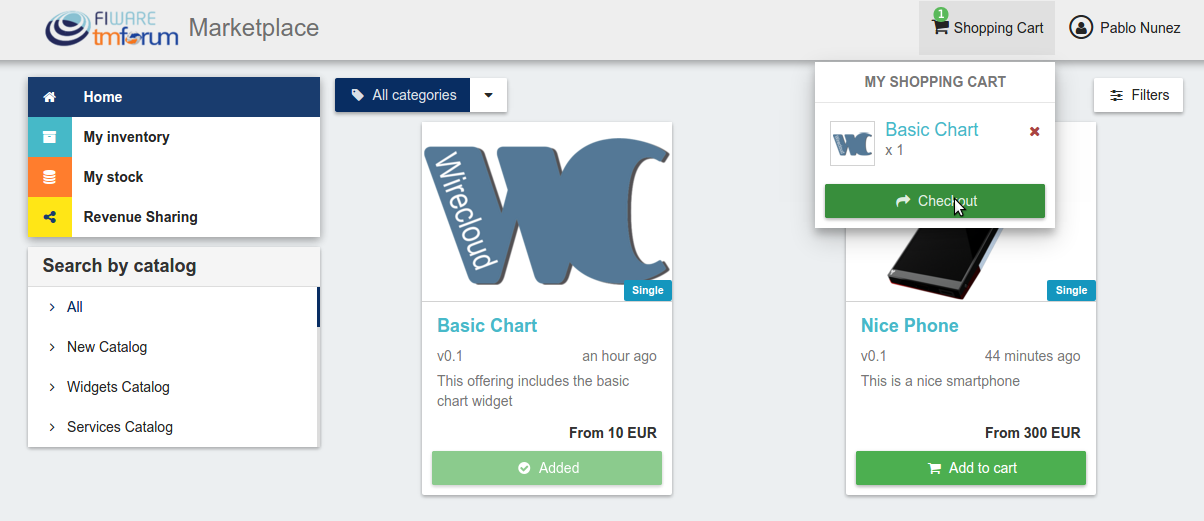
Once you have included all the offerings you want to acquire to the shopping cart, you can create the order clicking on Shopping Cart, and then on Checkout
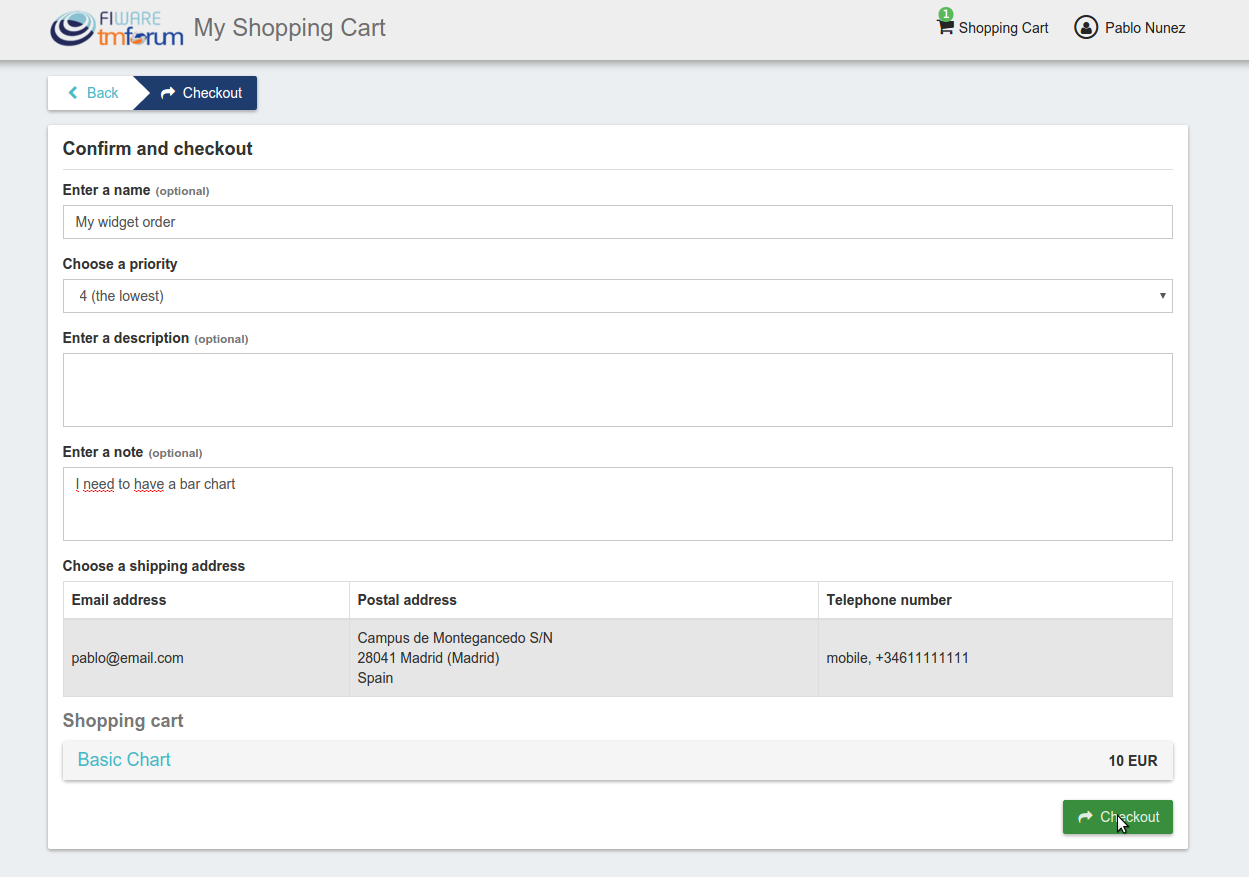
In the displayed form, you can include an optional name, an optional description, or an optional note. Notes can include any additional information you want to provide to the sellers of the acquired offerings.
Then, you have to choose a priority for your order, and select one of your shipping addresses.
Once you have provided all the required information you can start the order creation clicking on Checkout
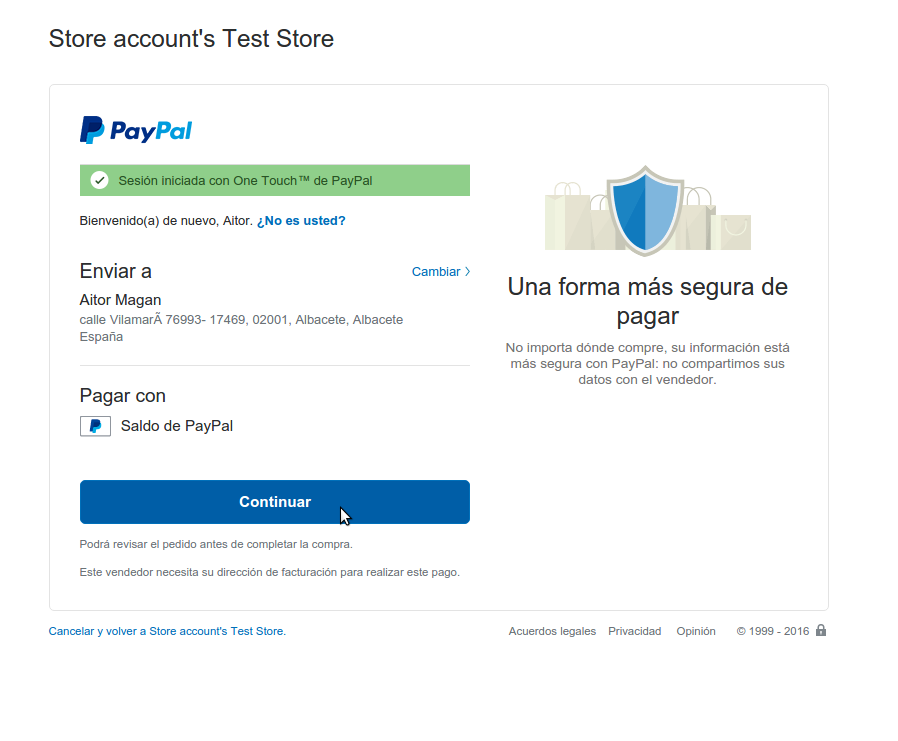
In the next step, you will be redirected to PayPal so you can pay for the offerings according to their pricing models
Finally, you will see a confirmation page

Manage Acquired Products
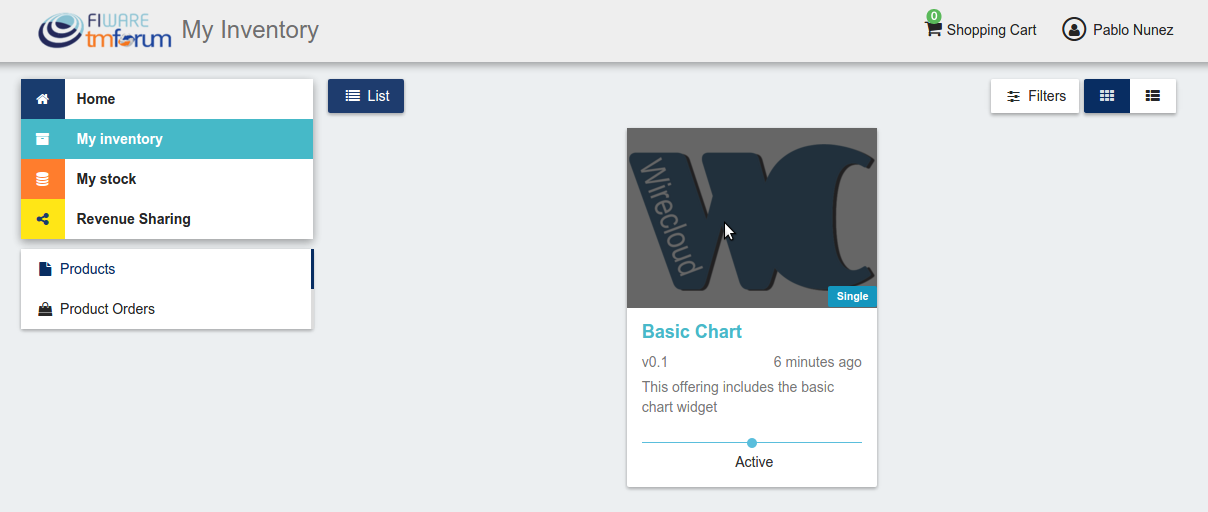
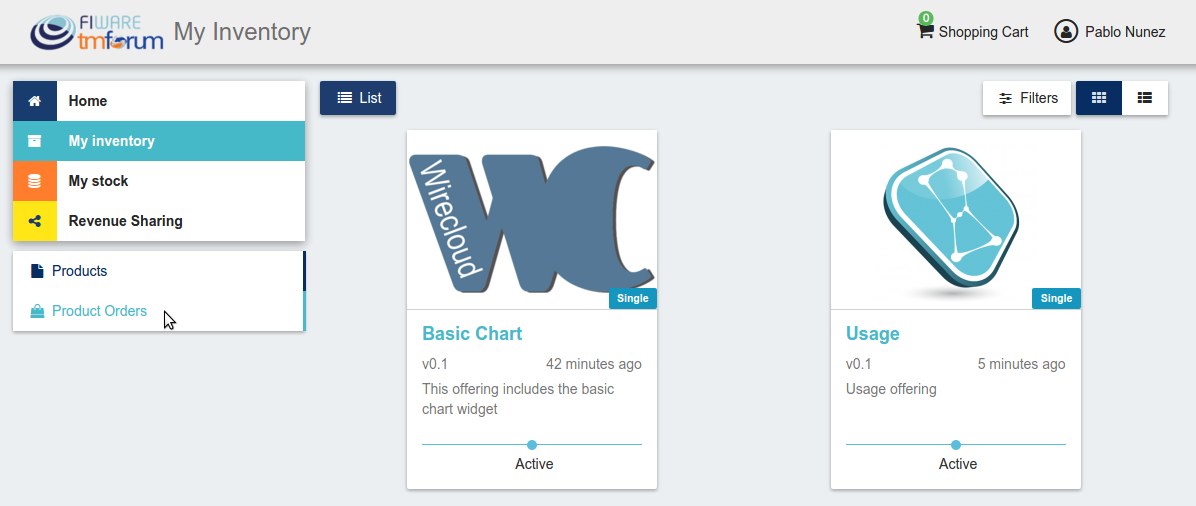
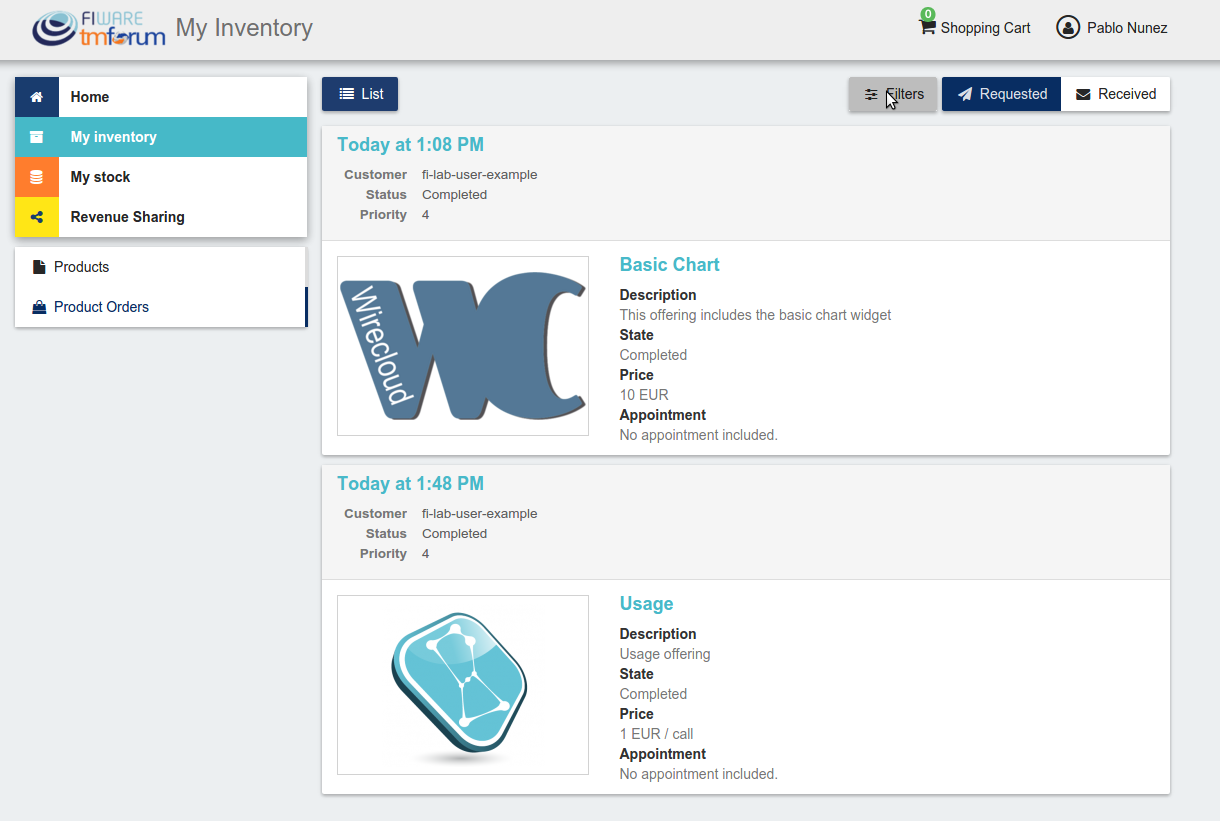
The products you have acquired are located in My Inventory, there you can list them, check their status, or download different assets.
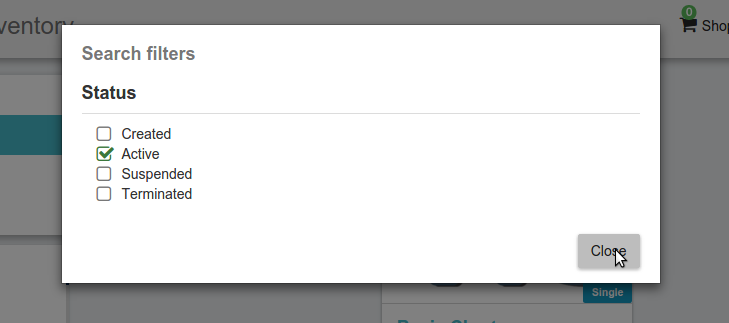
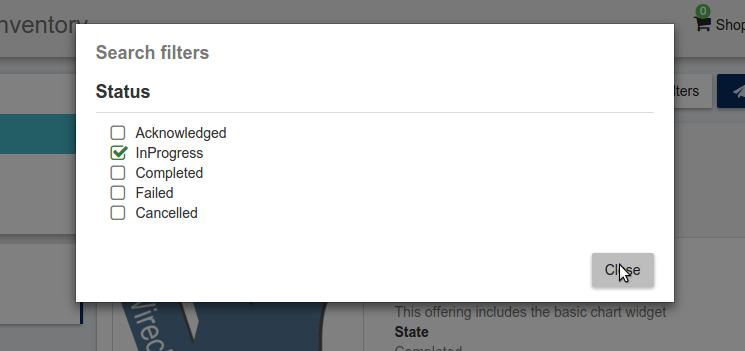
In this view, it is possible to filter you products by its status. To do that click on Filters, select the related statuses, and click on Close
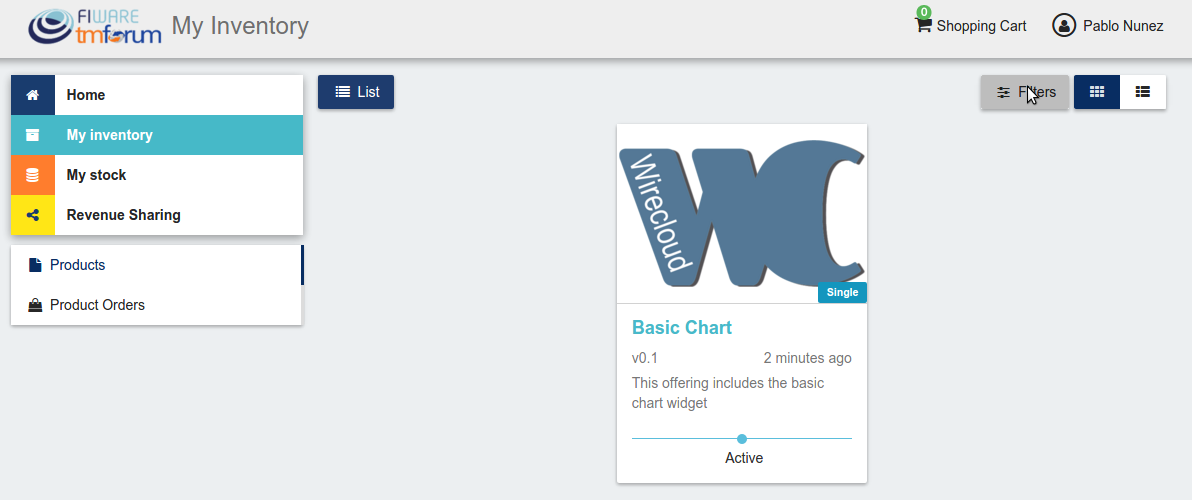
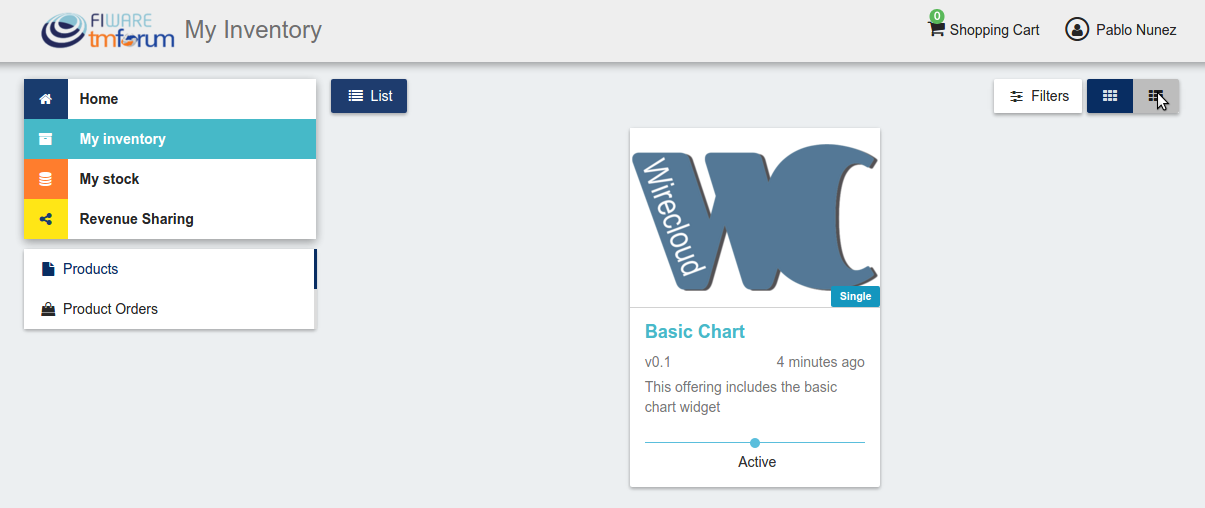
It is also possible to switch between the grid and tabular views using the related buttons

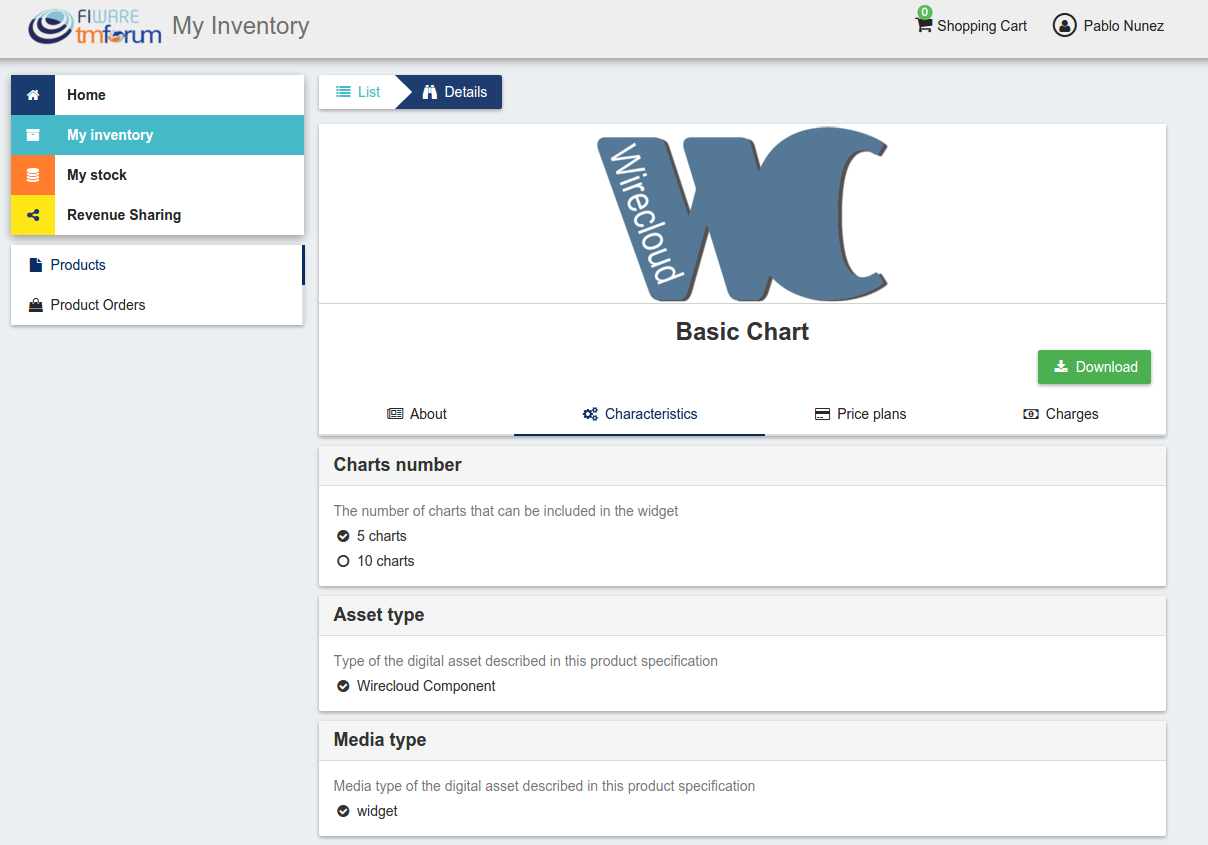
You can manage a specific acquired product clicking on it
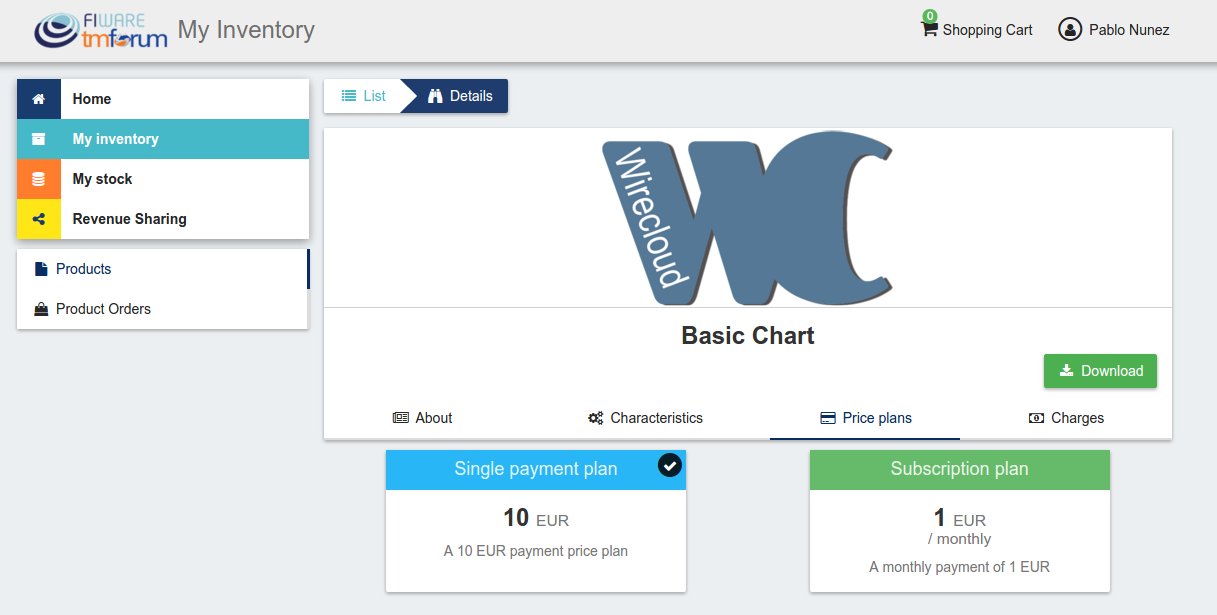
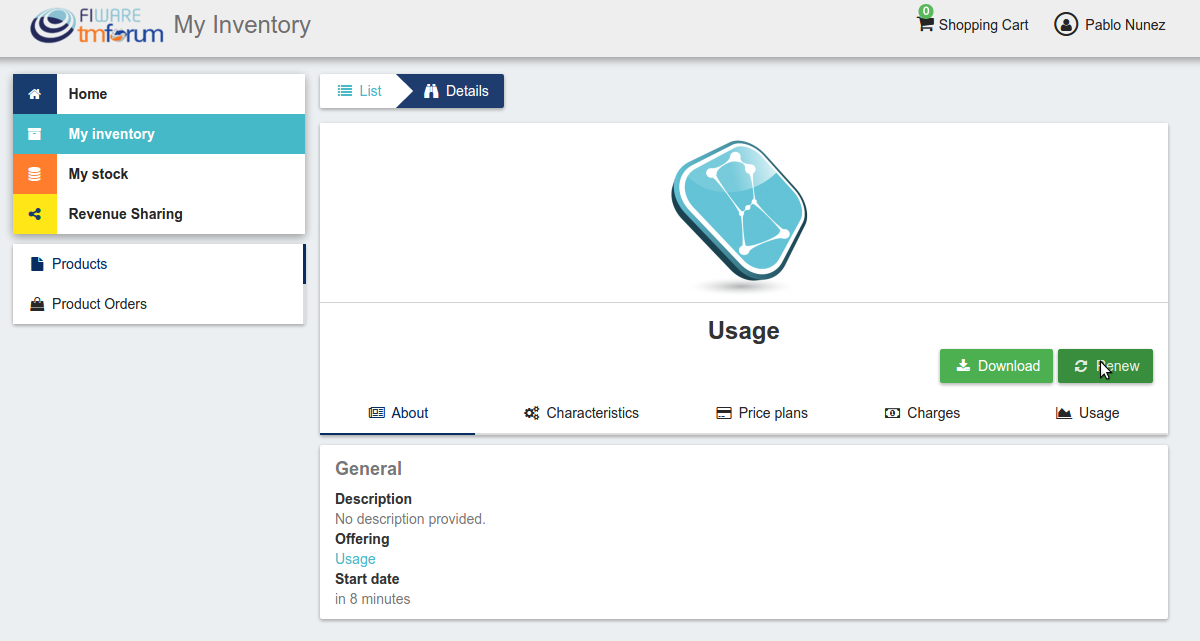
In the displayed view, you can see the general info of the acquired product, and the characteristics and pricing you have selected.

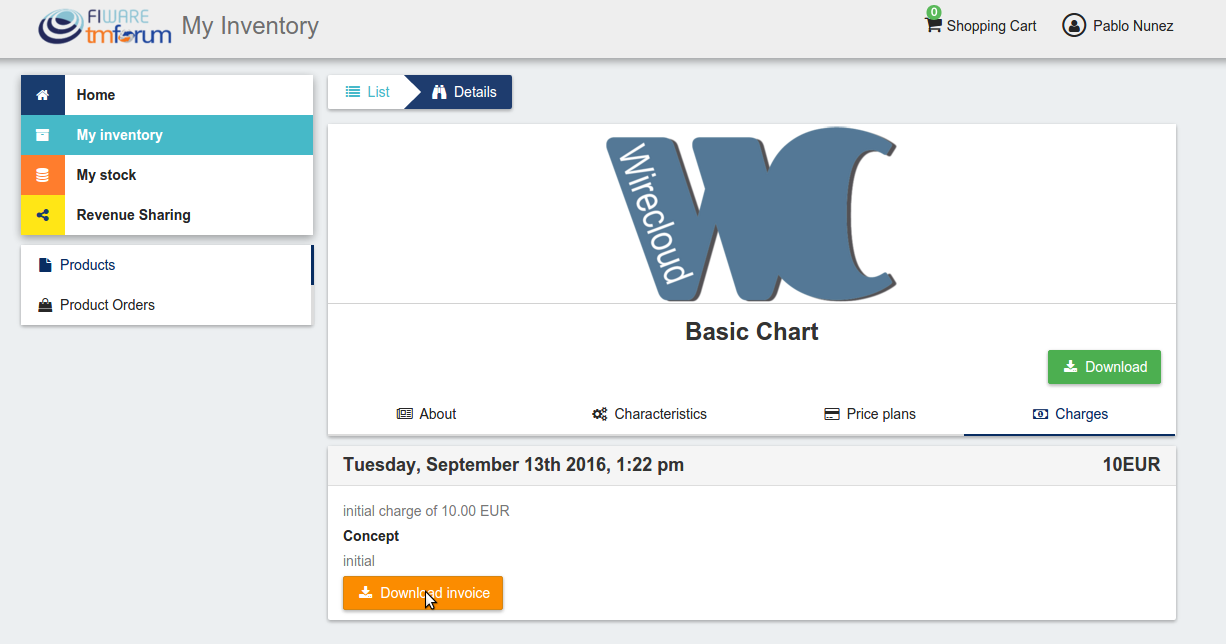
Additionally, you can see your charges related to the product accessing to the Charges tab
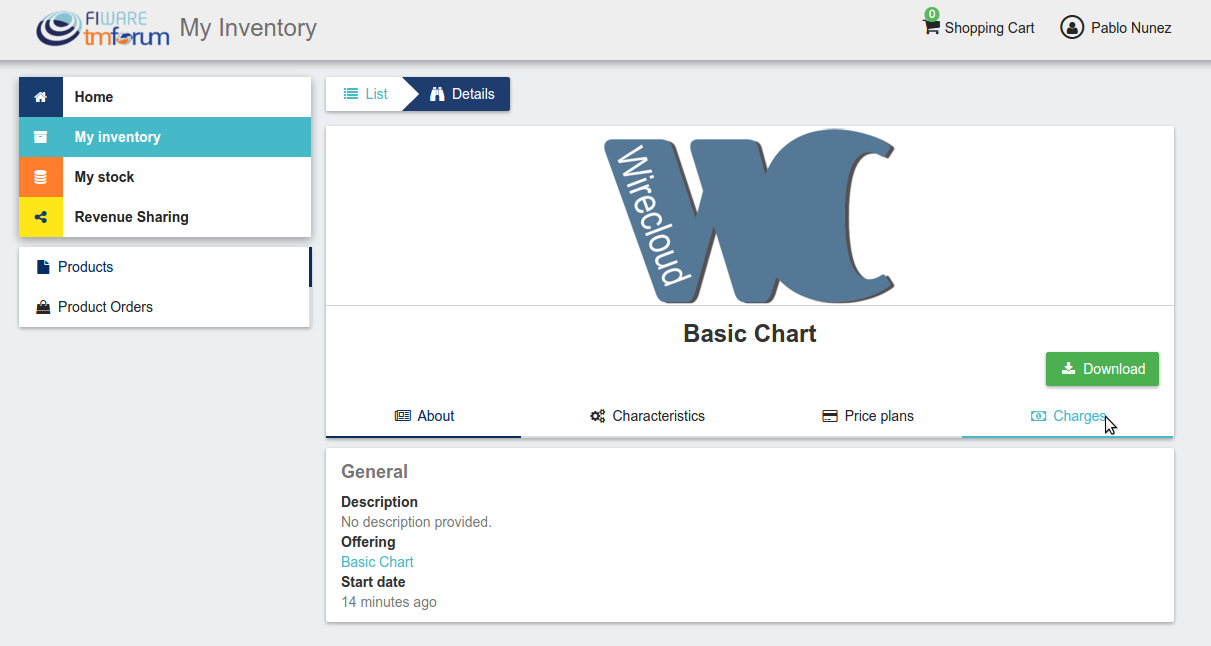
In this tab, you will find detailed information of the different charges and you will be able to download the related invoice clicking on Download Invoice
Moreover, this product view allows to download the related assets when the product is digital. To do that click on Download

In case the chosen pricing model defines a recurring payment or a usage payment, you will be able to renew your product clicking on Renew. After clicking, you will be redirected to PayPal to pay the related amount.
Note
If you product has expired and you do not renew it, it will be suspended, which means you will not have access to the acquired service until you pay
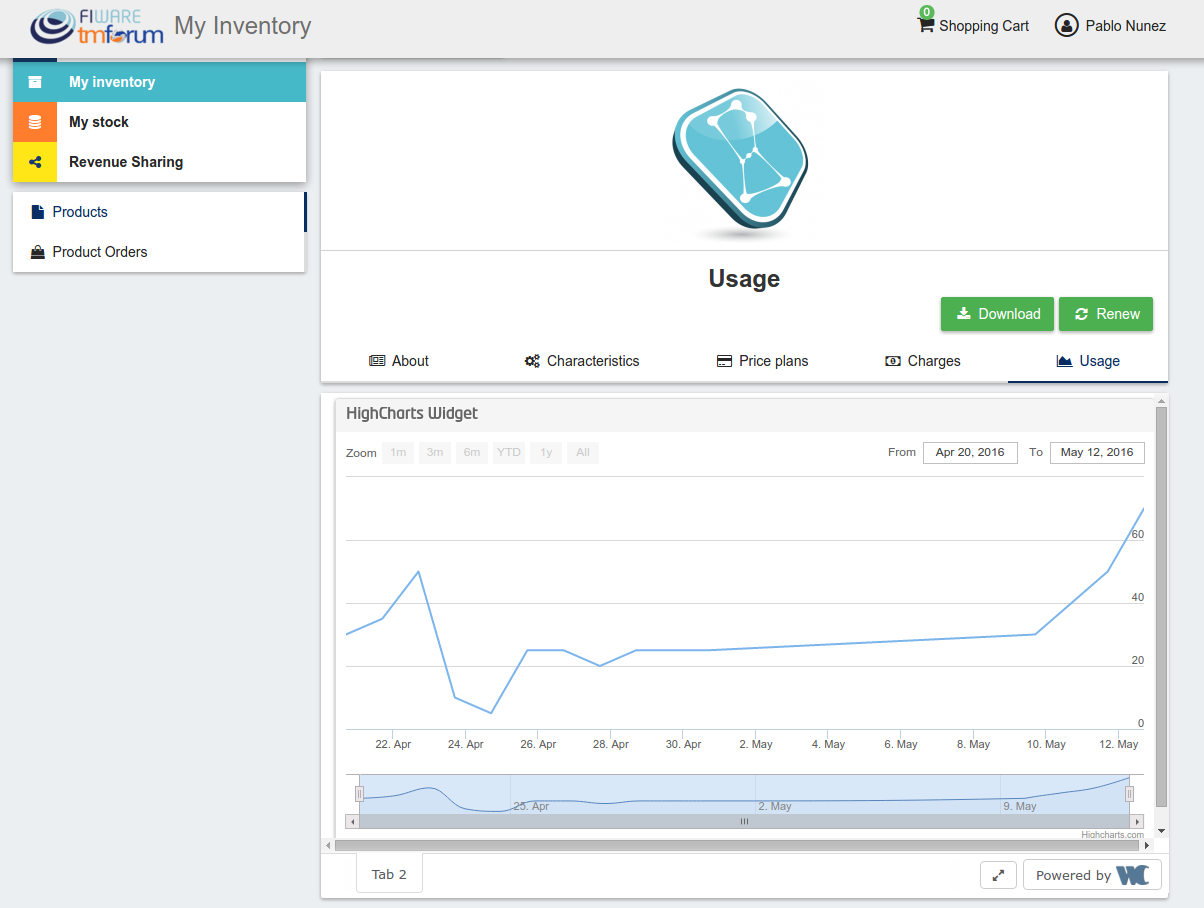
If the acquired product has a usage based price plan, you will be able to see your current consumption accessing the Usage tab
Manage Requested Orders
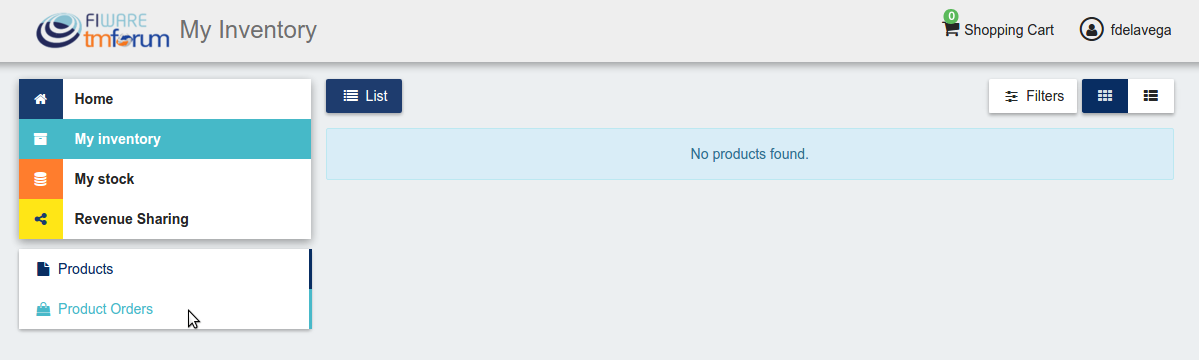
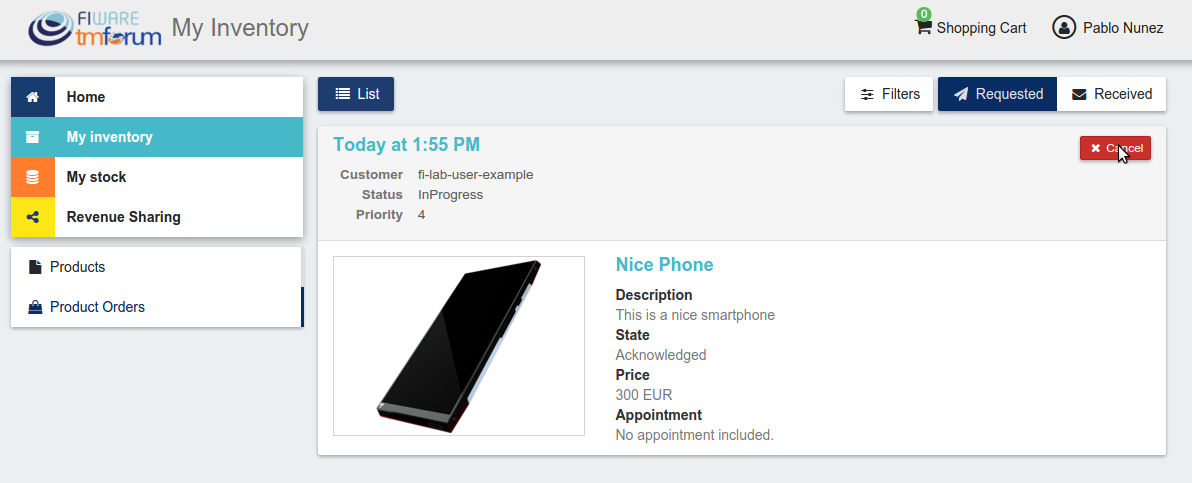
Customers can manage some aspects of the orders they have created. To see your requested orders, go to My Inventory and click on Product Orders
In the displayed view, you can see the orders you have created, which can be filtered by its status. To do that, click on Filters, select the wanted statuses, and click on Close
For those orders that include offerings of non digital products, you will be able to cancel them if the seller has not yet started the process. To do that, locate the order to be canceled and click on Cancel
Moreover, you can review the details of the order. To do that click on the date of the order.
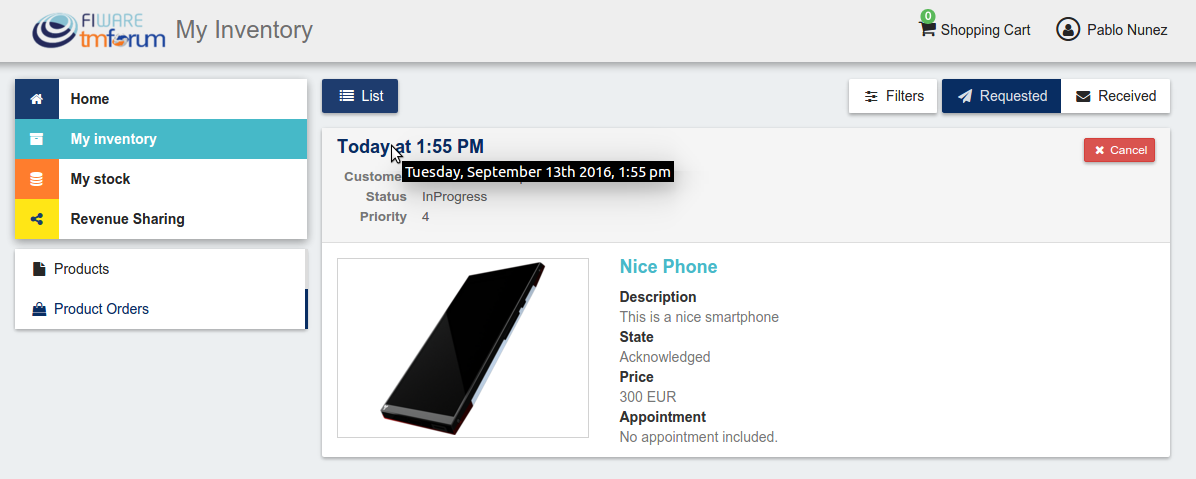
In the displayed view, you can see all the details of the order, as well as the included products. In addition, you can leave a note for the seller in the Notes tab
To leave a note, write it in the provided text area and click on the send button

Programmer Guide
The Business API Ecosystem allows to offer any kind of digital asset. In this regard, some kind of digital assets may require to perform specific actions and validations that require to know the format of the asset. To deal with this issue the Business API Ecosystem allows to register types of assets by creating plugins. This section explains how these plugins are created.
Additionally, the Business API Ecosystem exposes an API that can be used by developers in order to integrate the monetization features offered with their own solutions. The complete description of this API can be found in:
Plugin Package
Business API Ecosystem plugins must be packaged in a zip. This file will contain all the sources of the plugin and a configuration file called package.json in the root of the zip. This configuration file allows to specify some aspects of the behaviour of the plugin and contains the following fields:
- name: Name given to the resource type. This is the field that will be shown to providers
- author: Author of the plugin.
- formats: List that specify the different allowed formats for providing an asset of the given type. This list can contain the values “URL” and “FILE”.
- module: This field is used to specify the main class of the Plugin.
- version: Current version of the plugin.
- media_types: List of allowed media types that can be selected when providing an asset of the given type
Following you can find an example of a package.json file:
{
    "name": "Test Resource",
    "author": "fdelavega",
    "formats": ["FILE"],
    "module": "plugin.TestPlugin",
    "version": "1.0",
    "media_types": ["application/zip"]
}
The source code of the plugin must be written in Python and must contain a main class that must be a child class of the Plugin class defined in the Charging Backend of the Business API Ecosystem. Following you can find an example of a plugin main class.
from wstore.asset_manager.resource_plugins.plugin import Plugin

class TestPlugin(Plugin):
    def on_pre_product_spec_validation(self, provider, asset_t, media_type, url):
        pass

    def on_post_product_spec_validation(self, provider, asset):
        pass

    def on_pre_product_spec_attachment(self, asset, asset_t, product_spec):
        pass

    def on_post_product_spec_attachment(self, asset, asset_t, product_spec):
        pass

    def on_pre_product_offering_validation(self, asset, product_offering):
        pass

    def on_post_product_offering_validation(self, asset, product_offering):
        pass

    def on_product_acquisition(self, asset, contract, order):
        pass

    def on_product_suspension(self, asset, contract, order):
        pass
Implementing Event Handlers
It can be seen in the previous section that the main class of a plugin can implement some methods that are inherited from the Charging Backend Plugin class. This methods can be used to implement handlers of the different events of the life cycle of a product containing the asset. Concretely, the following events have been defined:
- on_pre_product_spec_validation: This method is executed when creating a new digital product containing an asset of the given type, before validating the product spec contents and saving the asset info in the database. This method can be used for validating the asset format or the seller permissions to sell the asset.
- on_post_product_spec_validation: This method is executed when creating a new digital product containing an asset of the given type, after validating the product spec and saving the asset info in the database. This method can be used if the plugin require to know some specific info of the asset model
- on_pre_product_spec_attachment: This method is executed when creating a new digital product containing an asset of the given type, after saving the product spec in the catalog API database but before attaching the product spec id to the asset model. This method can be used if the plugin require to know the id in the catalog of the product spec
- on_post_product_spec_attachment: This method is executed when creating a new digital product containing an asset of the given type, after saving the product spec in the catalog API database and after attaching the product spec id to the asset model. This method can be used if the plugin require to know the id in the catalog of the product spec
- on_pre_product_offering_validation: This method is executed when creating a new product offering containing an asset of the given type, before validating its pricing model. This method can be used to make extra validations on the pricing model, for example check if the unit of an usage model is supported by the given asset
- on_post_product_offering_validation: This method is executed when creating a new product offering containing an asset of the given type, after validating its pricing model. This method can be used to make extra validations on the pricing model, for example check if the unit of an usage model is supported by the given asset
- on_product_acquisition: This method is called when a product containing an asset of the given type has been acquired. This method can be used to activate the service for the customer and give him access rights.
- on_product_suspension: This method is called when a product containing an asset of the given type has been suspended for a customer (e.g he has not paid). Tjis method can be used to suspend the service for the customer and remove his access rights
As can be seen in the Plugin example, the different handler methods receive some parameters with relevant information and objects. In particular:
on_pre_product_spec_validation
- provider: User object containing the user who is creating the product specification (The User object is described later)
- asset_t: String containing the asset type, it must be equal to the one defined in package.json
- media_type: String containing the media type of the asset included in the product being created
- url: String containing the url of the asset included in the product being created
on_post_product_spec_validation
- provider: User object containing the user who is creating the product specification (The User object is described later)
- asset: Asset object with the recently created asset (The Asset object is described later)
on_pre_product_spec_attachment
- asset: Asset object where the created product specification id is going to be attached
- asset_t: String containing the asset type, it must be equal to the one defined in package.json
- product_spec: JSON with the raw product specification information that is going to be used for the attachment. (The structure of this JSON object can be found in the Open Api documentation)
on_post_product_spec_attachment
- asset: Asset object where the created product specification id has been attached
- asset_t: String containing the asset type, it must be equal to the one defined in package.json
- product_spec: JSON with the raw product specification information that has been used for the attachment. (The structure of this JSON object can be found in the Open Api documentation)
on_pre_product_offering_validation
- asset: Asset object included in the offering being created
- product_offering: JSON with the raw product offering information that is going to be validated. (The structure of this JSON object can be found in the Open Api documentation)
on_post_product_offering_validation
- asset: Asset object included in the offering being created
- product_offering: JSON with the raw product offering information that has been validated. (The structure of this JSON object can be found in the Open Api documentation)
on_product_acquisition
- asset: Asset object that has been acquired
- contract: Contract object including the information of the acquired offering which contains the asset. (The Contract object is described later)
- order: Order object including the information of the order where the asset was acquired. (The Order object is described later)
on_product_acquisition
- asset: Asset object that has been suspended
- contract: Contract object including the information of the acquired offering which contains the asset
- order: Order object including the information of the order where the asset was acquired
Handler Objects
Following you can find the information regarding the different objects used in plugin handlers
- User: Django model object with the following fields
- username: Username of the user
- email: Email of the user
- complete_name: Complete name of the user
- Asset: Django model object with the following fields
- product_id: Id of the product specification which includes the asset
- version: Version of the product specification which includes the asset
- provider: User object of the user that created the asset
- content_type: media type of the asset
- download_link: URL of the asset if it is a service in an external server
- resource_path: Path to the asset file if it is uploaded in the server
- resource_type: Type of the asset as defined in the package.json file of the related plug-in
- is_public: If true the asset can be downloaded by any user without the need of acquiring it
- meta_info: JSON with any related information. This field is useful to include specific info from the plugin code
Additionally, it includes the following methods:
get_url: Returns the URL where the asset can be accessed
get_uri: Returns the url where the asset info can be accessed
- Contract: Django model with the following fields
- item_id: Id of the order item which generated the current contract
- offering: Offering object with the information of the offering acquired in the current contract (The offering object is described later)
- product_id: Id of the inventory product created as a result if the acquisition of the specified offering
- pricing_model: JSON with the pricing model that is used in the current contract for charging the customer who acquired the included offering
- last_charge: Datetime object with the date and time of the last charge to the customer
- charges: List of Charge objects contaning the info of the different times the customer has been charged in the context of the current contract
- correlation_number: Next expected correlation number for usage documents. This field is only used when the pricing model is usage
- last_usage: Datetime object with the date and time of the last usage document received. This field is only used when the pricing model is usage
- revenue_class: Product class of the involved offering for revenue sharing
- terminated: Specified whether the contract has been terminated (the customer has no longer access to the acquired asset)
- Offering: Django model with the following fields
- off_id: Id of the product offering
- name: Name of the offering
- version: Version of the offering
- description: Description of the offering
- asset: Asset offered in the offering
- Charge Django model with the following fields
- date: Datetime object with the date and time of the charge
- cost: Total amount charged
- duty_free: Amount charged without taxes
- currency: Currency of the charge
- concept: Concept of the charge (initial, renovation, usage)
- invoice: Path to the PDF file containing the invoice of the charge
- Order: Django model with the following fields
- order_id: Id of the product order
- customer: User object of the customer of the order
- date: Datetime object with the date and time of the order creation
- tax_address: JSON with the billing address used by the customer in the order
- contracts: List of Conctract objects, one for earch offering acquired in the order
Additionally, it includes the following methods:
- get_item_contract: Returns a contract given an item_id
- get_product_contract: Returns a contract given a product_id
Managing Plugins
Once the plugin has been packaged in a zip file, the Charging Backend of the Business API Ecosystem offers some management command that can be used to manage the plugins.
When a new plugin is registered, The Business API Ecosystem automatically generates an id for the plugin that is used for managing it. To register a new plugin the following command is used:
python manage.py loadplugin TestPlugin.zip
It is also possible to list the existing plugins in order to retrieve the generated ids:
python manage.py listplugins
To remove a plugin it is needed to provide the plugin id. This can be done using the following command:
python manage.py removeplugin test-plugin